Love oatmeal, but the store-bought packets contain more sugar than you would like to start your day? Here is my “recipe” to enjoy oatmeal every morning with just enough sweet, but not all of the added sugar and still feel full and satisfied.
*Zero added sugar- depending on the toppings you add, they may *add* sugar, but this recipe does not contain sugar*
1/2 cup of oats
1 cup of milk (or water)
1-2 tablespoons of nuts
Sprinkle of Cinnamon
1 Tablespoon of nut butter
Splash of vanilla extract
Optional Toppings/ Add-ons
Dried dates, craisins, apricots, etc.
Fresh blueberries, banana, strawberries- really any fruit
Other: sprinkle of granola, cereal or anything you want!
Combine all ingredients (except the toppings) and microwave on high for 2 minutes or cook on the stove top per the package’s instructions. Mix and add topppings.
Let’s be real, oatmeal isn’t the prettiest, but it’s a great way to start the day
Oats– I prefer old fashioned rolled oats because they have more texture. Adjust cooking times for instant oats.
Milk- I am not going to get into dairy vs. non-dairy- use whichever milk you like! I actually hate the taste of milk and only tolerate when it is combined with other foods (i.e. chocolate). I use it in my oatmeal, though, to add protein to my meal. I recently discovered Fa!irlife (yes that’s right) Ultra-Filtered Milk and really like it. I really like Fa!irlife because it does not taste like milk (#1 priority) and it has less sugar.
Nuts: I prefer pecans. I have also been known to use walnuts, but any will do! I like mine cut into smaller pieces so they add some texture to every bite. Texture is big for me so this is an important step.
Cinnamon: Lately I have been using pumpkin pie spice.. shh don’t tell my husband- I’m not sure he has noticed. You could also add nutmeg, ginger- so many options.
Nut Butter: I use almond butter in my oats, but I make my husband’s oatmeal with peanut butter. I always put this in before I cook the oats so it turns into a melty goodness that can be mixed well in your bowl when it is done cooking. I tend to buy nut butter that does not have any added sugar, but this still adds just the right amount of protein, and flavor.
Vanilla– This adds a really nice flavor with just a splash, without adding sugar
Optional Toppings: This is where you can add something a little sweet and with that may come some sugar. Here is my secret: dried dates. I cut up one (or two depending on size) really good and juicy dried date and add it after the oats are cooked. Yes this adds a bit of sugar, but it also adds fiber-something the added sugar in the packets does not. You can also omit this completely if looking for something a little plainer. Sometimes I add a sprinkle of low- sugar cereal, granola etc, for added texture on top.
Prep ahead: I keep my oats in a glass jar with a scoop that came with a jar of protein powder. Fun fact: this scoop measures 1/4 of a cup so I leave it in there and always have a measuring cup ready to go. At the beginning of each week, I measure two scoops (or half a cup of oats) into jars, along with nuts, and cinnamon. This way they are all ready to be poured into a bowl or made in the jar if I am on the go and you just add the vanilla, milk and nut butter.
In November of 2019, my department at work hosted an event with the theme of Sustainability around the World. The planning process helped me to learn about a lot ways to improve my practices at home (or at work, but I have been working from home most of the year and barely used any paper!) to reduce waste and be more sustainable. My New Year’s Resolution for 2020 was to be more sustainable at home. Here are a few things that we did in our house this past year:
Pick one, pick a few or pick all! Anything you can do to help the earth is helpful.
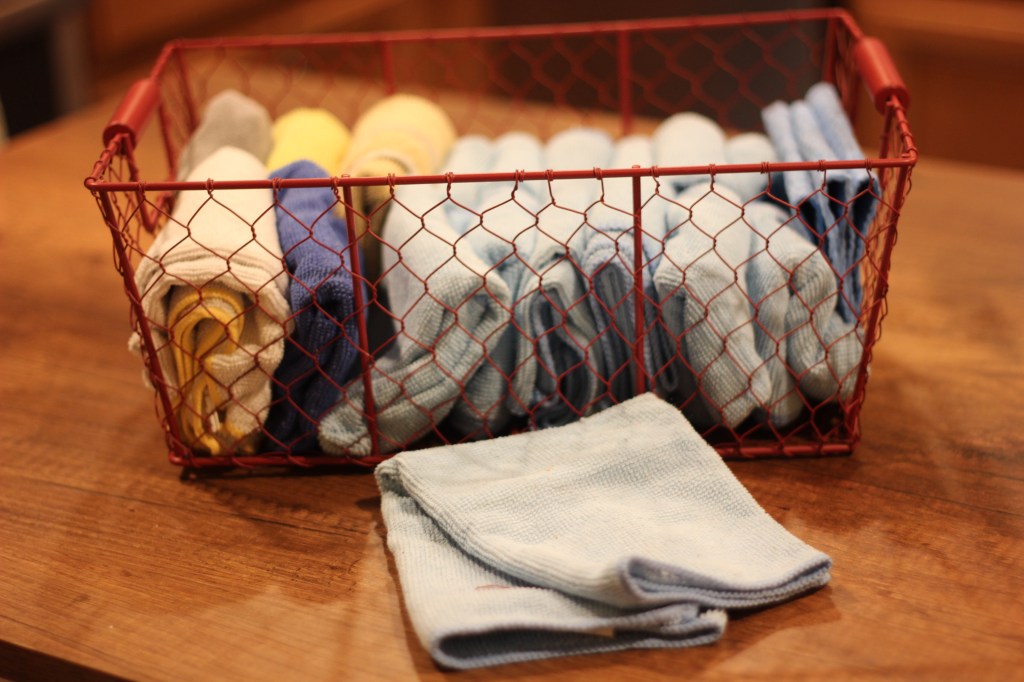
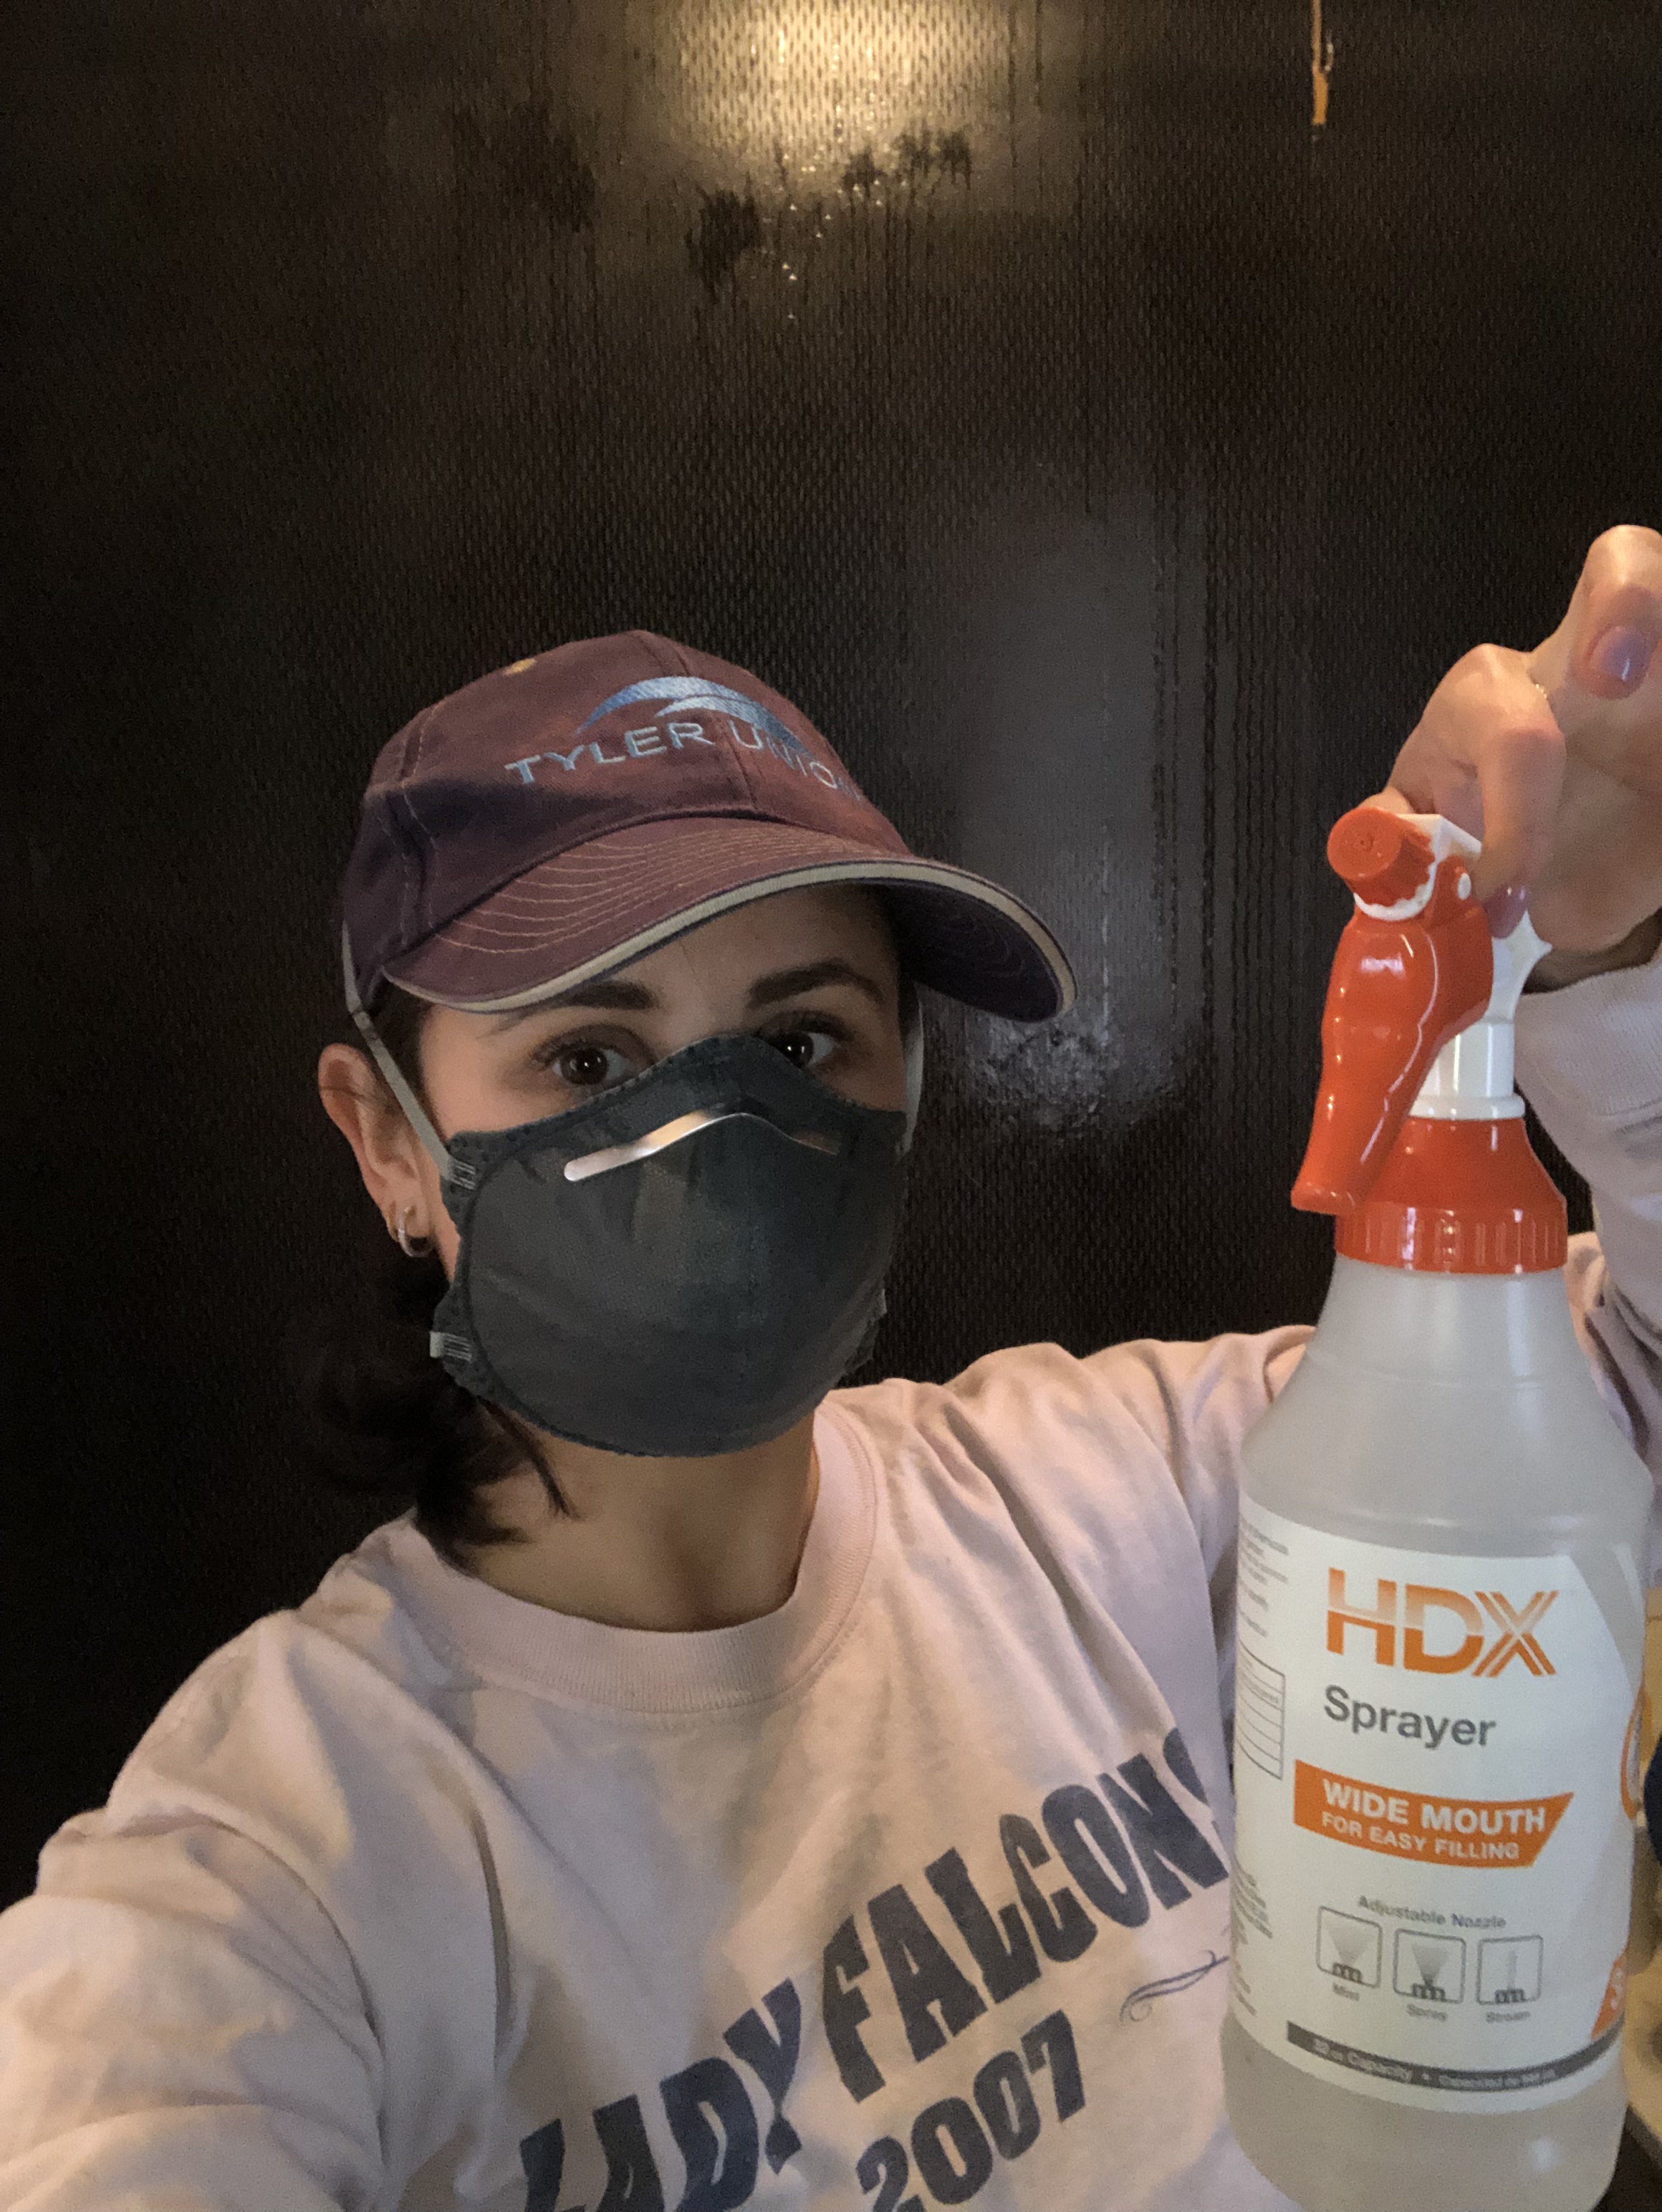
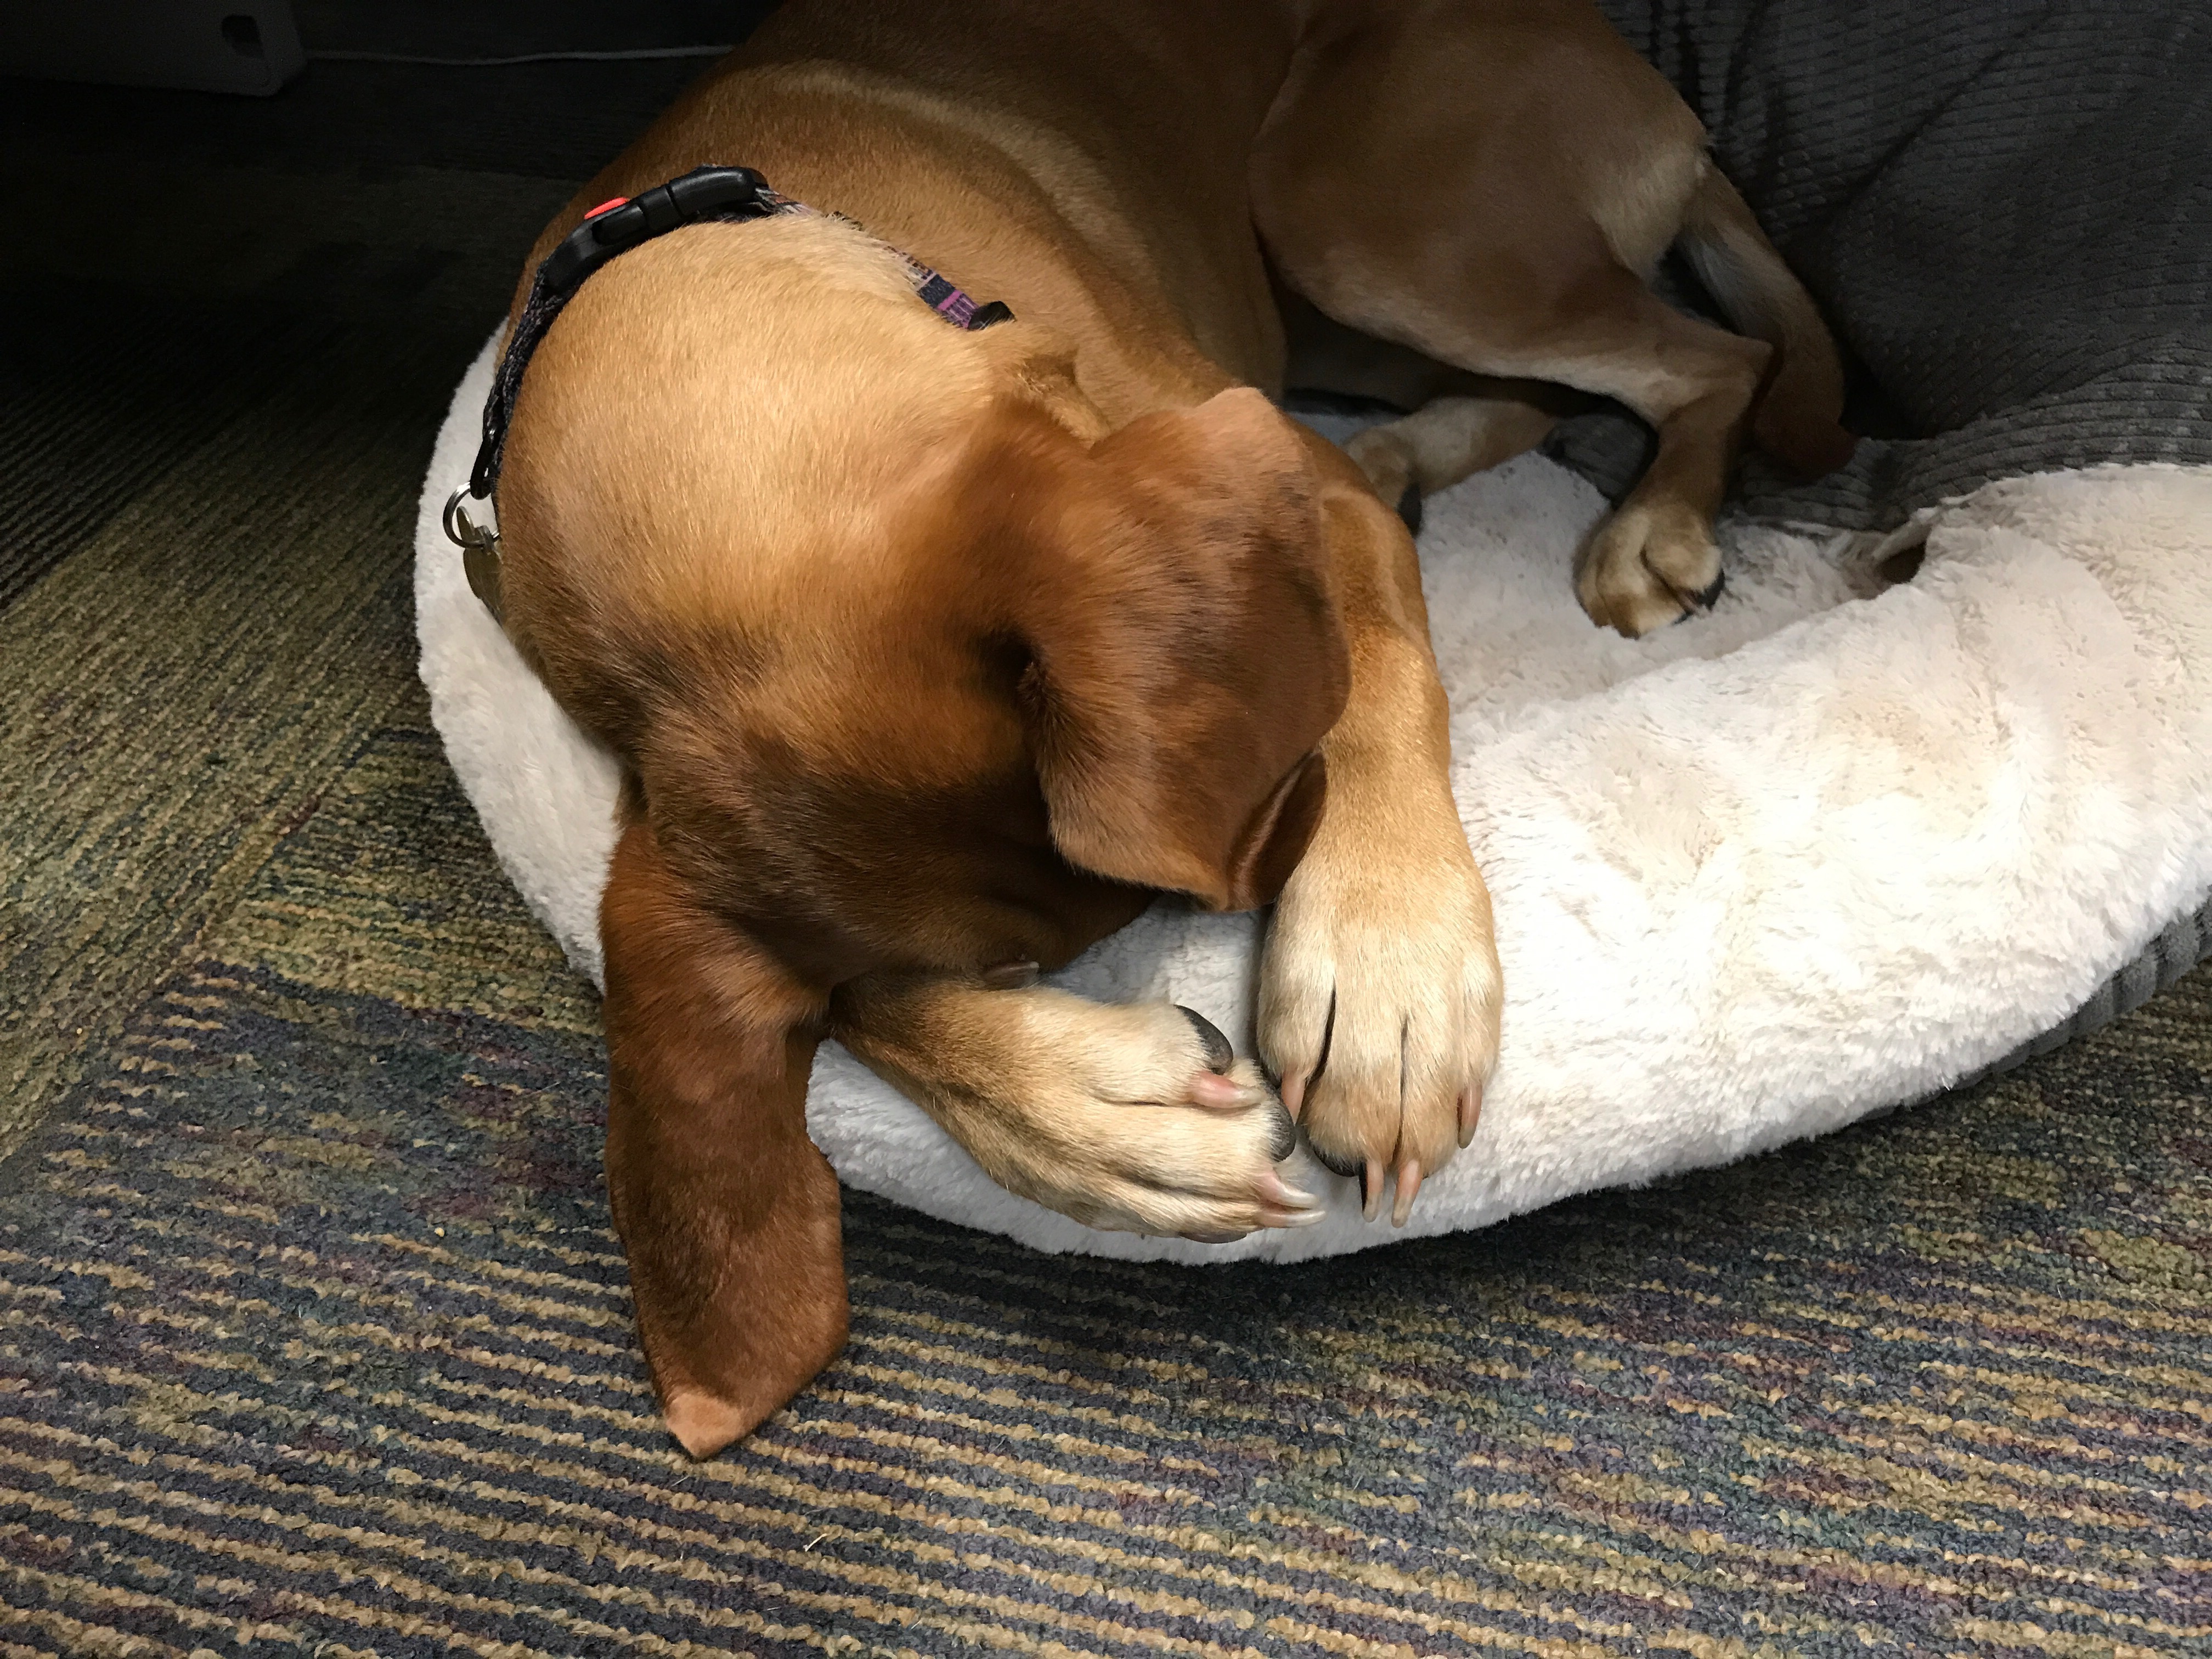
I use these for everything! Wiping up spills, cleaning the bathroom, dog paws, cleaning up saw dust – you name it! Then I just throw them in the wash and they’re good as new. Of course, there are times I still use paper towels – for particularly gross or messy messes, but the awareness piece is huge. Once I started realizing how much I used paper towels, I consciously stopped using them as often and thus saved on waste
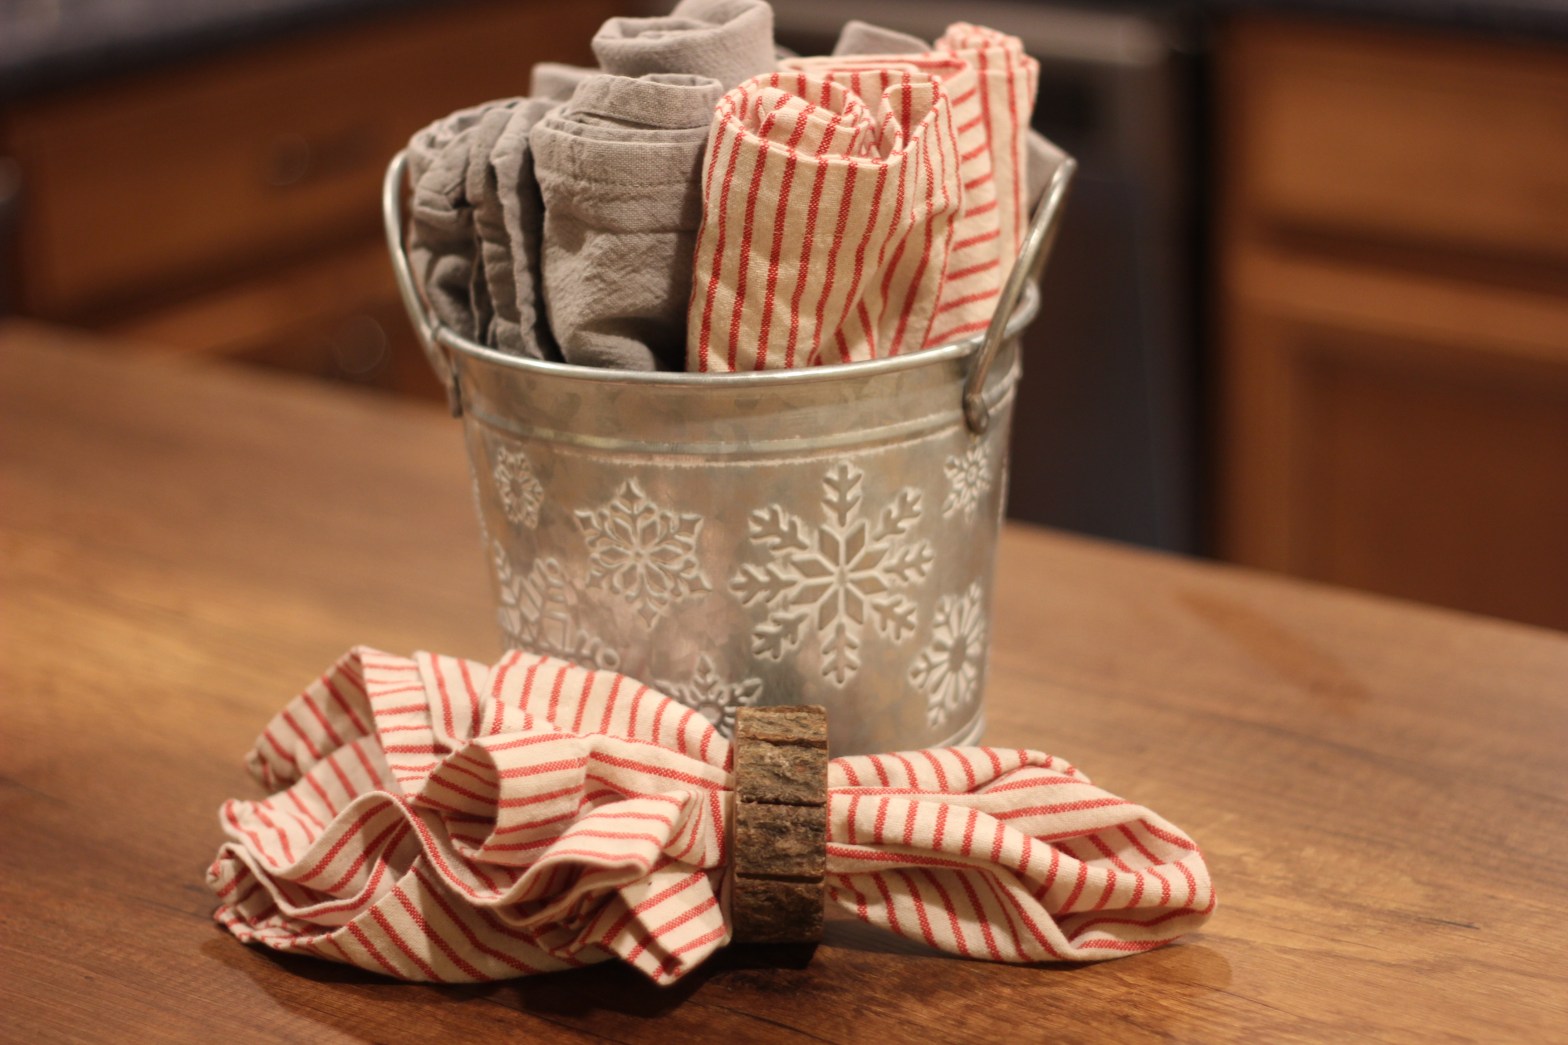
I have almost completely eliminated the use of paper napkins. Keep enough of these handy and it’s easy to adjust to using these all the time. Plus you can purchase them in nice seasonal patterns or colors and they’ll dress up your table or your decor
I purchased mine from Trader Joe’s, but this link is very similar. I also purchased them in wax bag form. These take a bit of getting used to, but radically decrease your waste
Reusable ziplock bagsinstead of disposable ziplocks- many even can go in the dishwasher!
Real silverware and glasses instead of disposable cups and paper plates
Make a conscious effort to get recyclables into the recycling bin
Unplug electronics not in use (i.e. toaster ovens, cell phone chargers)
Bar soap (and shampoo, conditioner, and deodorant) with minimal packaging- full disclosure I have only used the bar soap. My husband was better about using the bar shampoo and conditioner. I have found these at Whole Foods- I like purchasing these there because there is minimal packaging used
Eat less red meat – I’m not here to preach being a vegetarian or vegan – I am mostly a pescatarian, but on occasion I will eat some lean red meat. Now that I am aware of not only the harm to animals that eating red meat causes, but also the serious environmental harm because of all of the resources used and harmful gasses created, I think twice before I purchase red meat. Again awareness is key- you can read more about it here.
Repurpose items that can’t be recycled- i.e. clothes with holes- cut up and use as rags, padding for breakable goods, find craft projects for these etc. This includes furniture too! You can cut wood to use for shelves or just refinish the surface. It is amazing how some sanding and a fresh coat of paint can breath new life into an old piece
Purchase food, fruits and veggies from Misfit Market or places like this. We just started purchasing and almost all of our fruits or veggies have looked the same as the ones purchased in the store. Read more about how purchasing from here helps with sustainability.
My sustainability goals for 2021 (and 4 more bonus ideas for you):
Purchase a compost bin!
Purchase products with less or sustainable packaging (i.e. continue use of Misfit Markets, instead of buying packaged fruits and veggies in stores)
Wash synthetic clothing in mesh bags
Purchase more local goods (this will save some on resources used to transport, pack and ship them)
Let’s talk New Year’s Eve: often the night of the year when you get dressed up, go out and stay out late ringing in the new year with other people. It doesn’t have to be another thing 2020 has taken away from us.
Reframe your thinking- today is just another day. If you are feeling down because you are celebrating the holidays alone and won’t be seeing anyone for New Year’s Eve, it can help to remember that this has not been a normal year. Nothing right now is normal and you are not define by your NYE plans- nor do your NYE plans need to set the tone for how you will start your new year. There will be a lot of celebrating and a lot to celebrate when we are able to do things within 6 feet of one another again. It may be hard to change your thinking about that so it can help to stay off your instagram feed to avoid seeing what everyone else is doing and to have a plan of how to amuse yourself. Keep reading!
Drive-by gift drop – baked goods (i.e. granola is alway a good idea 🙂 !) , a bottle of wine, homemade cocktails or mocktails in mason jars, a game, etc. – it can boost your spirits to just do something fun for someone else
Gather with people outside– Even though it is winter and it is cold, there are still ways to connect safely with others. Gather outside for a fire and some drinks or a walk or even hang out in your garage, if you have one, which provides some protection from the elements, but still allows for some air flow. If your climate is very cold, like it is for me, opt for something earlier in the evening before the sun sets- who needs to be up until midnight anyway?
Make your own PaintNight– choose a picture you would like to paint or find a paint by numbers. It’s easy to find a paint kit on amazon or make your own. You could even make a game out of it- have a friend describe a picture to you and you need to paint it without seeing the picture. Then you would do the same for the friend and see whose best matches the picture.
Holiday light drive-through – find a local holiday light display to drive- through. Many are up through the new year. You can even go with friends in separate cars and spend the time driving through on the phone. If you can’t find a public light display, find a neighborhood or two with some spectacular lights. Many neighborhoods in our area have pinned their houses to saved google maps to show they are neighborhoods with lights for people to see. You can try searching for these on google.
Themed virtual food swap– a friend came up with this idea for her family for Thanksgiving. Each person or family participating makes a part of the meal. You keep some of what you make for yourself and trade some of it for another part of the meal with anyone else participating. We plan to choose a theme by making food from a specific country. After the swap, you can eat together over zoom.. or not! 🙂
Get dressed up or get really cozy, whichever makes you really happy! I know I have had very few opportunities this year to get dressed up so the idea makes me feel a bit more festive.
Yes, 2020 has been hard for so many people in so many ways. The holidays may look very different and I have heard from many that they are not in the holiday spirit this year. I know you have probably already tried all of the quarantine trends like baking bread, have Zoom fatigue and the darkness of winter makes it hard to be motivated to find ways to safely connect with others. As an extrovert, I need to see and connect with people on a daily or weekly basis, but my husband and I have chosen to do our part to minimize the spread by only seeing people outside, socially distanced and within 6 feet of each other (or very rarely and briefly inside with masks on and 6 feet apart). There are times I feel like all the days roll together, I will think about some of the things I miss and it can be hard to imagine how much longer we will need to live life in this way. Despite this, I have kept very busy this pandemic and found things to do that help me enjoy my time, ways to connect with people from 6 feet apart and to feel more cheery throughout the pandemic.
Here are few things that I have been doing to not only make it through the pandemic, but actually enjoy my time.
Obviously # 1 is – Adopt a DOG (fine a dog-like cat would do)- I know that not everyone can do this so if this not possible, please see the rest of my ideas 🙂
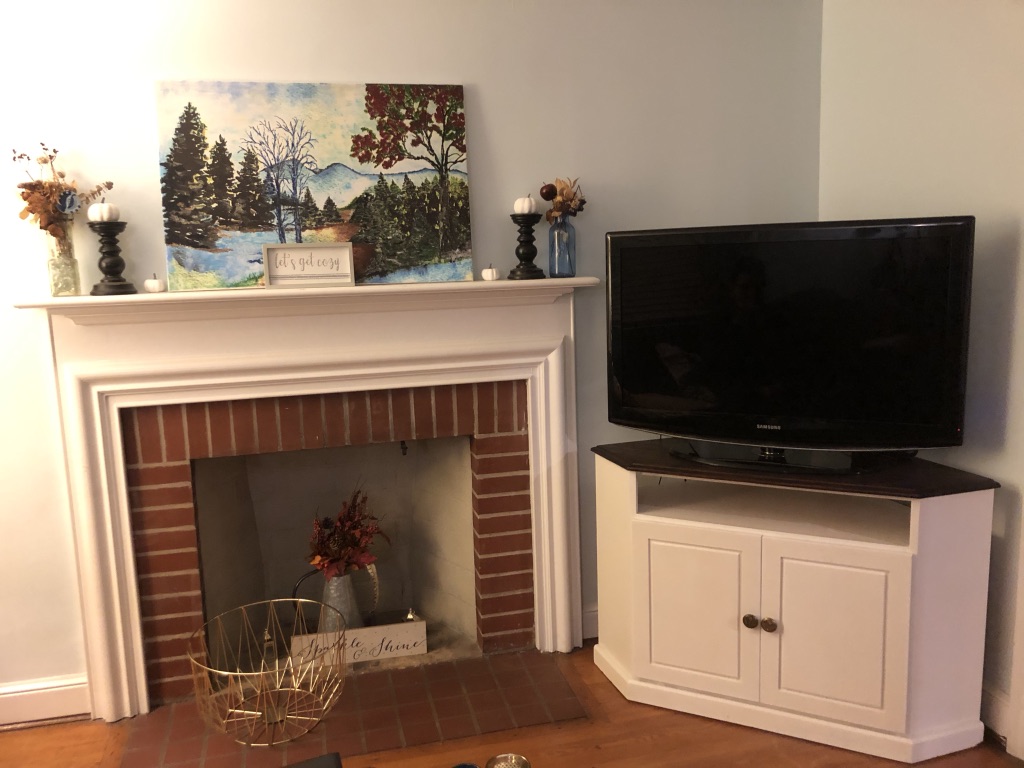
Make your home a place you REALLY want to be – maybe you have already done some decluttering or some cleaning. Now it’s time to think about where you like to spend the most of your time. When you come home, where is it that you look forward to spending time on a rainy day? Focus on that room. I personally, love Marie Kondo’s method– if it doesn’t spark joy, get rid of it (preferably give it away)! Go to town on that space- declutter it, deep clean it and make it a place you can’t wait to be. For me, that is my living room. I purchased some pillow covers, which are a very inexpensive way to touch up your room (and cover the holes my lovely pooch chewed in mine), I have tons of cozy blankets, and some candles.
Get outside E v E r Y day.. yes I mean every day. I live in the northeast and do not tolerate being cold well (nor do I tolerate being hot well- hard to please), but I go outside every. single. day. Having active dogs is mostly like the reason I do this, but I never regret it- whether it is a walk around the neighborhood or just a few seconds outside for a breath of fresh air and a break from a screen, it helps. If you invest in anything, I highly recommend a really good quality coat and some waterproof and warm boots. Last year I purchased this coat (well a VERY similar version that is no longer made) and this coat, both at 50% off! I cleared out my closet and gave away almost all of my other winter coats. I wore one of these coats every single day from about November through April. They may not look like much, but they were warm enough on the coldest of days, waterproof and windproof. They also are not very bulky and are form fitting (and are on sale for 50% off right now!). My husband purchased the men’s version of the shorter coat- we both ripped ours and were able to get them replaced for free. If you have the right gear, you can be outside in any weather. As a compromise, at the very least try to be active in some way at least once a day. There are so many ways to be active from home with very little equipment. Hasfit, Daily DeFusion (not a big deal, but this is my brother’s business), and Beach Body on Demand are some of my favorites, but really you can find anything you want on YouTube. Whatever you do, just move a little! Fresh air, and endorphins can do you wonders- especially if you are like me and are on a screen all of your working days
Have a routine– I get up early because my dogs are early risers. This allows me to exercise them and then exercise myself before I even have breakfast. I then shower, do my hair and maybe put on some makeup, if I will be seeing people either in-person or on camera. Now i’m not talking getting dressed up fancy- I haven’t worn work clothes (or a real bra 🙂 in months) and I have something against wearing jeans in my own home, unless I am hosting some kind of gathering. I am just saying put on some clothes that you didn’t wear to bed or to work out and put on something that you would feel comfortable leaving the house in. I am a leggings every day kind of gal and athleisure is my jam all day, every day, but I try to look put together. Being dressed and ready for the day makes it a little easier to feel motivated to something.
Give yourself permission to do things you like to do, but that you never allow yourself to do. i.e. spend a lot of the day on the couch watching T.V. – at least every once in a while
Do a project you have been meaning to do – I have a few pieces of furniture of I have finally been getting around to refinishing. Start small- success leads to more success so if you start with one small goal, you will have accomplished something for the day and you will likely be motivated to do more.
Volunteer– there are plenty of ways to volunteer remotely! I have been doing virtual home visits for a dog rescue. This has been one of those things that the pandemic has made slightly easier and it is nice to connect with people over a shared love of dogs.
Do something good for someone who is struggling- next time you grocery shop, grab a few extra items for a local free pantry, town food drive etc. There are so many people who are struggling with food insecurity and who are relying on these places to ensure they have food on the table. This is something that is easy for you to do that will still help people.
Take time to slow down– to breath, to work on you – sometimes we get so caught up in the daily grind, in staying busy, that we forget to listen to ourselves and our bodies about what we need. Is there something that has been causing you anxiety? Do you have an ever-growing to-do list in your head? Take a moment to write some of these things down and think about what you want to do about them. My wise brother recently explained to me that people can only handle so many things on their plate before things start to metaphorically fall off the plate. It can help to write these down and prioritize or at least get them down on paper so they can get off your mind. I started seeing a sleep and headache psychologist this year (who knew they existed?!) and it has really helped me to have tools to help improve my sleep, which has really suffered this pandemic, and to reduce headaches.
Get back in touch something you used to love to do– maybe that is your creative side, maybe that is reading, writing, yoga- whatever it is just try it. I hadn’t painted probably since high school, but one day I decided to start painting with water colors and acrylic paint. Then I moved into pouring paint, which turned into pouring resin, and now I make and sell resin coasters (and handknit balnkets)! My point is – just try something- you don’t have to show anyone, no one needs to know, just try to do something you enjoy.
The corner T.V. cabinet is one of my recent furniture refurbs.Some things I have made out of resin.Cozy up your space with some patterned fabrics, cozy blankets, and seasonal pillow covers. A watercolor painting I made- olives
Just grab your favorite toppings and put a bow on it!
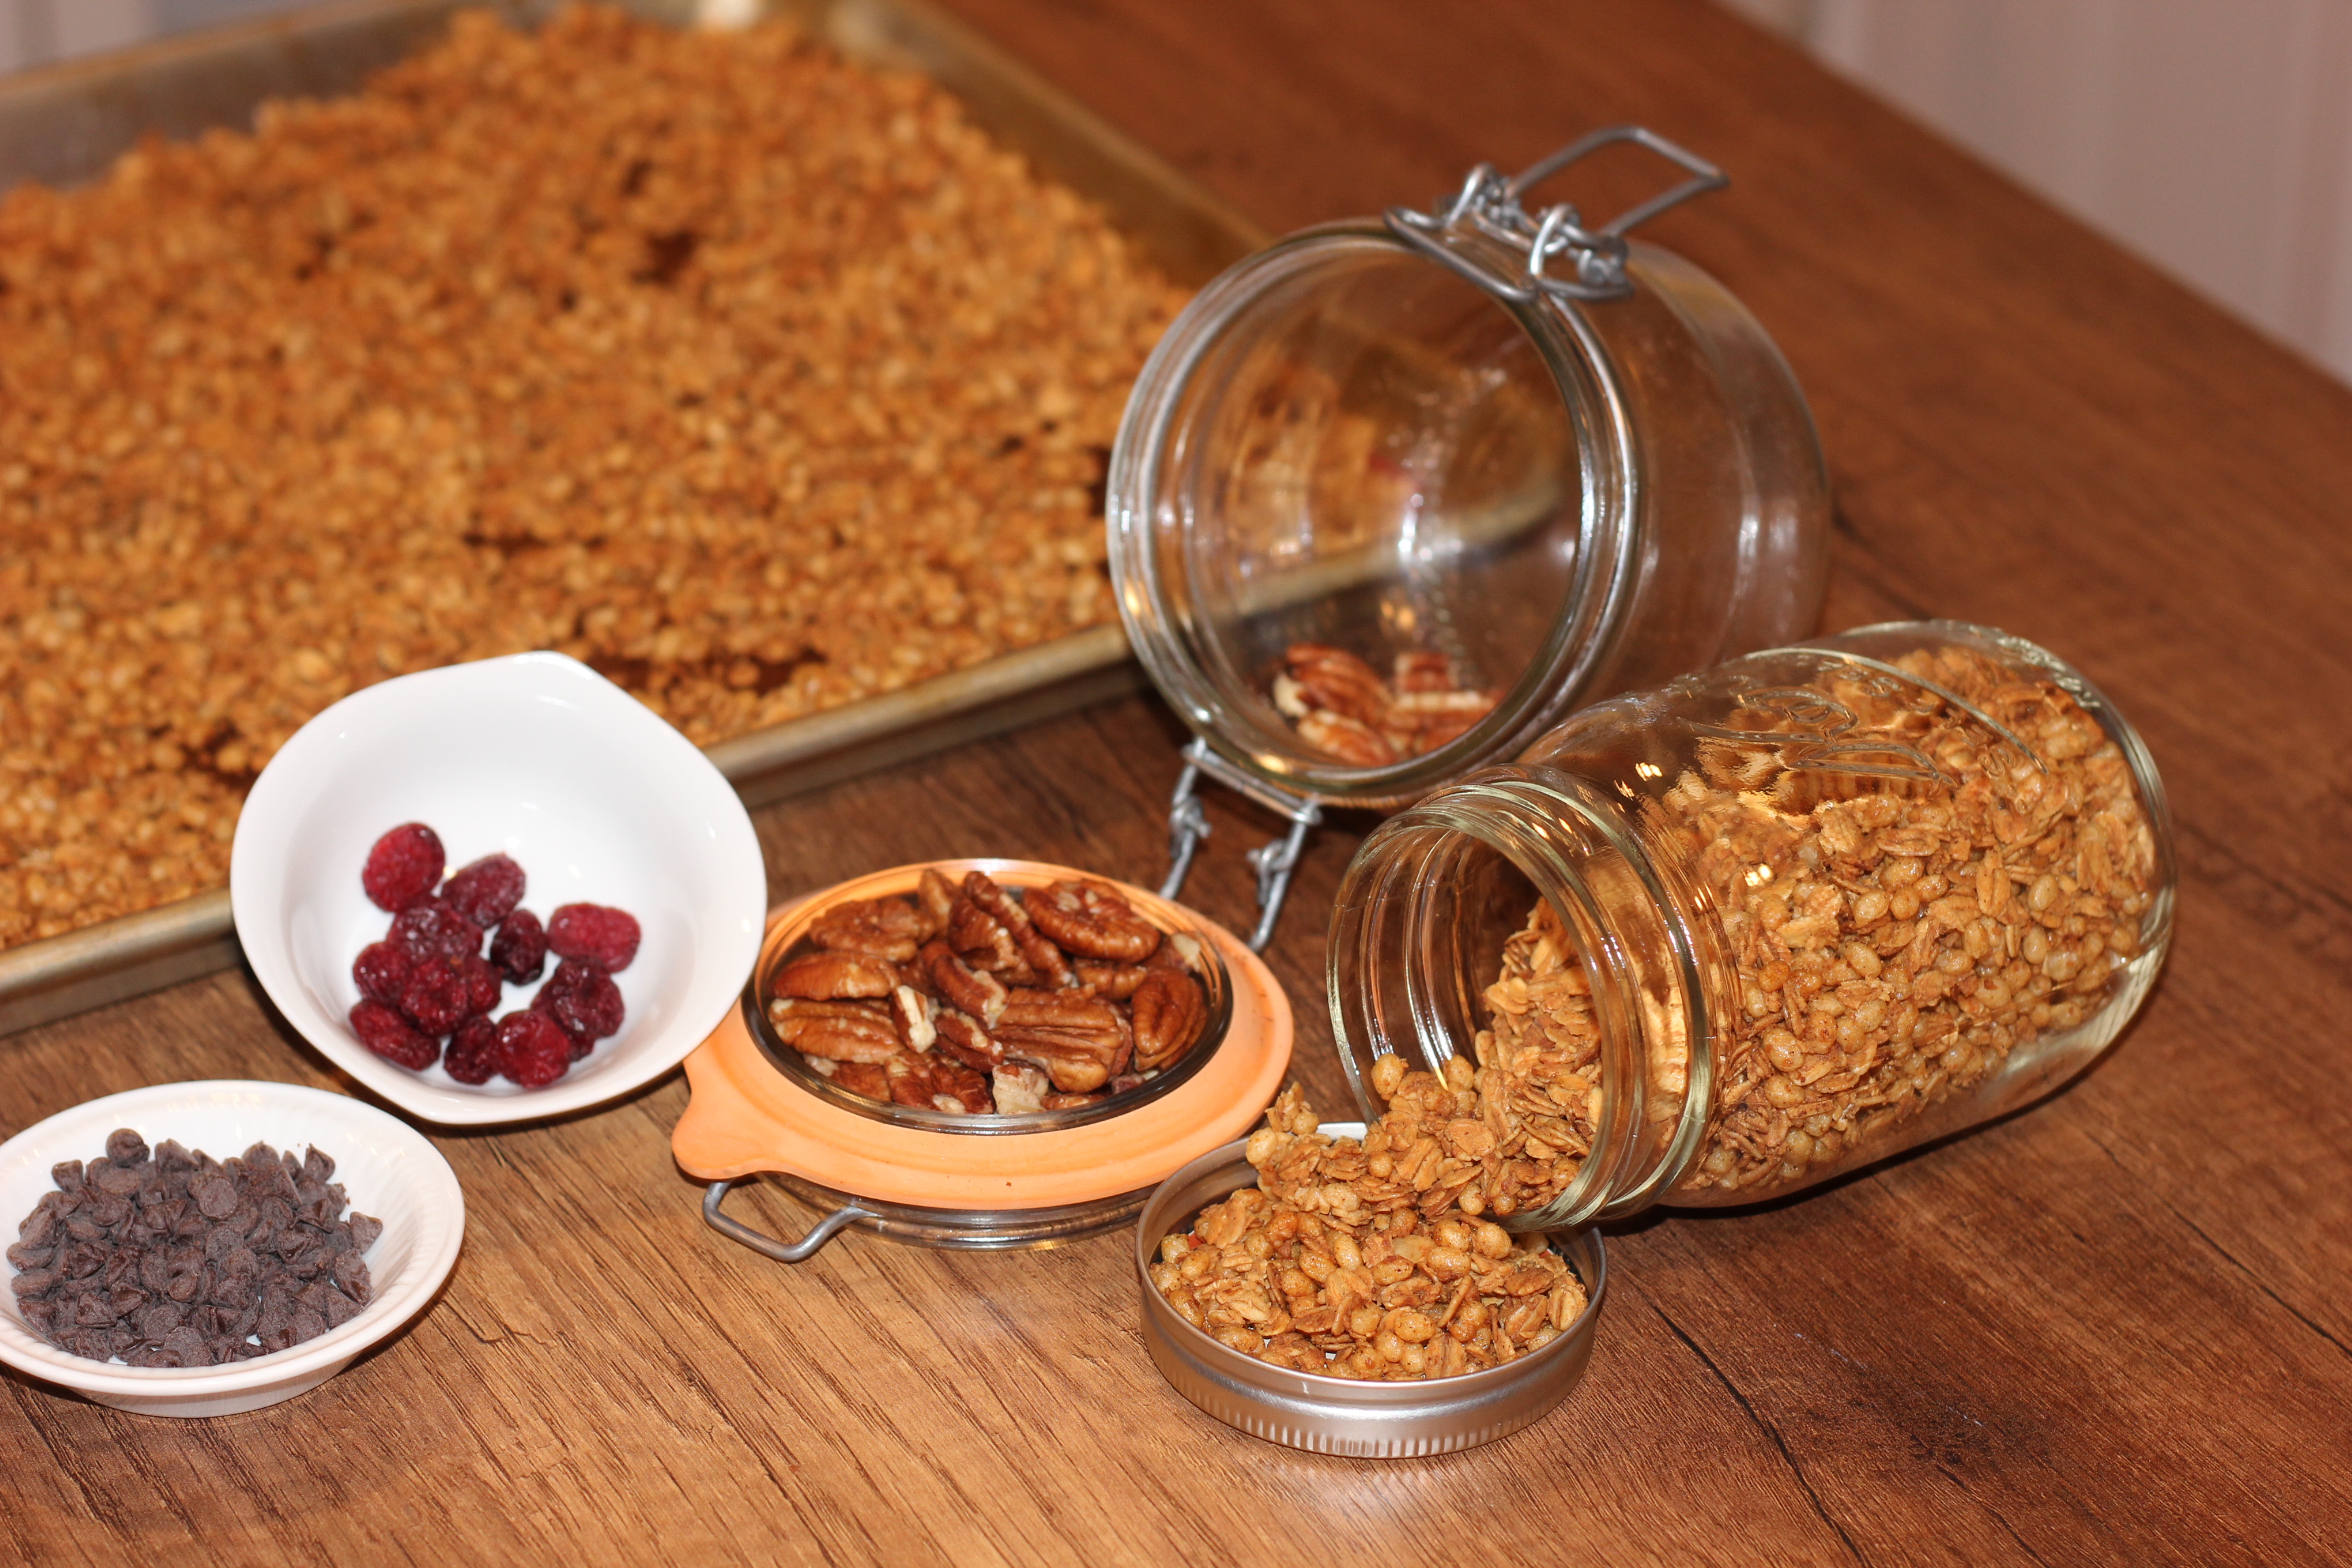
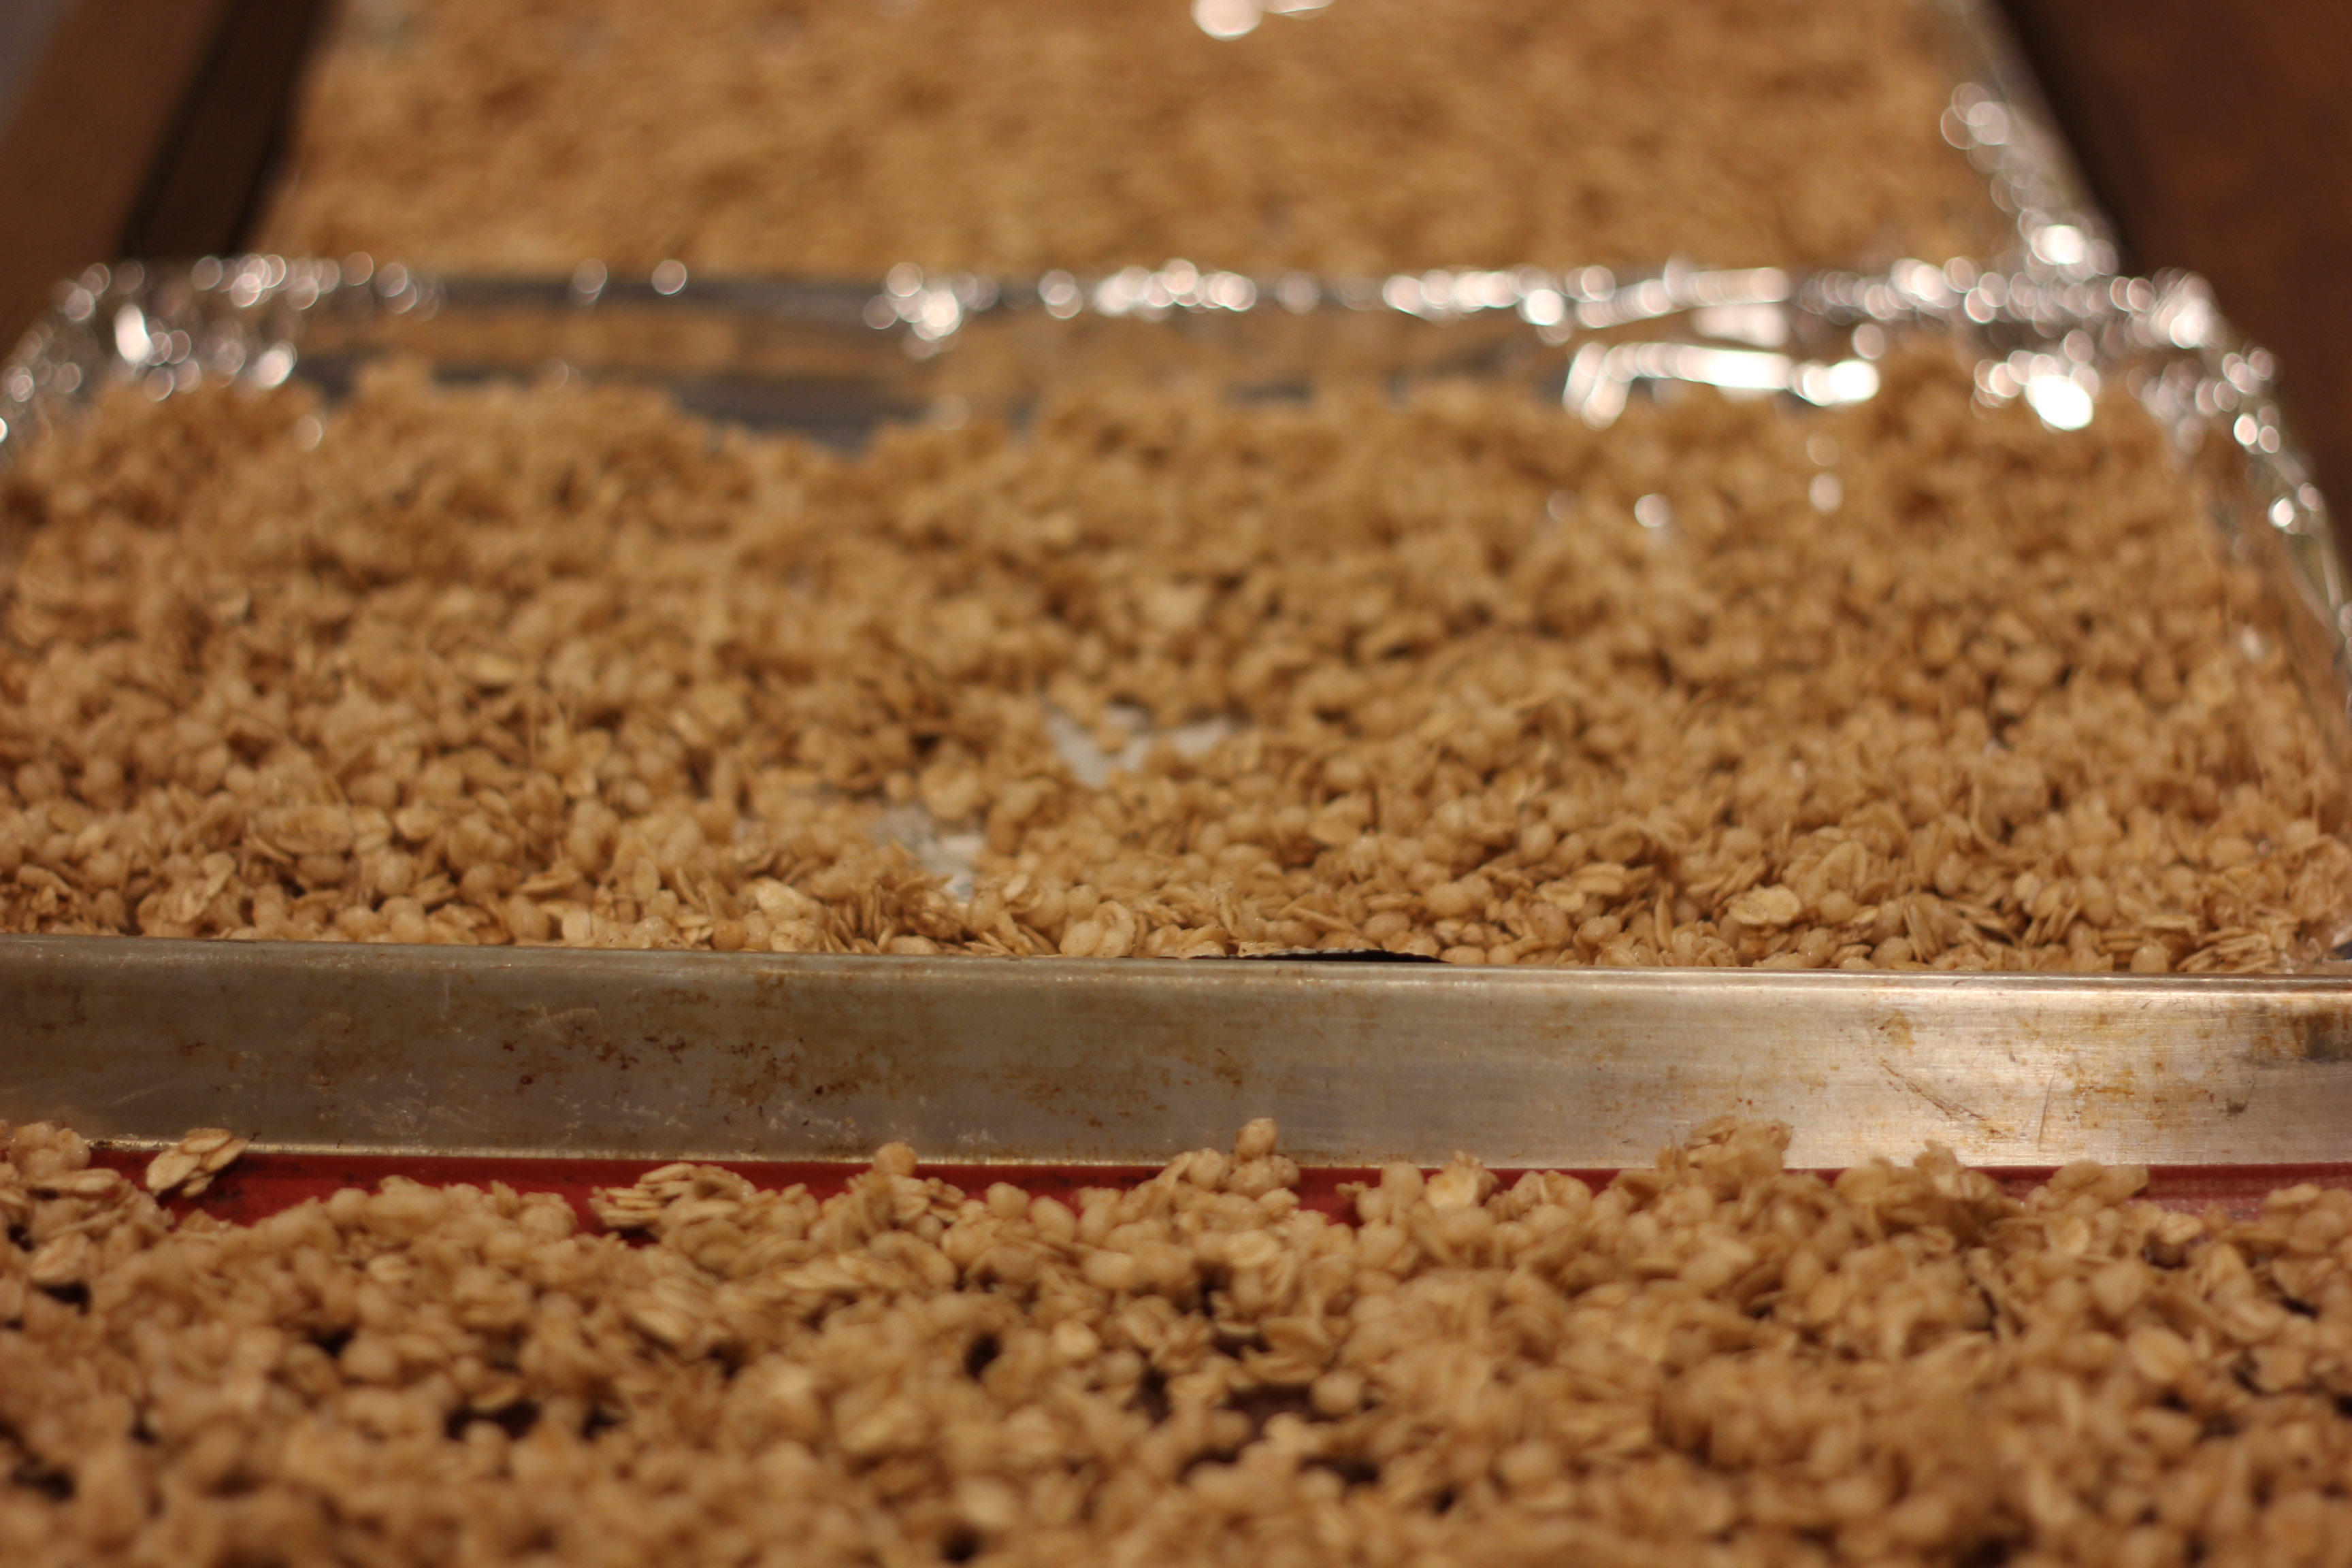
Let me first introduce you to my favorite granola recipe from the Clever Carrot, which is aptly named “My Favorite Granola.” One of my childhood besties shared this recipe with me years ago and it is the only one I have been making since.
Are you looking for last minute gifts for people you just couldn’t decide what to get? Do you need to add a little oomph to some gifts you already purchased? Do you just want to make something yummy for yourself? Granola is your answer! It can be packaged to look beautiful, goes with many different foods, is great for anyone and can be stored in mason jars for several weeks.
Here are the steps to giving the gift of granola:
Follow the recipe to make the granola- you can also use butter or margarine in the same amount instead of coconut oil
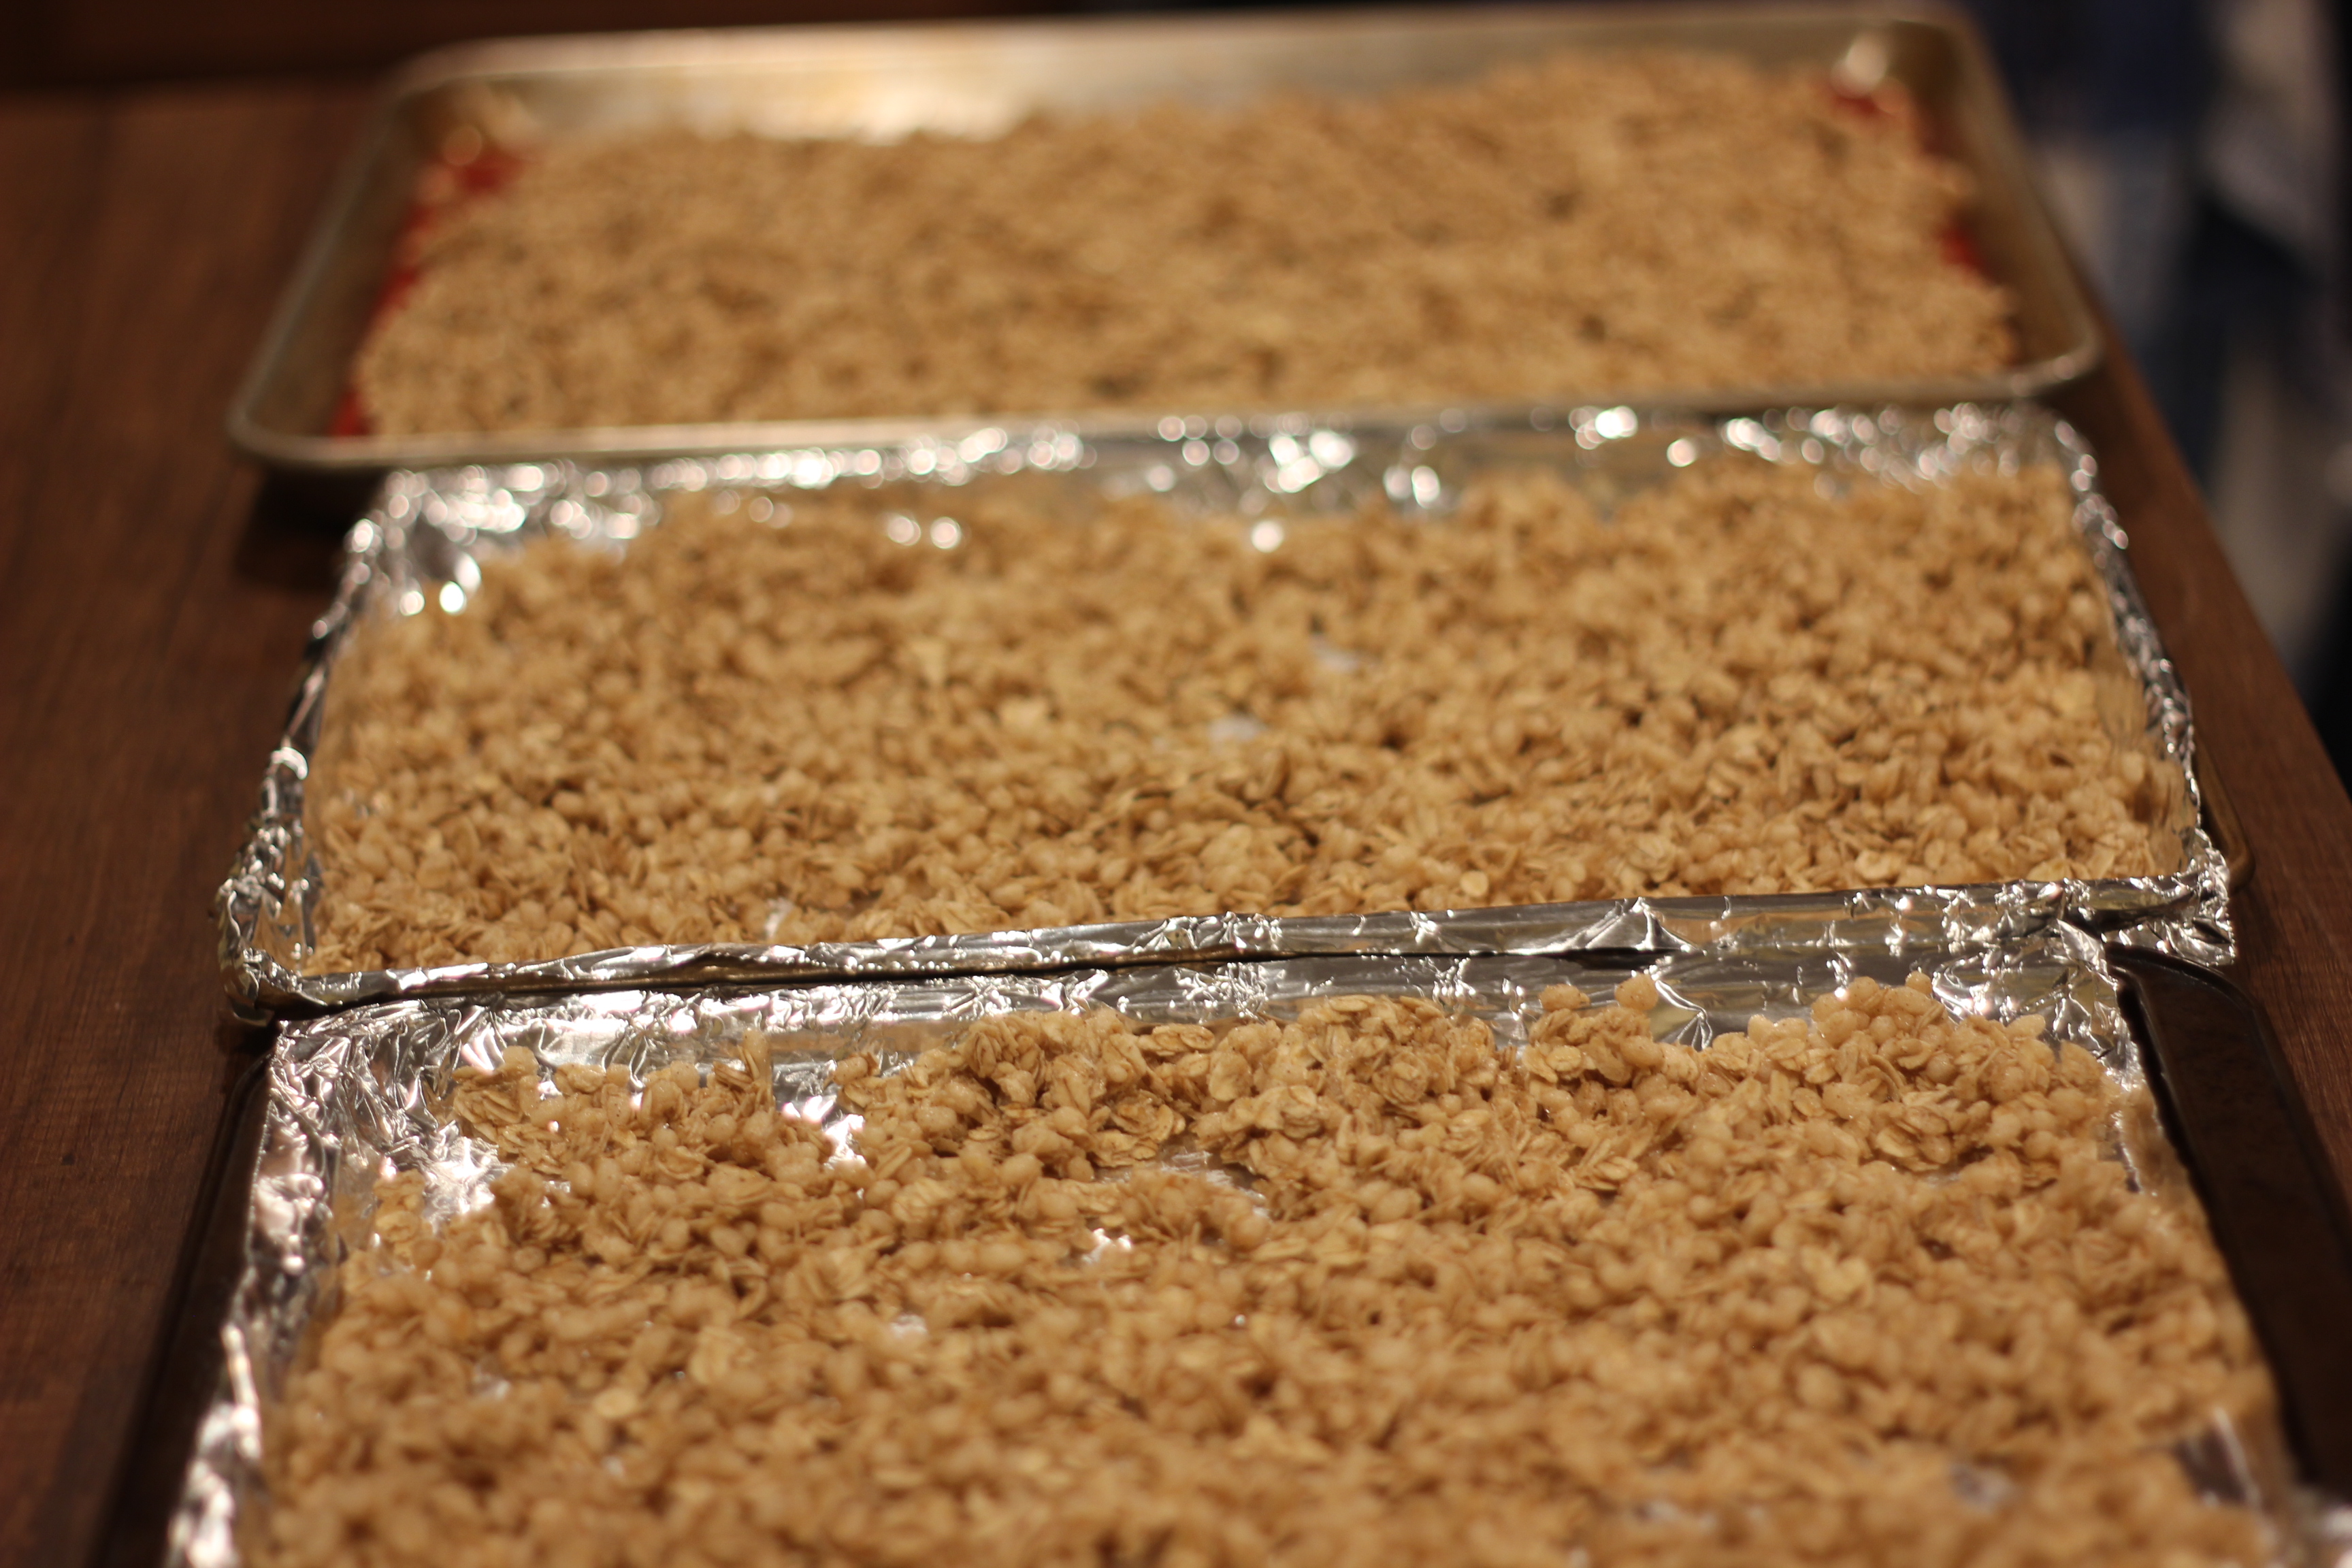
I doubled the recipe for the ultimate gift giving granola
Remove from oven every 10 minutes or so and stir around in the tray
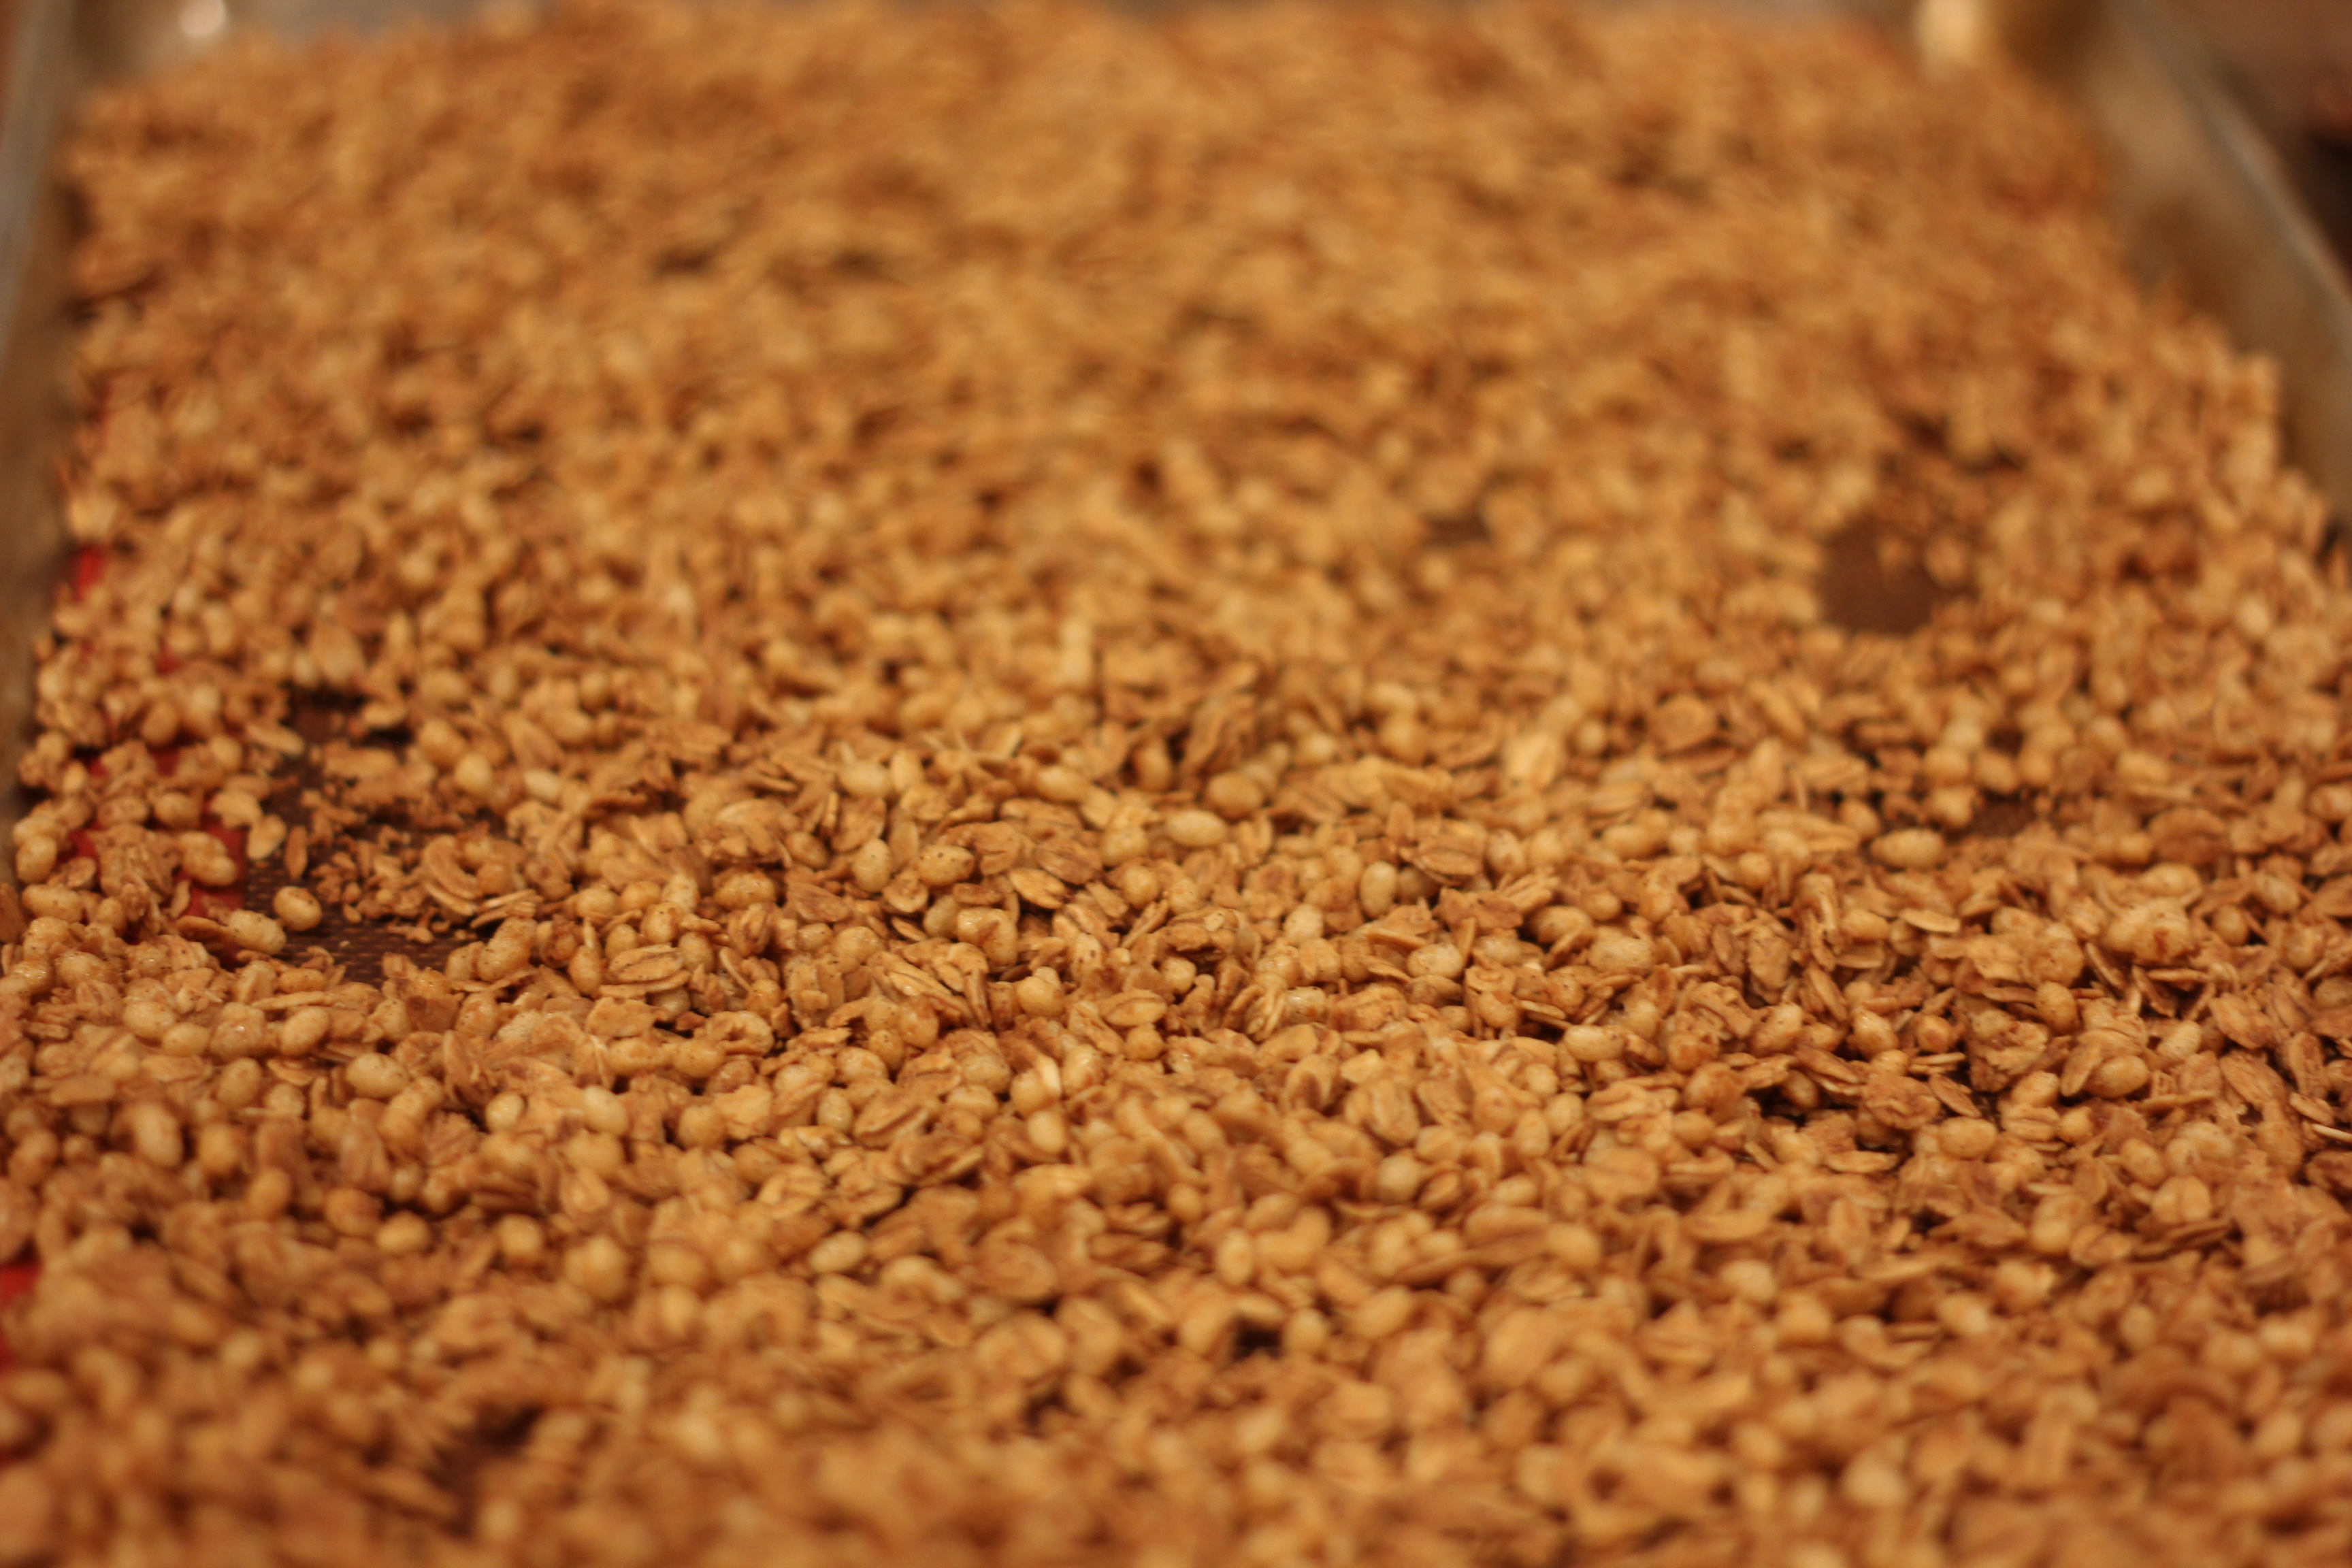
Let it cool completely – I usually let mine cool overnight
Add some toppings, if you wish; dried cranberries, coconut, nuts, chocolate chips- I leave these on top so picky eaters can remove them without them being all mixed into the granola
Grab some mason jars from Michaels, or Amazon or wherever you do your food shopping- small, medium, big- whatever you would like
Did anyone else ever have a teacher tell them, if you’re really stressed out and can’t get anything done, go clean your room? Maybe this was a trick, but it is something I have prescribed to since 5th grade.
Personally, I need a clean, organized work space to get things done. I know when my house is a mess, I feel like a mess. I truly believe organized home = organized life. Here are a few organizing hacks to help get your whole house in order:
Bins, Bins, and more bins!
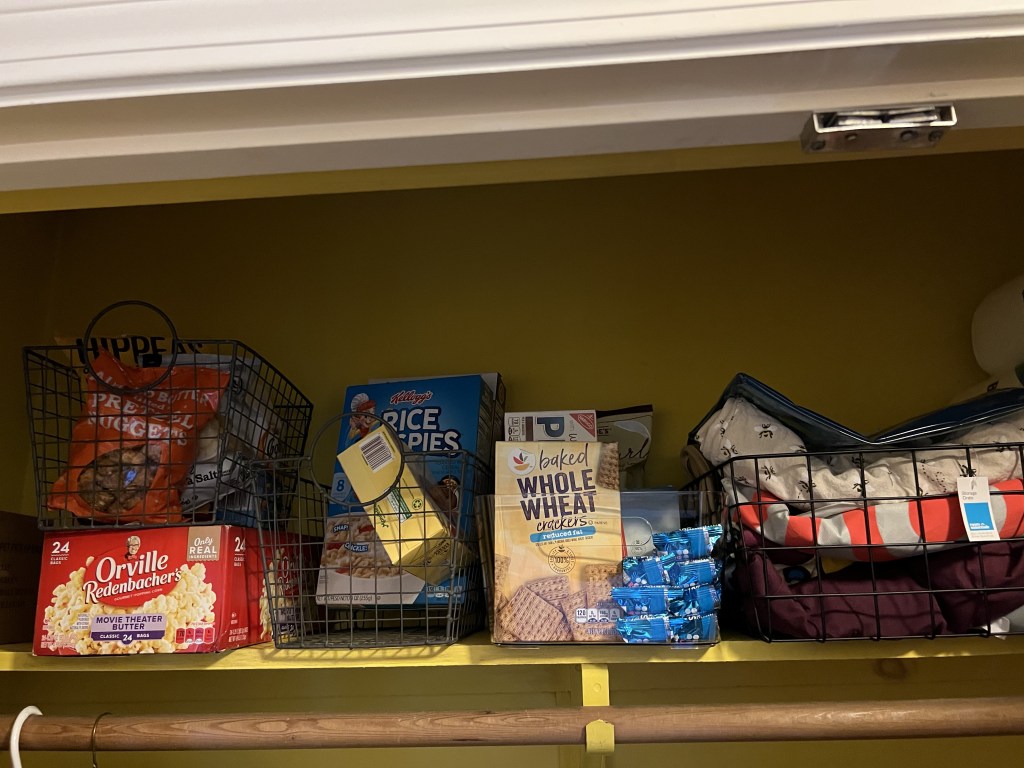
Extra food and reusable bags
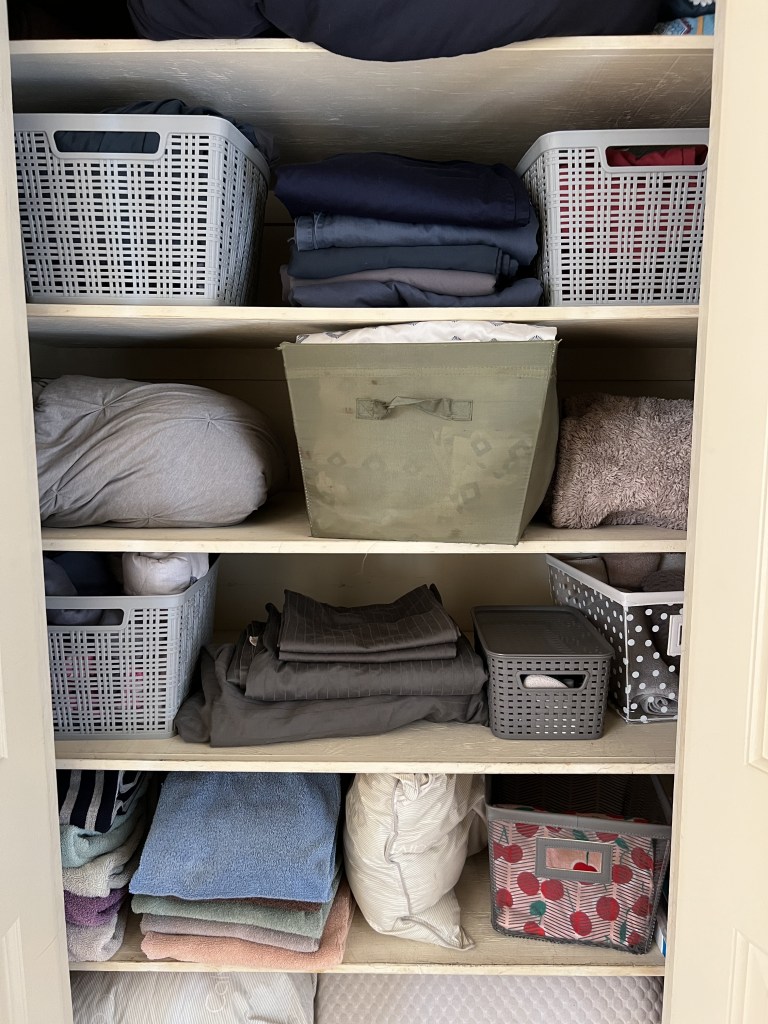
I use bins e.v.e.r.y.w.h.e.r.e.; Under the sink, in the pantry, the linen closet, closets, cabinets, etc. Depending on the bin and where it’s going, this can be a nice way to create “organized chaos,” or just hide regular chaos. You can throw things in and not worry about how organized they look. They also help so that you can pull the bin out to find something, without having to grab 10 things at once. I usually try to put like-items in the same bins; i.e. in my linen closet, i put all the pillow cases in one bin, or in the pantry, I group salty snacks together. This was it’s easy to find what you’re looking for.
Bins in the linen closet help keep items together and neatly folded or rolled
Try to put items you use frequently in the middle of shelves and shelves at eye or chest level so you don’t have to move a lot around to get what you need. In the pantry, I try to put the healthier snacks front and center. If you really want the good stuff, you’ll dig for it 🙂
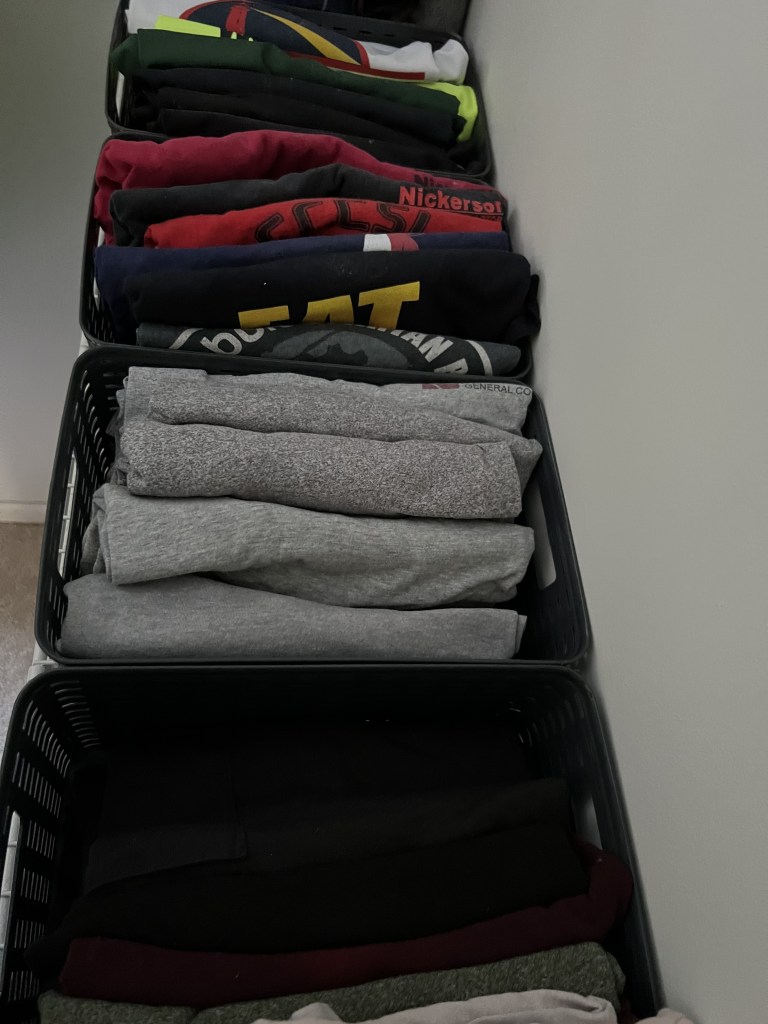
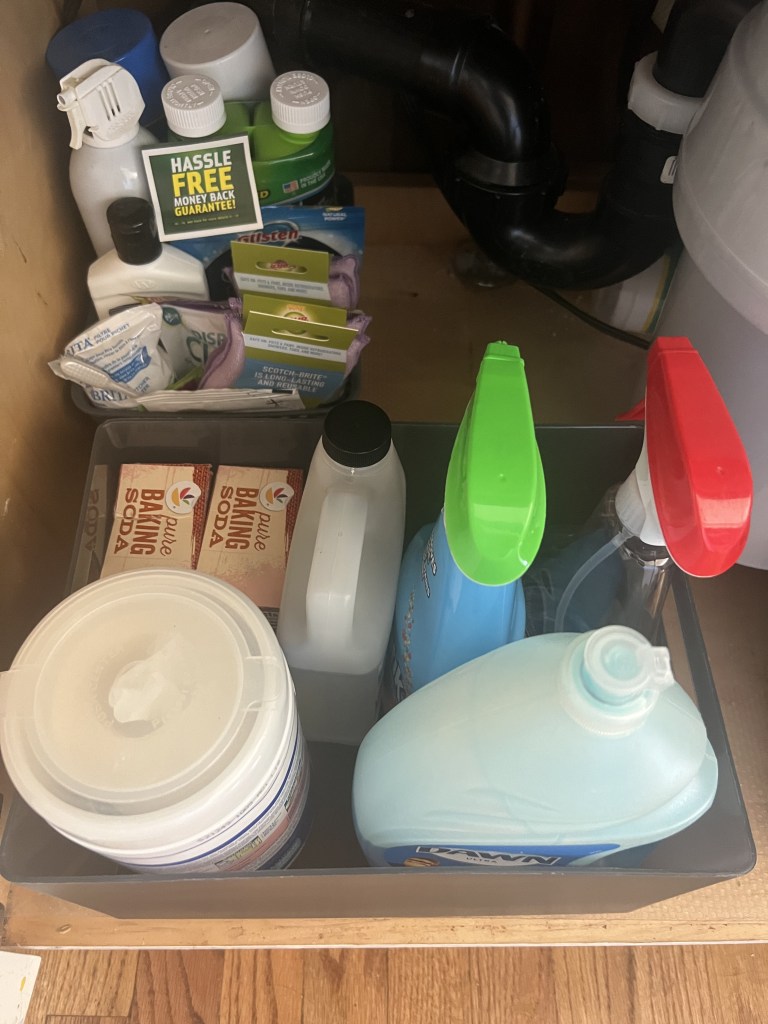
These stackable drawer bins are awesome under the bathroom sinkFirst aid knick knacksT-shirts fold nicely into theseGreat for closets that just have open shelvesCleaning products
Links:
Pantry bins– I like these because the front is lower so you can grab things from there without having to pull the bins out. Plus they are stackable
I purchased the majority of the above a number on amazon, but I often find good deals at TJMax/Home Goods or Bed, Bath & Beyond (Don’t forget your coups!).
Drawer Organizers
Drawer Organizers
I found these here, but again, TJMax/ Bed Bath and Beyond often have great buys for these items. These make every day life easier, but when we moved (see Listing your House in 3 Weeks or Less), I packed everything into boxes already in their organizers so it made it much easier to unpack.
Cord organizers
Cord Organizers
Nothing makes a drawer messier than tangled cords, but these make it so easy to keep all your chargers neat. They can be found here. They come in multiple colors and are easy to take on and off or leave them on while in use.
Organize your Life
It doesn’t have to take a lot of time or effort to reorganize a closet or pantry. I already recommend this if you end up moving in the future. Having everything in bins can be really helpful for packing purposes. You can often pack everything as it is so that when you go to unpack it’s ready to go on a shelf. SO go and get yourself a few organizing bins and drawer organizers and you’ll have yourself an orderly space in no time! You don’t have to do your whole house at once. I recommend starting with a space that has a lot of stuff, a disorderly space you use often or an area that a lot of people see so your organizing efforts can be noticed! And let that organized life begin!
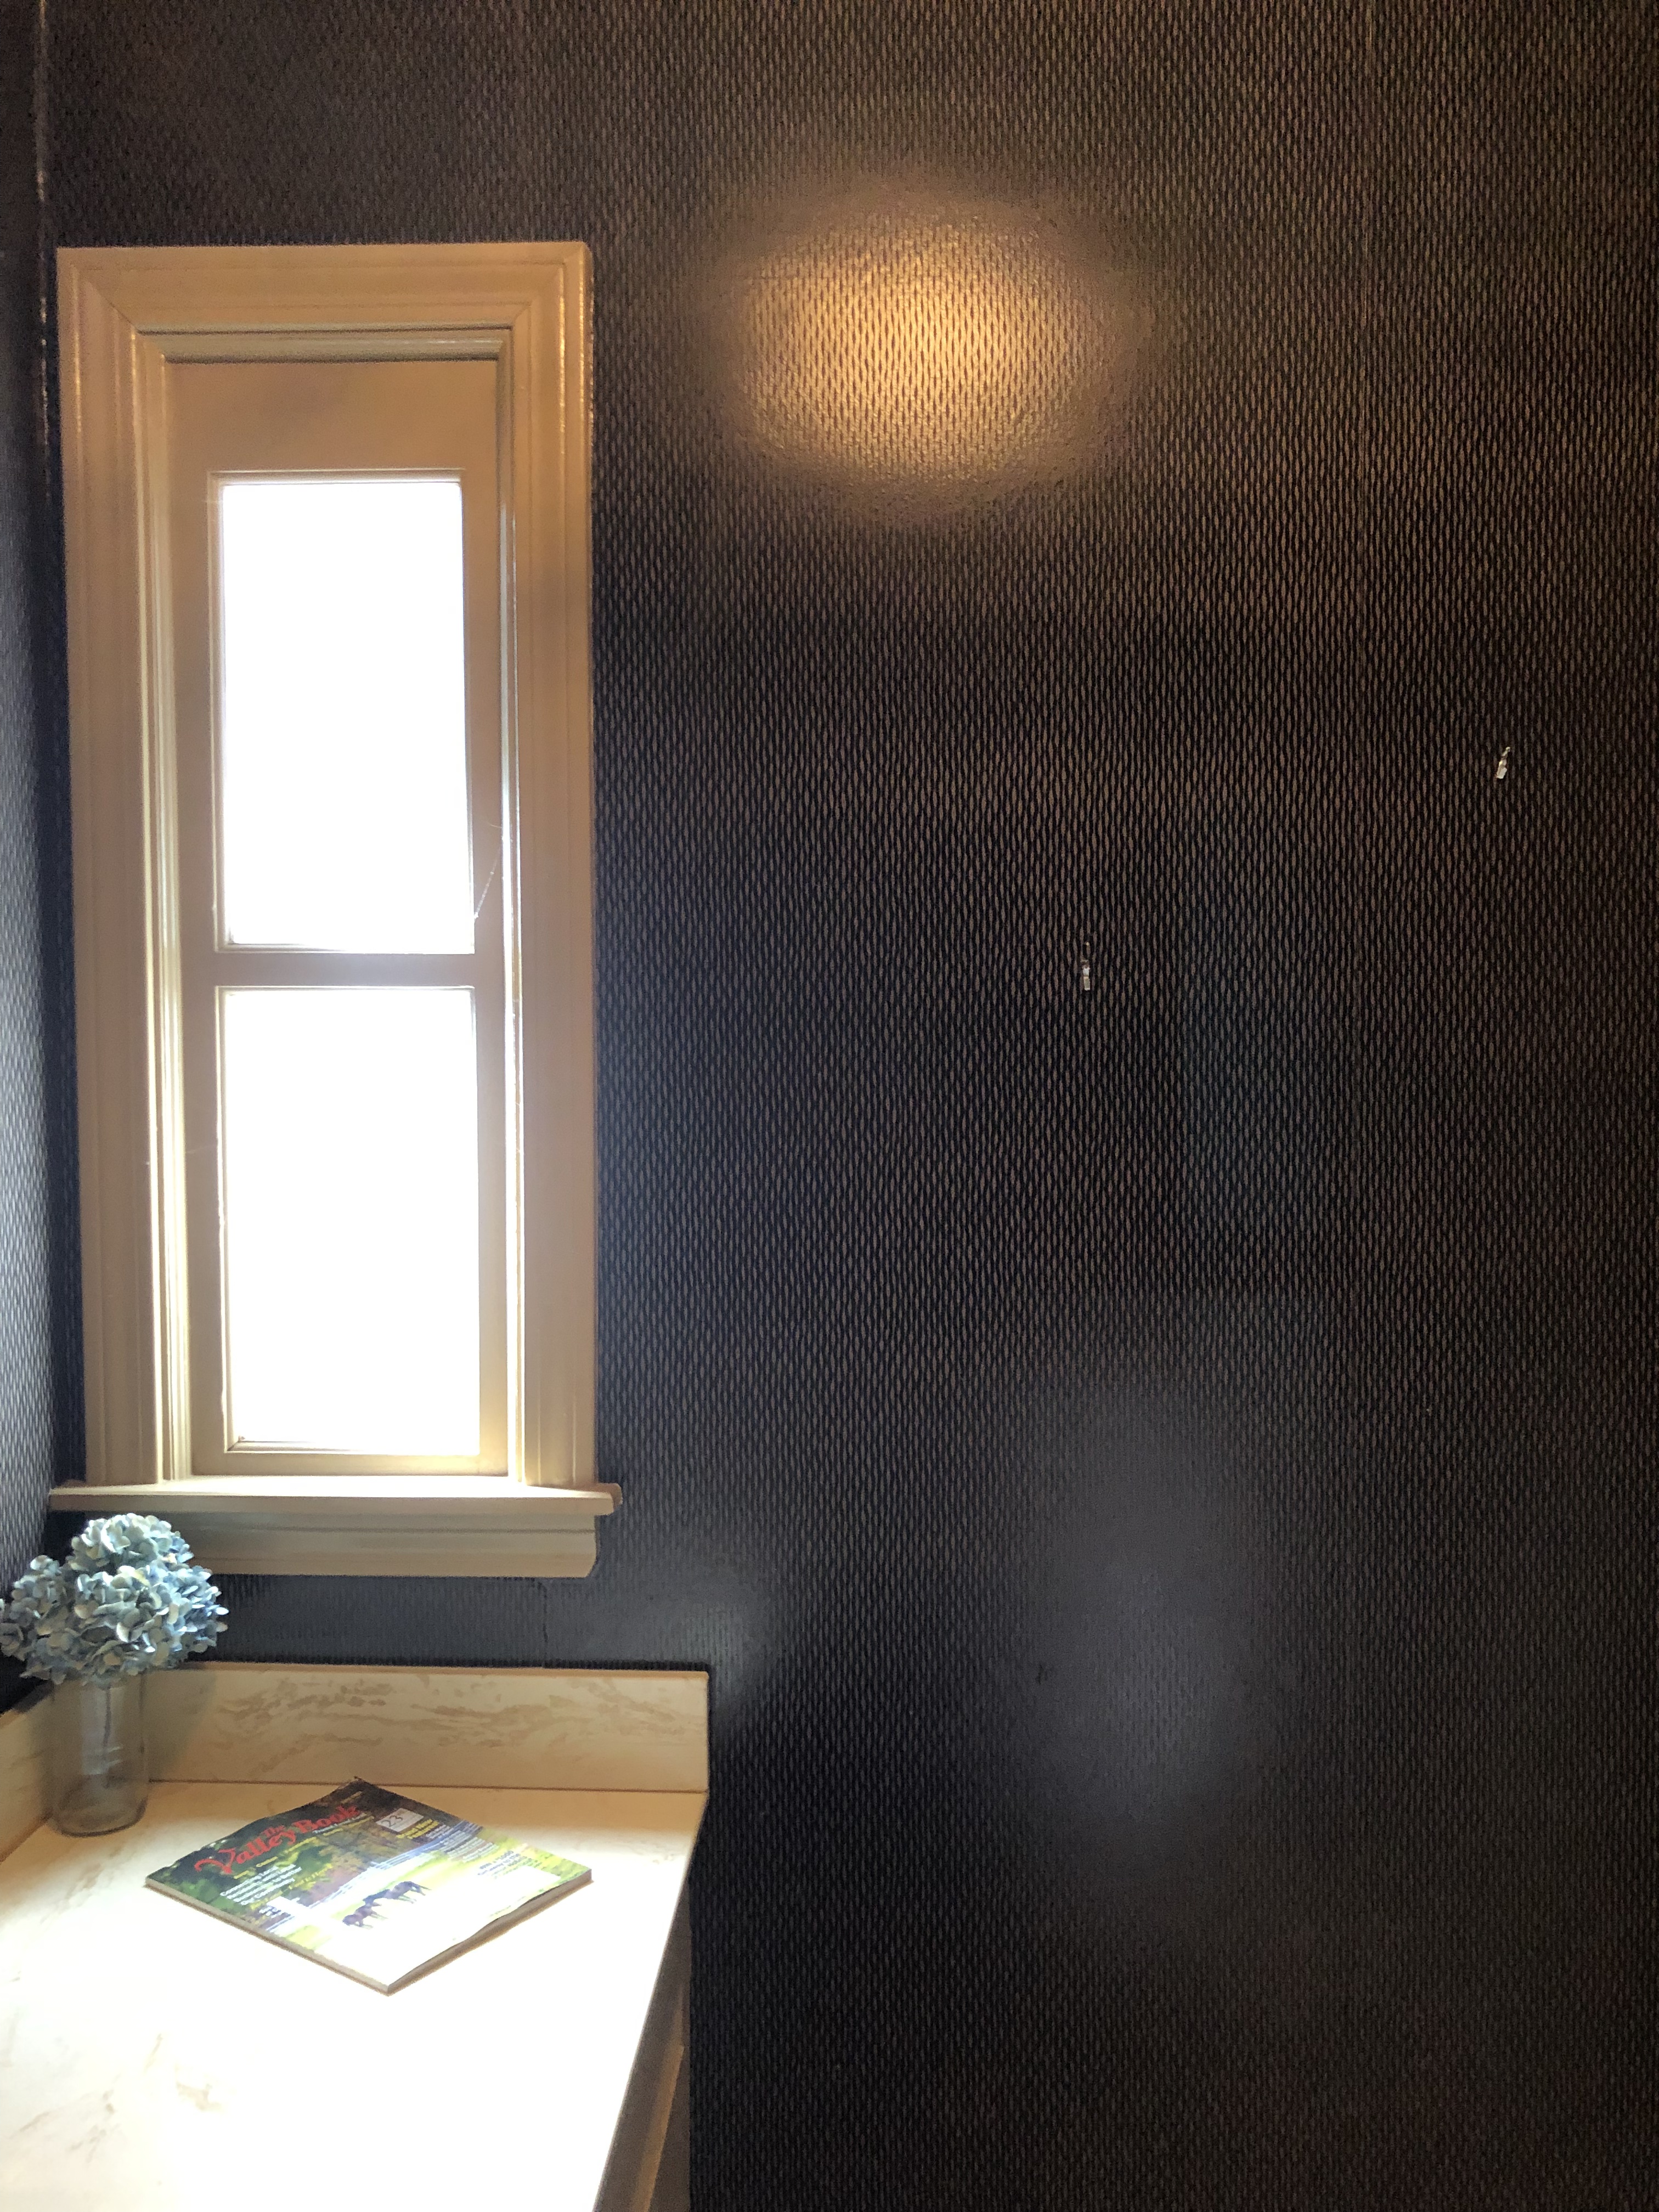
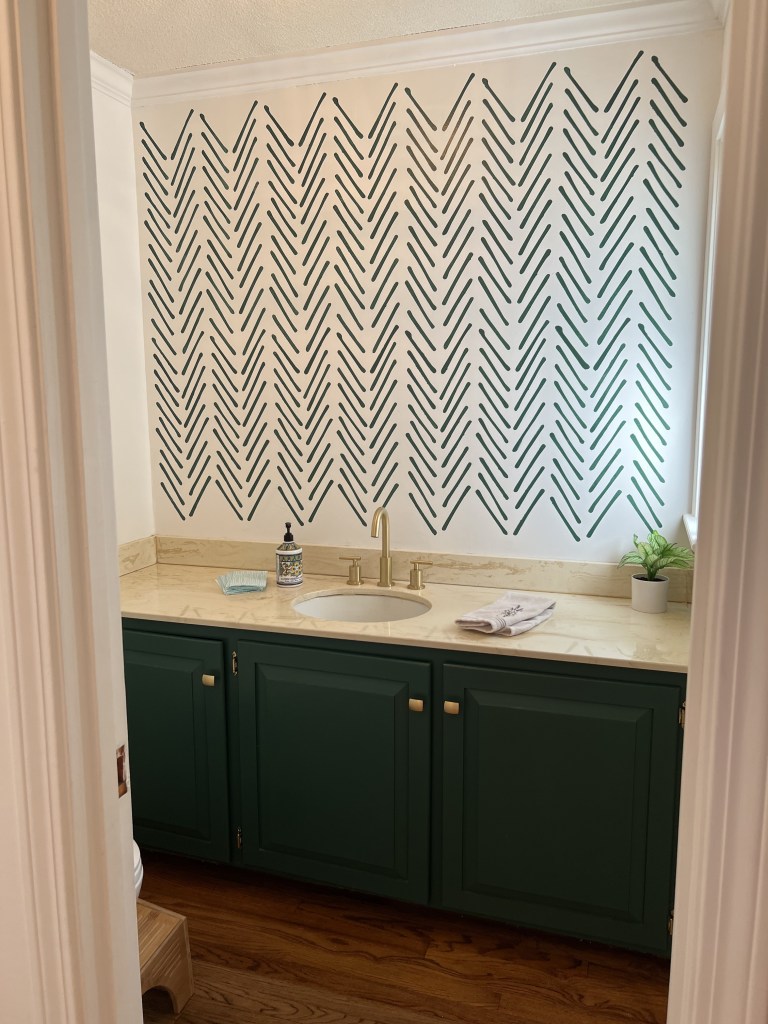
Powder Room Reno Complete! (Minus needing outlet covers and to adjust the height of the mirror)
Spoiler Alert: Wall Stencils!
Wallpaper is trendy at the moment, but let’s face it, it’s also not the easiest thing to do. I’m so excited to share how I used wall stencils to achieve a patterned look without all the time, hassle and frustration of wallpaper!
HALF BATH– before:
When we bought our house last year, the half bath on our first floor looked like this:
As far as wallpaper goes, this wasn’t bad and I didn’t really mind it, but the room only has a frosted window so it was really dark and the big kicker for me was that the wallpaper seams were starting to come apart and peel. Not to mention a piece of the backsplash on the side had come off the wall so the bathroom needed a little TLC.
WALL PAPER REMOVAL
We started by removing everything from the walls and we actually removed the door since it’s a small space and at times, two of us were working on this project. Then, we went to the dreaded wall paper removal phase. I will say, for this project, removing it was not as bad as I expected.
Removal tool kit (the first product came in this kit- also available at Home Depot and other hardware stores)
Both products worked fine. The first one was more of a pain- it had to be mixed in a bucket with hot water and it worked best when it was kept warm. The second product was much easier to use- you could just spray it on from the bottle, but I only used this on a small area (see DIY Fail below). You can also use steam or they sell wallpaper removal machines. Whatever works is just fine!
The best method I found was to start peeling the top layer of paper if there was something to grab onto, and if not, use the scoring tool to rough up the surface. Peel or scrap whatever you can first and then apply some removal product (if you’re me, you apply liberally) and use the scraper to to scrape off the next layer of paper/ glue until you see dry wall. Don’t go to town too hard, like I did, or you will have to do a lot more spackling before the you can paint.
You can see in the above photos the glue on the walls, where you can still see that icky brown coloring on the walls. That glue all has to be scraped off. Keep going if you still see that. And yes, we (by we, I mean my husband), did remove the toilet so that we could remove the wallpaper behind it. It spent too long for comfort hanging out in our foyer. Don’t worry, it’s back in its rightful place now!
PAINTING
Once all of the wallpaper and glue was removed, we painted the walls and trim white. I like this Killz 2 All-Purpose Interior Exterior Primer. You can buy a large vat of it, you don’t have to wait for it to be mixed, and it’s easy to remember what the container looks like so I can be sure I am using the same white in my entire house.
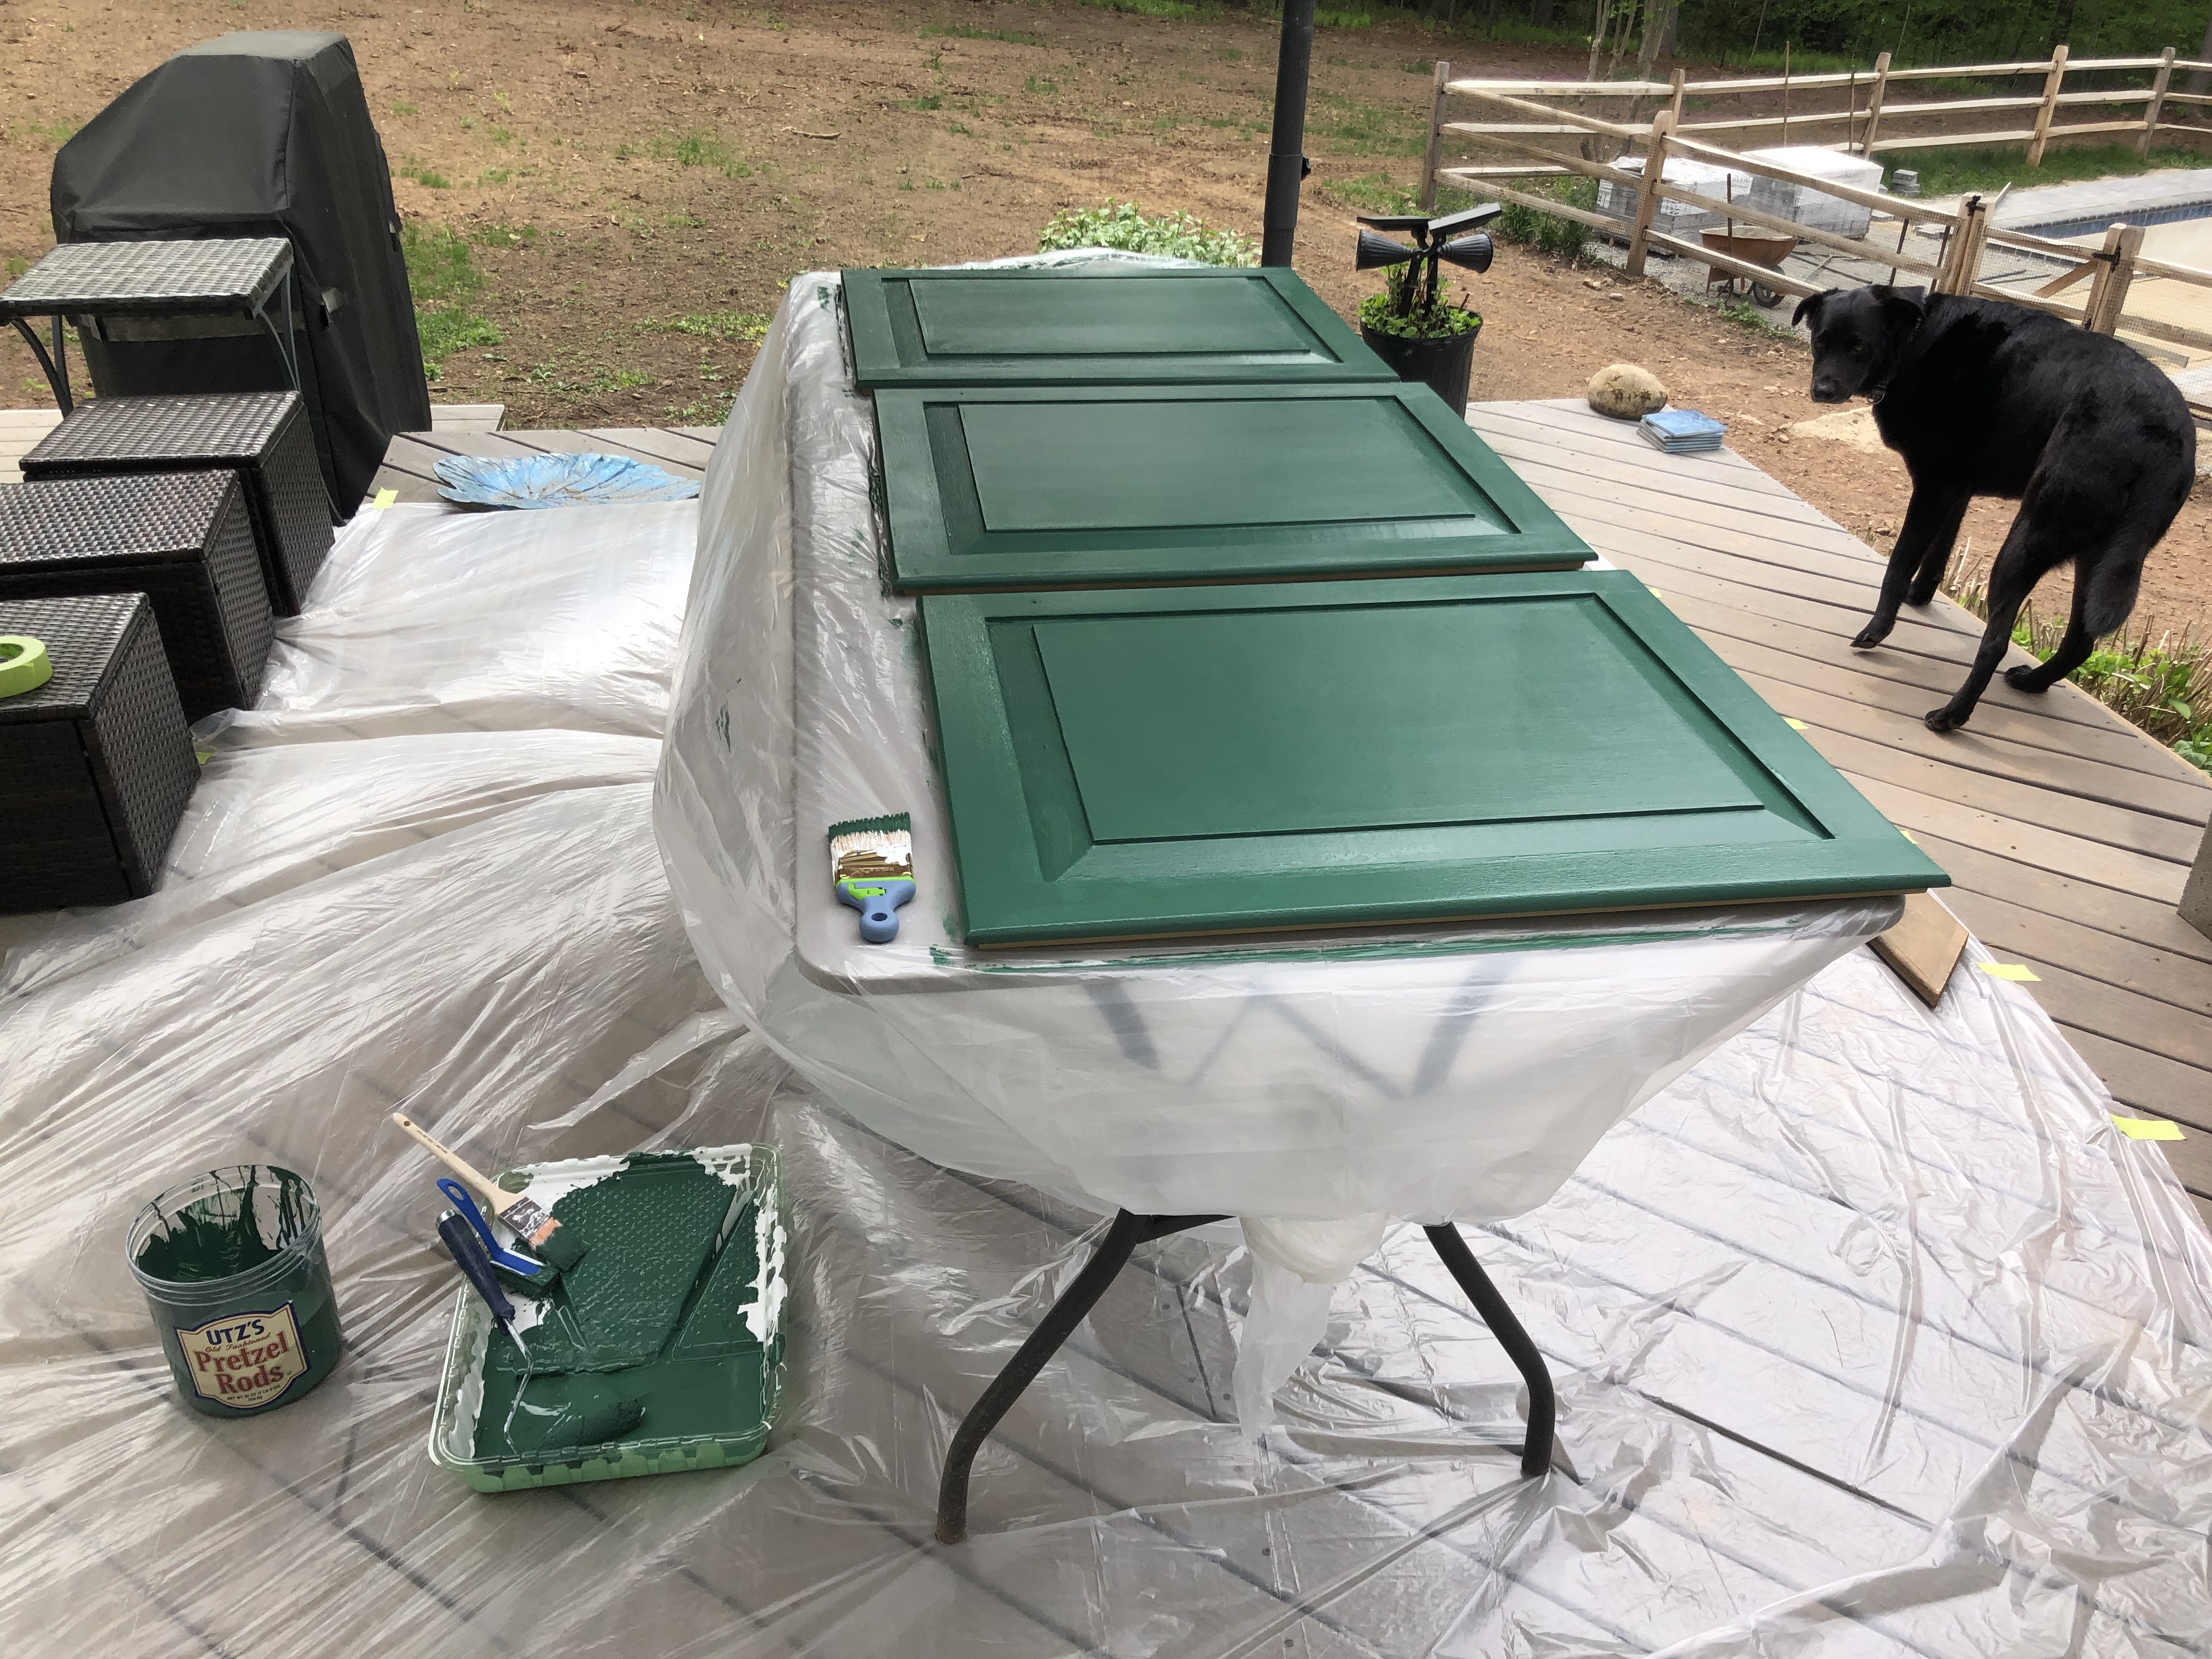
We also removed the cabinet doors and hardware and later replaced them with updated knobs and hinges to match the new faucet, toilet paper and hand towel holder. I painted the front of the vanity without the doors and the inside of it. The hubby painted to the cabinet doors outside. (Can you tell he’s an engineer by his painting set up?). I also painted the door with the same Killz white primer. Heck, while i was at it, I painted the small hallway outside the bathroom that was in the most dilapidated yellowish white. A fresh coat of paint goes a long way in freshening up an old space! [Fun fact: I dropped a microfiber towel in the vent on the wall while prepping the walls. It’s still there if anyone is able to help retrieve it..]
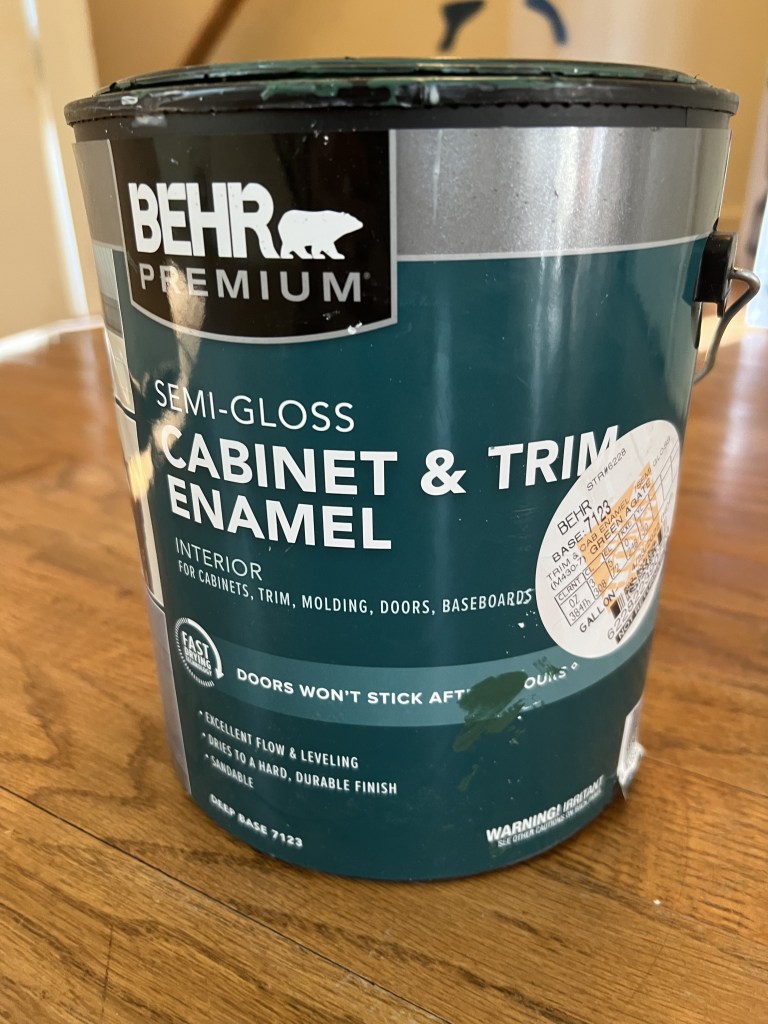
Here is the paint I used for the cabinets (and later for the stenciling)
DIY FAIL
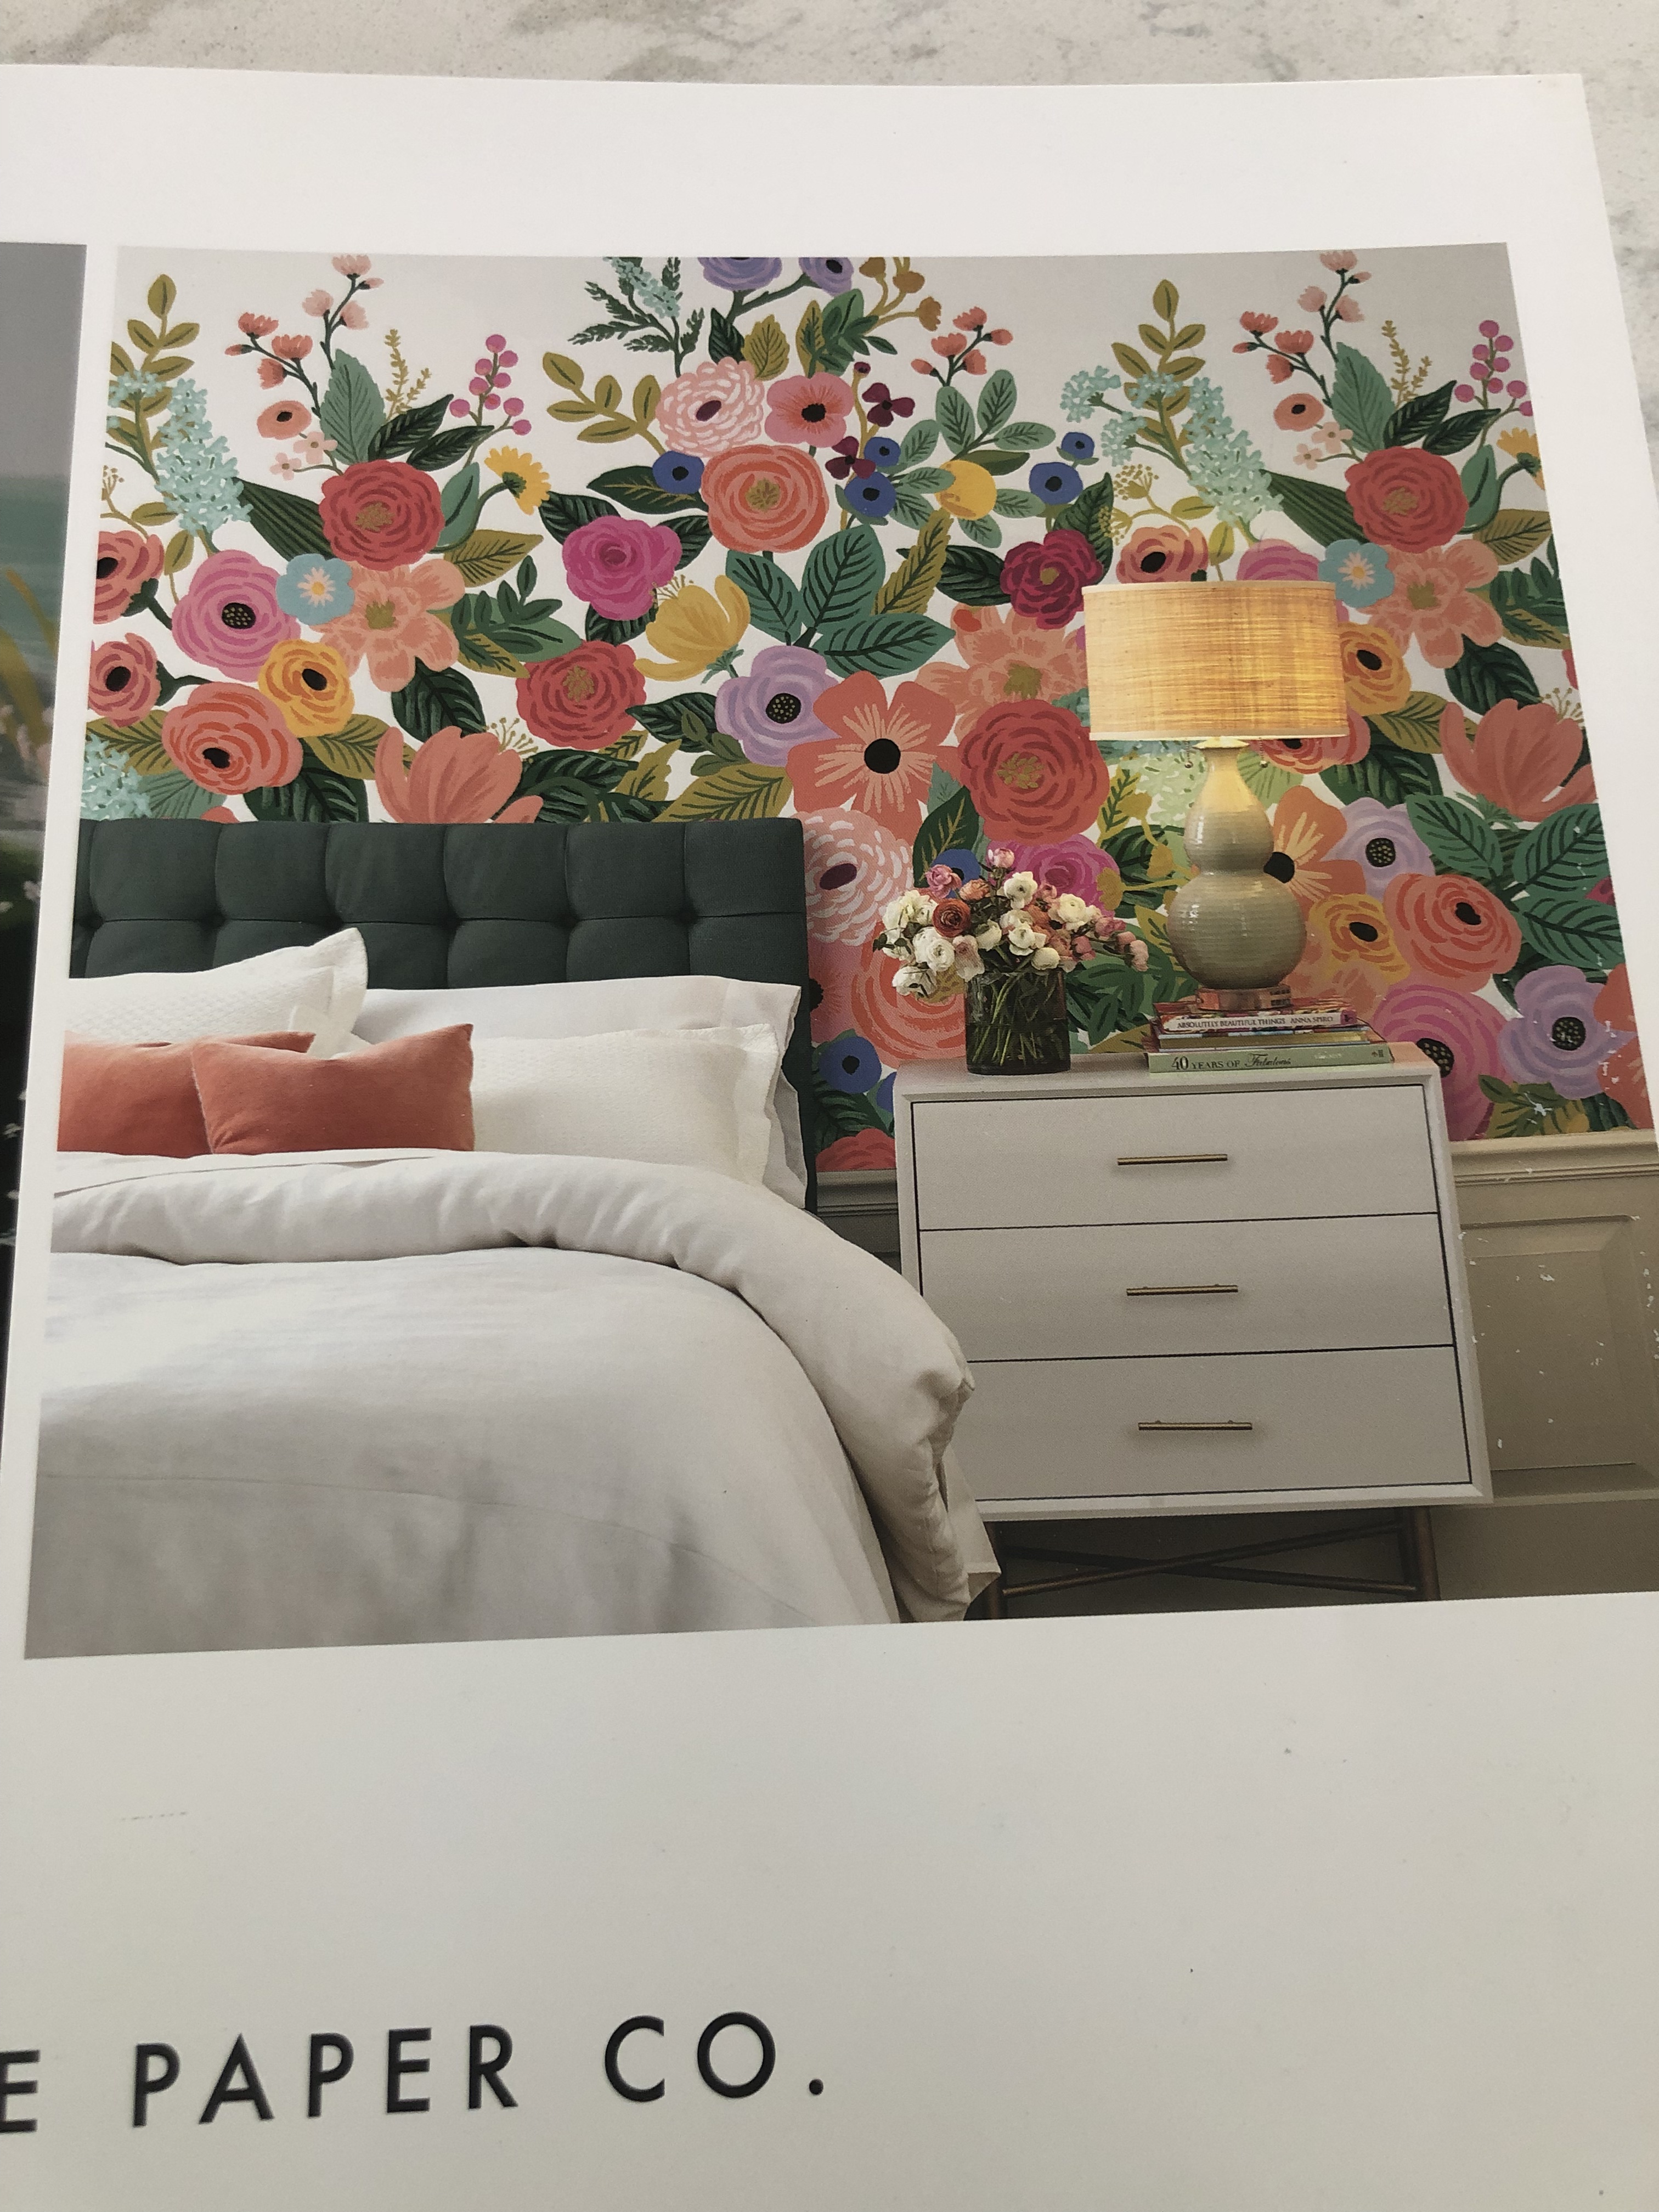
Full disclosure, I attempted wall paper first. I failed. I was so excited when I started this project. I had gone to a local paint store that had books of wallpaper and I picked out the most fun garden print from Rifle Paper Company (see below! How fun is that?). I had picked a paint color for the cabinets to go with the wallpaper (which I ended up using). By the time I got to the wallpapering step, I was down two hands (my husband decided to break his leg- convenient timing) and it just did not go well. It kept wrinkling and sliding and not lining up correctly. I eventually gave up and removed what was still stuck on the walls.
Then I even had someone come and give me a quote for what it would cost to have a professional do it. The paint store had told me one double roll of wallpaper (pictured below), should be enough for a small bathroom. Well, the wall paper professional told me I would need two more rolls (~$120/ roll plus shipping = ~$260) which take about a week to come in, I would need to prep the walls better if I did not want to pay him to do that (spackle, fix the corner with joint compound where we had a slight issue, and paint the walls with wall sealer) and it would cost him another $380 for him to do. That would mean I would need to spend about $640 more on this small powder room. In the grand scheme of things, that might have been worth it, but I was hoping this was a room I could do myself and with other projects I would like to do, this wasn’t going to be what I spent my money on. Plus, I was going to have to put just as much time in to prep the space as I would if I wanted to just paint it.
I did not want a plain white bathroom. So what to do? I scoured Pinterest and Amazon and finally found wall stencils! These are such an easy way to add a little something to your space in a short period of time, on a budget and without hassle. Here is the stencil I selected.
There are a number of stencils available online- most places do not sell them in store. I chose this one because the pattern was neat, and also because the size of the stencil was quite large (24 x 36). The larger, the stencil, the fewer times you need to tape, paint, repeat.
How to stencil: I read several posts and watched several videos before stenciling. I was also a little nervous about it, so I did some test runs on cardboard.
Here are the takeaways:
Do not overload the roller with paint
Prep your space – tape a drop cloth down, get your pait in the paint tray and have a roller ready
What I could not find in any post I read or video I watched, was how long do you need to wait to move the stencil? Here is what I discovered on my own: not long!
STENCILING Once your space is prepped, you’ll start in the left hand corner of the wall you want to stencil. Use some painters tape to tape the top left corner to the wall (without covering the cutouts in the stencil). Then tape the top right corner and then smooth the stencil down as much as possible before taping the bottom. The art is in the prep of taping the stencil. Lightly roll your roller through the paint – you can always go over it again before you move the stencil if you don’t use enough. Simply roll the roller over the stencil, being careful not to roll it over any bare wall. And that’s it- you’re done with that section! You can actually immediately (and gently) remove the stencil from the wall. I let me stencil rest on a drop cloth on the floor for just a few minutes, just to let the paint on the stencil dry, before repeating. You could probably wipe the stencil, but this was easier and less messy.
REPEAT To stencil again, you’ll just repeat above, and line up the next section with the previous section. This stencil had two extra pieces so you could line those two up for the next section. When you get to the bottom or the side of the wall, I recommend covering the cutouts in the stencils with painters tape when it’s taped to the wall so that you do not accidentally paint one of the cutouts that will get cut off.
I had no issues, luckily, with color bleeding under the stencil. You may want to read reviews of your stencil. I did see reviews of other stencils where people said that was an issue, but that could be an issue with the taping. If you do have any issues, keep your wall paint handy and just use a brush to touch up any spots. I had a few spots I accidentally painted that needed touching up and they are now unnoticeable (or so I think)!
Supplies Needed
Paint
Paint tray
Small roller
Painter’s Tape
Drop cloth
Et voila, here is the finished product!
TLDR: Save yourself the trouble and time and try wall stencils! Prep your space, get some painter’s tape and stencil away!
The following are some suggested steps to make the experience of getting your house on the market feel less daunting. They may not all work for everyone, but you can see what works for your specific situation. Disclaimer: my photos are not the best quality as we took them in the midst of moving! [TLDR at the bottom!]
Week 1 PACKING SUPPLIES
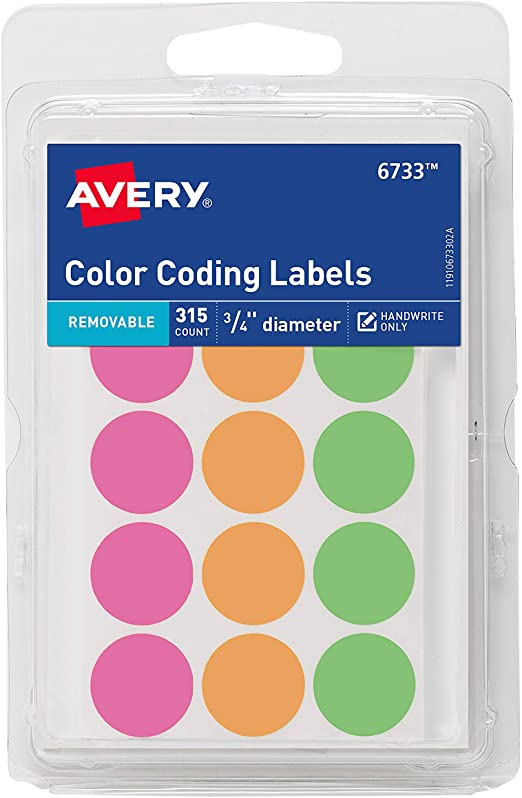
Colored Dot Stickers for color coding boxes
STEP 1: Obtain* boxes, clear bins, packing tape, and sharpies. I purchased some really good boxes at Home Depot with built in handles, but a *pro tip* is to see if your Realtor knows of anyone looking to get rid of boxes. I also found a bunch of clear bins at Ocean State Job lot and Home Depot as well, but you can definitely find them elsewhere such as Lowe’s, Target, Walmart, Amazon etc. I recommend the majority of the boxes to be medium sized, next small, and only a few large since they are hard to carry. I also ordered colored dot stickers similar to these (see pic above), but in green, yellow and red. I used the green to label boxes that I needed to unpack first, yellow (or in this case orange) for second priority boxes, and red (or in this case pink) for boxes that did not need unpacking right away. (Think like a street light- green, yellow, red). Additionally I recommend getting some space saver bags (Bed, Bath and Beyond (and of course Amazon, Home Depot etc.) sells them- don’t forget your coups!) and some for hanging clothes.
Step 2: Collect Packing Materials such as paper, bubble wrap, foam, glass dividers etc. You’ll need something to wrap up breakable items. Home Depot also sells a breakable moving kit.
Step 3: Order or reserve some form of storage unit such as a Pod, *U- Box (from UHaul), Pack Rat or even a local moving company that will store your items for you in a climate controlled location. Alternatively, you can always rent a local storage unit (and possibly) some sort of transportation to get the bigger items there. [*A quick note about low hanging power lines – Our previous house had low hanging power lines across our driveway that did not allow enough clearance for a Pod or Pack Rat to be delivered. The U-Boxes were the only ones that could be delivered via forklift so that they did not need to raise the portable storage unit as high as the power lines to drop them off.]
This is me in our U-Box!
You’ll want to have all of these supplies before you start so once you are ready, you can get things in boxes, into storage, and forget about them.
Week 2 DECLUTTERING
The ultimate goal here is two-fold; 1. get the house listing ready, and 2. start to get the house packed up so you’re ready to move when it sells. Declutter accomplishes both of these goals. Keep this in mind when you’re making those tough decisions about packing now or later.
START by going through your house and removing any personal items from the walls i.e.) family photos and pack them up. This is an easy first step that you can do quickly and feel like you’ve accomplished something. Only leave items that you will use when staging your house. If you expect that whatever you had hanging on the walls in your kitchen, will go directly to your new kitchen, then box those items up together and label that box KITCHEN (and the specifics of what’s inside). If you don’t know where you will hang things in your next home, box all wall hangings together. I recommend putting wall hangings in a cardboard box as usually this is one of the later/ last things you will unpack/ set up so you don’t need to see in inside the box.
Packing tips
Pack things by room if you will unpack them and put them back in the same type of room OR pack things of similar categories if you don’t know where some things will go
i.e. “Kitchen” OR “Wall Art”
Be neat
Label e.v.e.r.y.t.h.i.n.g.- you want to be able to look at a box and know exactly what’s inside
Add colored dot stickers to color code your boxes for unpacking (Green for boxes to unpack first, yellow, second, and red boxes can wait to be unpacked)
Use some dish towels or extra towels to wrap breakables- if you’re moving you likely don’t need to keep as many on hand as you normally would and this will help start to declutter your closets and drawers
Week 3 ROOM BY ROOM
Start in a small room that you do not use a lot so that it does not feel overwhelming. The more tasks you finish, the more accomplished you’ll feel and the less daunting it will be.
Dining Room – I started with my dining room because there was a lot of stuff in there that we do not use every day and since we were moving, we didn’t have plans to entertain a lot of people in the near future.
Start in a room like this or a maybe a living room or guest room, for example. There is no use waiting to pack a room with infrequently used items. Plus since those boxes will be packed up first, they will be at the bottom of your storage unit and therefore unpacked last. Most likely these boxes can be color coded with a red dot sticker.
Just start somewhere! Don’t get too bogged down in what to do first. Pack up as much as you can and really only leave out items that you use every day or will use to stage your house
Remove furniture that clutters the space and get that into your storage. This will immediately start to make you feel like you have less to pack and make rooms look more open. We put shelves in our U-box that we wouldn’t be needing and this helped us organize the storage space.
Kid/pet toys/Games– I am guessing there are many toys they don’t actually use. This is also a good place to get some things packed up early as they add mess and clutter. Use a clear bin if you’re not sure if you’ll need them so you can easily find those items later
Linen Closet– this is another place to work on early. If you’re like me, you have a lot of extra towels, sheets etc. Just keep the bare minimum- you can always do laundry! Use space saver bags for all of these
Bookshelves– You can probably remove most things from your book shelf, but if you run out of steam, this is an area you can at least try to stage nicely. Grouping by color always looks nice!
Kitchen– the kitchen can feel really overwhelming because most of us spend the majority of our time in our kitchens and it’s hard to figure out what to pack and what you’ll need for the next few weeks. Here are some tips:
Holiday dishes/ baking tins- pack those!
Extra dishes- if you have more than one set, you definitely can do with just one set for a few weeks
Dish towels- if you have a drawer full of these, keep half and use the other half to wrap dishes
Serving ware- keep the bare minimum
Pots and pans- chances are you can make do with one or two pots and one or two pans and you can pack away the really large ones you only use when you have a lot of people over
Appliances- if you do not use them every day, pack them away- maybe these would be good boxes to label with a yellow dot sticker
Wine/ specialized glasses- I know it might pain you, but you can use a different glass, if needed
Non-perishable food- you may think you need access to your entire pantry, but trust me, you don’t! We survived without many of our snacks (and alcohol). Separate out the most commonly eaten ones and items you will need for a few weeks. Put everything else in a clear bin. You can leave this bin in the house, just in case, but at least now it’s packed and can go into storage or the garage or basement since it’s safe in these bins and it’s out of your way.
A lot of the kitchen was coded in either green or yellow dots
Clothes are another overwhelming category, but let me break it down for you! Think about which season you are in or even if you’ll be changing seasons, you will not need allll of your clothes. Pack the clothes that are not in season. You do not need them! Here are a few tips:
Pack your fancy clothes and shoes first. If you do have a fancy event coming up (we had a wedding), just set aside the items you need for that, otherwise you likely won’t need these items.
Focus on things that are in your closet- again your goal is to make your home look decluttered and trust me, people do look in closets when they are looking at a house. A cluttered closet is a turn off for a buyer
Pack shoes that are not in season- if it is summer, you do not need your winter boots!
Next, focus on clothes in furniture that is adding clutter to your space.
Use these clear ziplock bags, too so you can easily find what you’re looking for and they are easy to move and stack.
Space saver hanging bags for clothes- highly recommend!
Keep your focus on those high-priority rooms that people care a lot about i.e. kitchen, bedrooms, and family room. You want the potential buyer to be able to picture living in your house and it’s hard to do that if they can’t see the room through all the clutter. Rooms like dining rooms and living rooms should have the bare minimum since those may be more formal spaces and you will hopefully be able to eliminate a lot from those space.
The above items that you packed can now go into your storage space and you can forget about them until you move into your new space. Hopefully, this will help your home look a bit less cluttered!
One last tip:
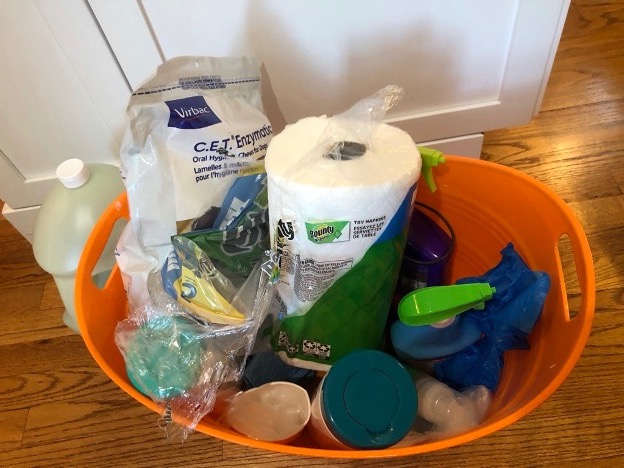
First in/Last Out Box – I recommend making one (or more of these) and store in a clear plastic bin or even a plastic bucket. I had one that had cleaning supplies ; wipes, paper towels, soap, sponge, toilet paper, microfiber cloths, swiffers- everything I needed to clean the house we were selling and what we would need the second we walked into the house we were buying. This box i was able to pack right away, but leave handy. I also had one of these boxes with kitchen stuff; paper plates, forks, knives, spoons, a few dishes, glasses, olive oil, salt, pepper, a few kitchen utensils such as a spatula and a pot and pan, dog needs etc. . I packed up this box later, but kept a list of the items I would want readily available. These boxes traveled to the new house in my car.
I hope some of these tips are helpful or at least help you find a place to start! I followed these tips for my move and I had my house almost completely unpacked within a week. It made it very easy for me to prioritize what to start with and figure out where items were that I needed.
TLDR: Get packing materials and some sort of storage unit, start decluttering your space with rooms you don’t often use and items you will not be needing for a few weeks. Remove as much as possible, pack up and label everything!
Lots of love and some unexpected home expenses along the way.
On a Wednesday evening in March 2019, I spent about an hour on the phone with the kind woman who had fostered Lou in Tennessee, to see if us fostering Lou would be a good idea. From that conversation, I learned that Lou was not playful, she was a flight risk, an escape artist, and had some serious separation anxiety. My main concern was that there was doubt she would be interested in playing with Charlie, who at the time was 9 months old and a bundle of energy.
Her Backstory
Her foster shared that Lou had been passed around from various homes in her first year and she wasn’t being cared for by a vet. She and her brother often escaped and ended up at the pound a few times. She was eventually surrendered, and Companion Pet Rescue (CPR) took her in to foster her until she was adopted up north by another family. She was subsequently returned to CPR after about 10 days because of her separation anxiety. At that time, she went to stay in the CPR barn in CT. It’s a bit unclear what else happened in those 13 months, but something to do with the lack of instability set her up for some nervous habits and lack of confidence. Being the nervous gal that she is, she was in need of a foster, rather than staying with many other dogs in the barn. So I picked Lou up from Southbury the following evening, and brought her home, with every intention of bringing her to the adoption event scheduled for Saturday morning.
The first night
The first night was interesting. Lou and Charlie were okay- some minor growls from Lou and Lou spent a lot of the evening hiding upstairs as far away as possible and crying if anyone came near her. By bedtime, she was lying on our bed asking for belly rubs.
“He left his desk for a few minutes and returned to a pee spot… and a shaking Lou.”
Friday morning, my husband, Sid, brought her to work for the day because we weren’t ready to test leaving her at home just yet. He left her at his desk for a few minutes to use the bathroom and returned to find a pee spot on the floor and a shaking Lou. Unbeknownst to me, that was the moment Sid knew we would be ours forever.
#FOSTERFAIL
Saturday morning, when it came time to get ready for the adoption event, we made the official request to adopt her and became official foster fails. My main hesitation in keeping Lou was that Charlie needed a buddy who would play with her and Lou had not yet been willing to play. As soon as I got the official email confirmation, I found Charlie and Lou chasing and playing in the yard.
We knew that Lou’s next home needed to be her final home and we promised her and ourselves that ours would be it. We knew that Lou needed a lot of help and we made a promise that day that we would help her. We could not bear the thought of her being returned again. After having Lou in our life for 2 years, we still believe that if she had been adopted, someone would have returned her whether it would have been in a few weeks or a few months. Don’t get me wrong, there are plenty of really patient people out there who will help even the most troubled of dogs. When you hear more about our life with Lou, though, you may be agree.
The Real Lou
Over the next few months, we got to know Lou, and the baggage she came with. Each day, she trusted us more, and we fell more in love with her, despite the issues that came to the surface as the months went on.
April/ May– Lou destroyed our couch (including our new sectional), countless toys, her bed, shoe laces, underwear- anything we stupidly left within her reach. We have holes in almost every pillow and couch cushion (thank you pillow covers and flippable cushions).
June– the destruction had gotten out of control and Lou chewed anything- even if it was nailed down; both of our coffee tables, the floor trim, the window sill- you name it, she probably chewed it. There is a simple solution you may say- crate her! Think again. First of all, the crate was ziptied together because she had been known to escape it. Second, she had started hurting herself in the crate. I would come home to the bars of the metal crate bend, red marks around her neck and blood in the crate.
July– In July she found her voice. She was unruly on the leash, she pulled, and barked at other dogs. It was also around this time that she showed us she knew how to howl- good thing for this because it made us laugh.
She was so rail thing, I swear people thought we didn’t feed her, but she was eating three times a day and not keeping any weight on. We couldn’t crate her because she was hurting herself, and we couldn’t leave her home without one of us there because she was chewing things we couldn’t tuck away out of her site. This really limited what we did and our lives. Both of us worked full-time outside of the house. We were beside ourselves and there were times we doubted if we could do this. BUT we made a promise to Lou so we kept on. We knew she could not be happy in a constant state of stress so we talked to our trainer at the vet and we all agreed it was time to get Lou some extra help. We put her on anti-anxiety meds, with the intention of this being a short-term thing to help her calm down while we came up with some new strategies.
New Plan
We stopped taking her places with a lot of people and dogs that stressed her out i.e.) soccer games. We set up doggie cams in the house, we put blinds on the front window, and we left her and Charlie home alone only for short periods of time (after hiding pretty much all belongings possible that could be moved). We didn’t leave them home if we knew someone would be doing work near or around our house. We kept an eye on the cameras to see when Lou had reached her limit of being alone. We gradually increased the amount of time we left them home alone and eventually got to a point where we could leave them for about 4-5 hours. Two times in a day though- she wasn’t messing around with that. Things were usually fine on the days I could come home at lunch, but by the end of the day, something would be destroyed.
This helped a lot with her separation anxiety and we could breathe again.
By the end of July– Lou started waking up every night sometime between 1am-3am. Do you know who did not wake up for any of it? Sid! This habit continued for the next three months. Every. Single. Night.
September– she figured out how to open the gate to the fence. When we clipped that shut, She found a way to squeeze through the fence post. When we blocked that off, she started hopping the fence. Sometimes in the middle of the night, too. She trusted maybe 4 people at the time and barked at almost anyone who came in the house. Charlie had picked up on Lou’s on-leash reactivity to other dogs.
Enter Claudia Burburto, Owner of Naturally Pawsitive Training and Reactive Dog Trainer Extraordinaire (my words). This was actually more people training disguised by dog training. We have had many sessions, classes, calls, zooms, texts, instagram messages, etc. with Claudia since she came to our house for the first time. She has taught us so much about the things that we have done (unintentionally, of course), that did not help Lou. The biggest thing us humans can do is to set dogs up for success. Put them in situations where they can learn to behave, not the ones where they’re too stressed to learn. We still go back to Claudia for refreshers and help and we would highly recommend her to anyone who is struggling with dog issues.
By November she was climbing or hopping the fence every chance she got. It got to the point where Sid and I didn’t flinch; however, Charlie was quite attached to Lou and would be frantic as soon as Lou fled the yard (in hot pursuit of the neighborhood squirrels). We would get Charlie on her leash, walk down the street and Charlie usually cried when Lou was close. We could call Lou when she emerged, praise her, get her leash on, and walk home… only for her to do it all over again. Finally, we had no choice but to keep her on a leash and watch her like a hawk when she was in the yard.
Unexpected Home Expenses
We didn’t buy a home with a yard so that our dogs would have to spend their life on a leash any time they were outside, but Lou also could not control her prey drive so we sucked it up and had a 6ft vinyl fence installed. This was hefty, but worth it. Of course, Lou found a way out of that (under), but we addressed that, and of course she has tried to jump it on many occasions. So far, her 43 lb lean, mean, muscle machine of a body has only been able to reach one paw to the top of the fence. My fears of our yard feeling like a fortress were overshadowed by the privacy that this fence gave us and the peace of mind that Charlie and Lou could play freely in the yard without having to worry about Lou escaping.
You may also remember that time that she chewed our window sill, floor trim, coffee tables, etc., shoes, etc? Well once we knew the chewing was under control, all of that had to be replaced. These were not necessarily costs we had factored into owning a dog. They are also not costs that most people have to pay, but they are good to keep in mind. I mean did you even know floor trim was chewable?
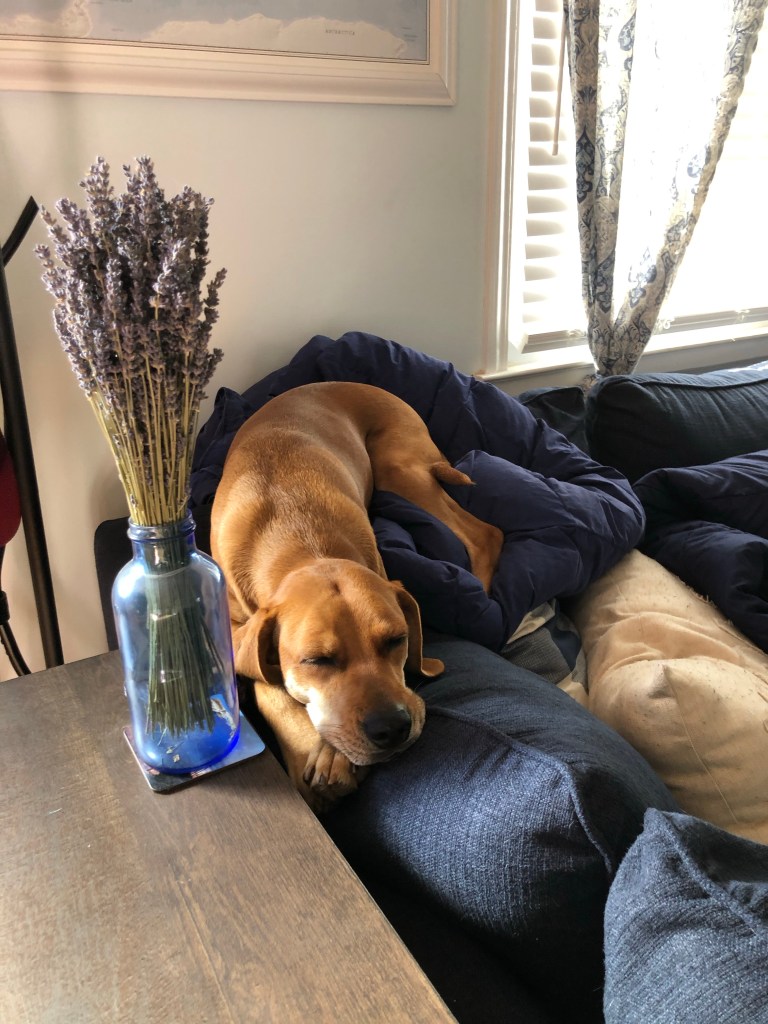
Lou is 100% Worth It
Lou keeping me company when feeling sick
There were times we really didn’t know how much more or how much longer we could put up with this. So why share this? Every animal is worth helping and with the right help, they can become their best self. There are still hard days, but there are also SO many positives.
She and Charlie are the best of friends. When we walk them together, they have a limit to how far they are willing to be separated. One of them plops themselves on the ground and will not move until the other catches up. Their bond is unmatched and it is so sweet to watch.
For us, coming home to Lou and Charlie was and still is the best thing ever. Lou wiggles her whole body so hard her tail thumps against anything in sight. Her howl CRACKS us up. Lou is THE best companion. She is happy just to be with us. She is more than happy to spend hours curled up with us on the couch, or to keep us company in our offices while we are working. She is as sweet as she is sassy and her personality makes us laugh every day. She has taught us so much about patience, understanding, and of course that hounds love mounds (see below).
Year two with Lou has been much better than year one. Pandemic life really suits her. She has gained and kept on weight and now looks like the healthy beefcake that she is. She has expanded her circle of trust to about 12 members of our family and friends who have been patient with her learning to trust them (and accepting it if she does not). We have new strategies when new visitors come over- we let Charlie greet them first and give her stamp of approval, which tells Lou it is okay. She has learned more than the basic commands and learned to walk impeccably (if we do say so) on a leash. Today we went for a run and saw 5 dogs- not a peep out of her… later in the day we went for a walk and it wasn’t as perfect- alas we are all a work in progress. We have days where we get frustrated, but we have to ask ourselves what we have done to make her anxious or nervous.
We did all of this with positive reinforcement training (praise and LOTS of treats- never any type of punishment). We have put in and still continue to put in a LOT of work, but as much as we put in, we get out so much more. We now have her complete trust and she has ours. Her unconditional love is unmatched and has been 100% worth it. Love you, Lou <3!
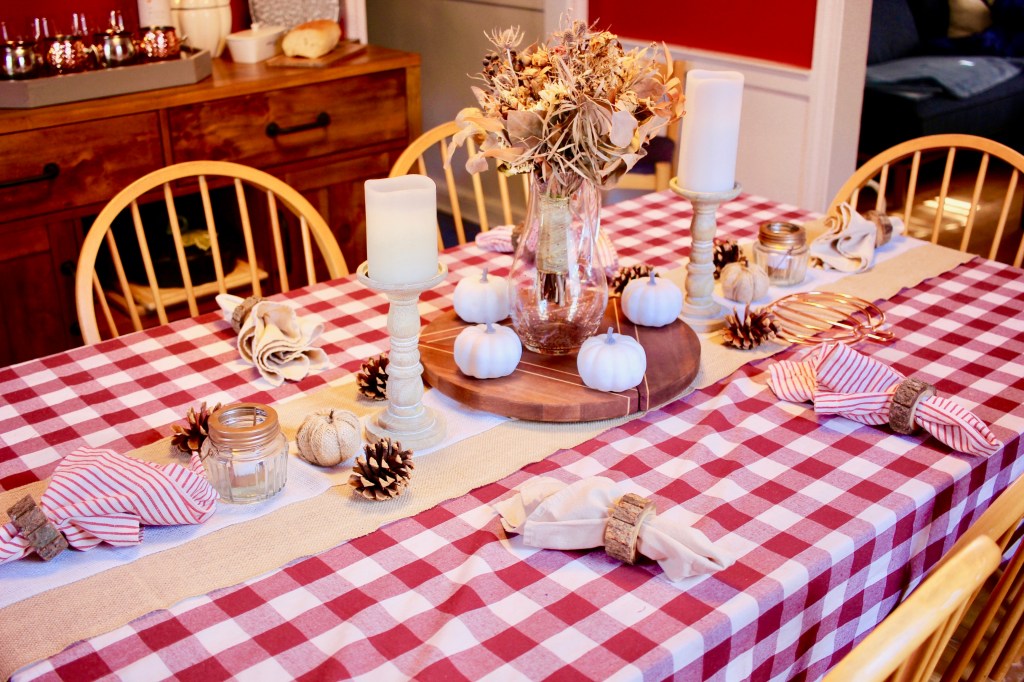
Simple Fall table scape for your Thanksgiving table
I love Fall!
I know some people are moving on to holiday decor early this year, but we still have one holiday left to squeeze out the beautiful colors and textures of fall. I put together this simple fall table scape that is easy to recreate for last minute Thanksgiving inspiration.
When it comes to fall, there are so many fun options and it is easy to find some of these things around your house or right outside your door.
Here are the items I look for to create a fall-inspired space:
No one says your drink glasses and food can’t be part of the display and decor!
Tablecloth and/or table runner – this is a good place to set the tone for your table- I went for a warm and cozy look with a few touches of elegance
Wood and metal items- i.e. cutting/serving boards, candle holders, napkin rings
Real and fake elements from nature- i.e. pumpkins, gourds, pine cones, leaves
Fall materials- plaid, burlap, galvanized metal, copper metal
Candles- nothing creates a feeling of warmth like some (controlled) fire!
A touch of gold here and there for some elegance – i.e. wine glasses, ribbons
Dried or fresh flowers
Mix and match texture with a a few types of materials and patterns
Add some height with a three-tiered stand, pitchers, wood serving board- things you can use for every season
Love a mix of outdoor elements, soft prints, wood and metal
To get my look:
Tablecloth – $23.99 – this tablecloth is no longer available.
I also purchased this one in navy blue and maroon- not these colors are muted versions of navy and maroon, but perfect for fall and winter tables for $18.99
All three of these wash and dry in the machine perfectly with no wrinkles!
Dried flowers from my wedding, roses from a bouquet I had purchased, and rose buds I trimmed from my backyard
Three- tiered stands are multi-purpose- use to show off decor when you are not hosting or use as a fancy way to display food and desserts
Wow, this is a lot of stuff just for one holiday gathering.. is what my husband probably thought when I ordered all of this (about $90 by my calculation), but hear me out. With the exception of the mini pumpkins, harvest sign, and pumpkin bowls, I will use all of these items for my holiday tables later this year and I used all of these items previously for the Jewish holidays and other fall (socially-distanced gatherings).
Repurposing These Items
By my count, that is about $30/ gathering on table decor that can all be reused for years to come. It is very important for me that the majority of it serves a purpose, rather than just adding clutter to the table- whether it holds a candle that adds light and warmth to the table, or it can be used for serving food, that is a key factor in how I set my table. The goal is to look festive and create the vibe you are going for, but don’t forget, people do need to sit there and have room to enjoy theirfood and drinks without knocking over decor.
Not Feeling so Celebratory?
I know this year may be different and you, like me, may not be spending your Thanksgiving at a large family gathering or with any family at all. That doesn’t mean you can’t add some festivity to your home, even if you are not in the mood for it this year. Adding some of the colors, textures, and feels of the season to your table hopefully will help you to remember whatever it is you are grateful for this year and make your house feel a little more like home.