

(Minus needing outlet covers and to adjust the height of the mirror)
Spoiler Alert: Wall Stencils!
Wallpaper is trendy at the moment, but let’s face it, it’s also not the easiest thing to do. I’m so excited to share how I used wall stencils to achieve a patterned look without all the time, hassle and frustration of wallpaper!
HALF BATH– before:
When we bought our house last year, the half bath on our first floor looked like this:

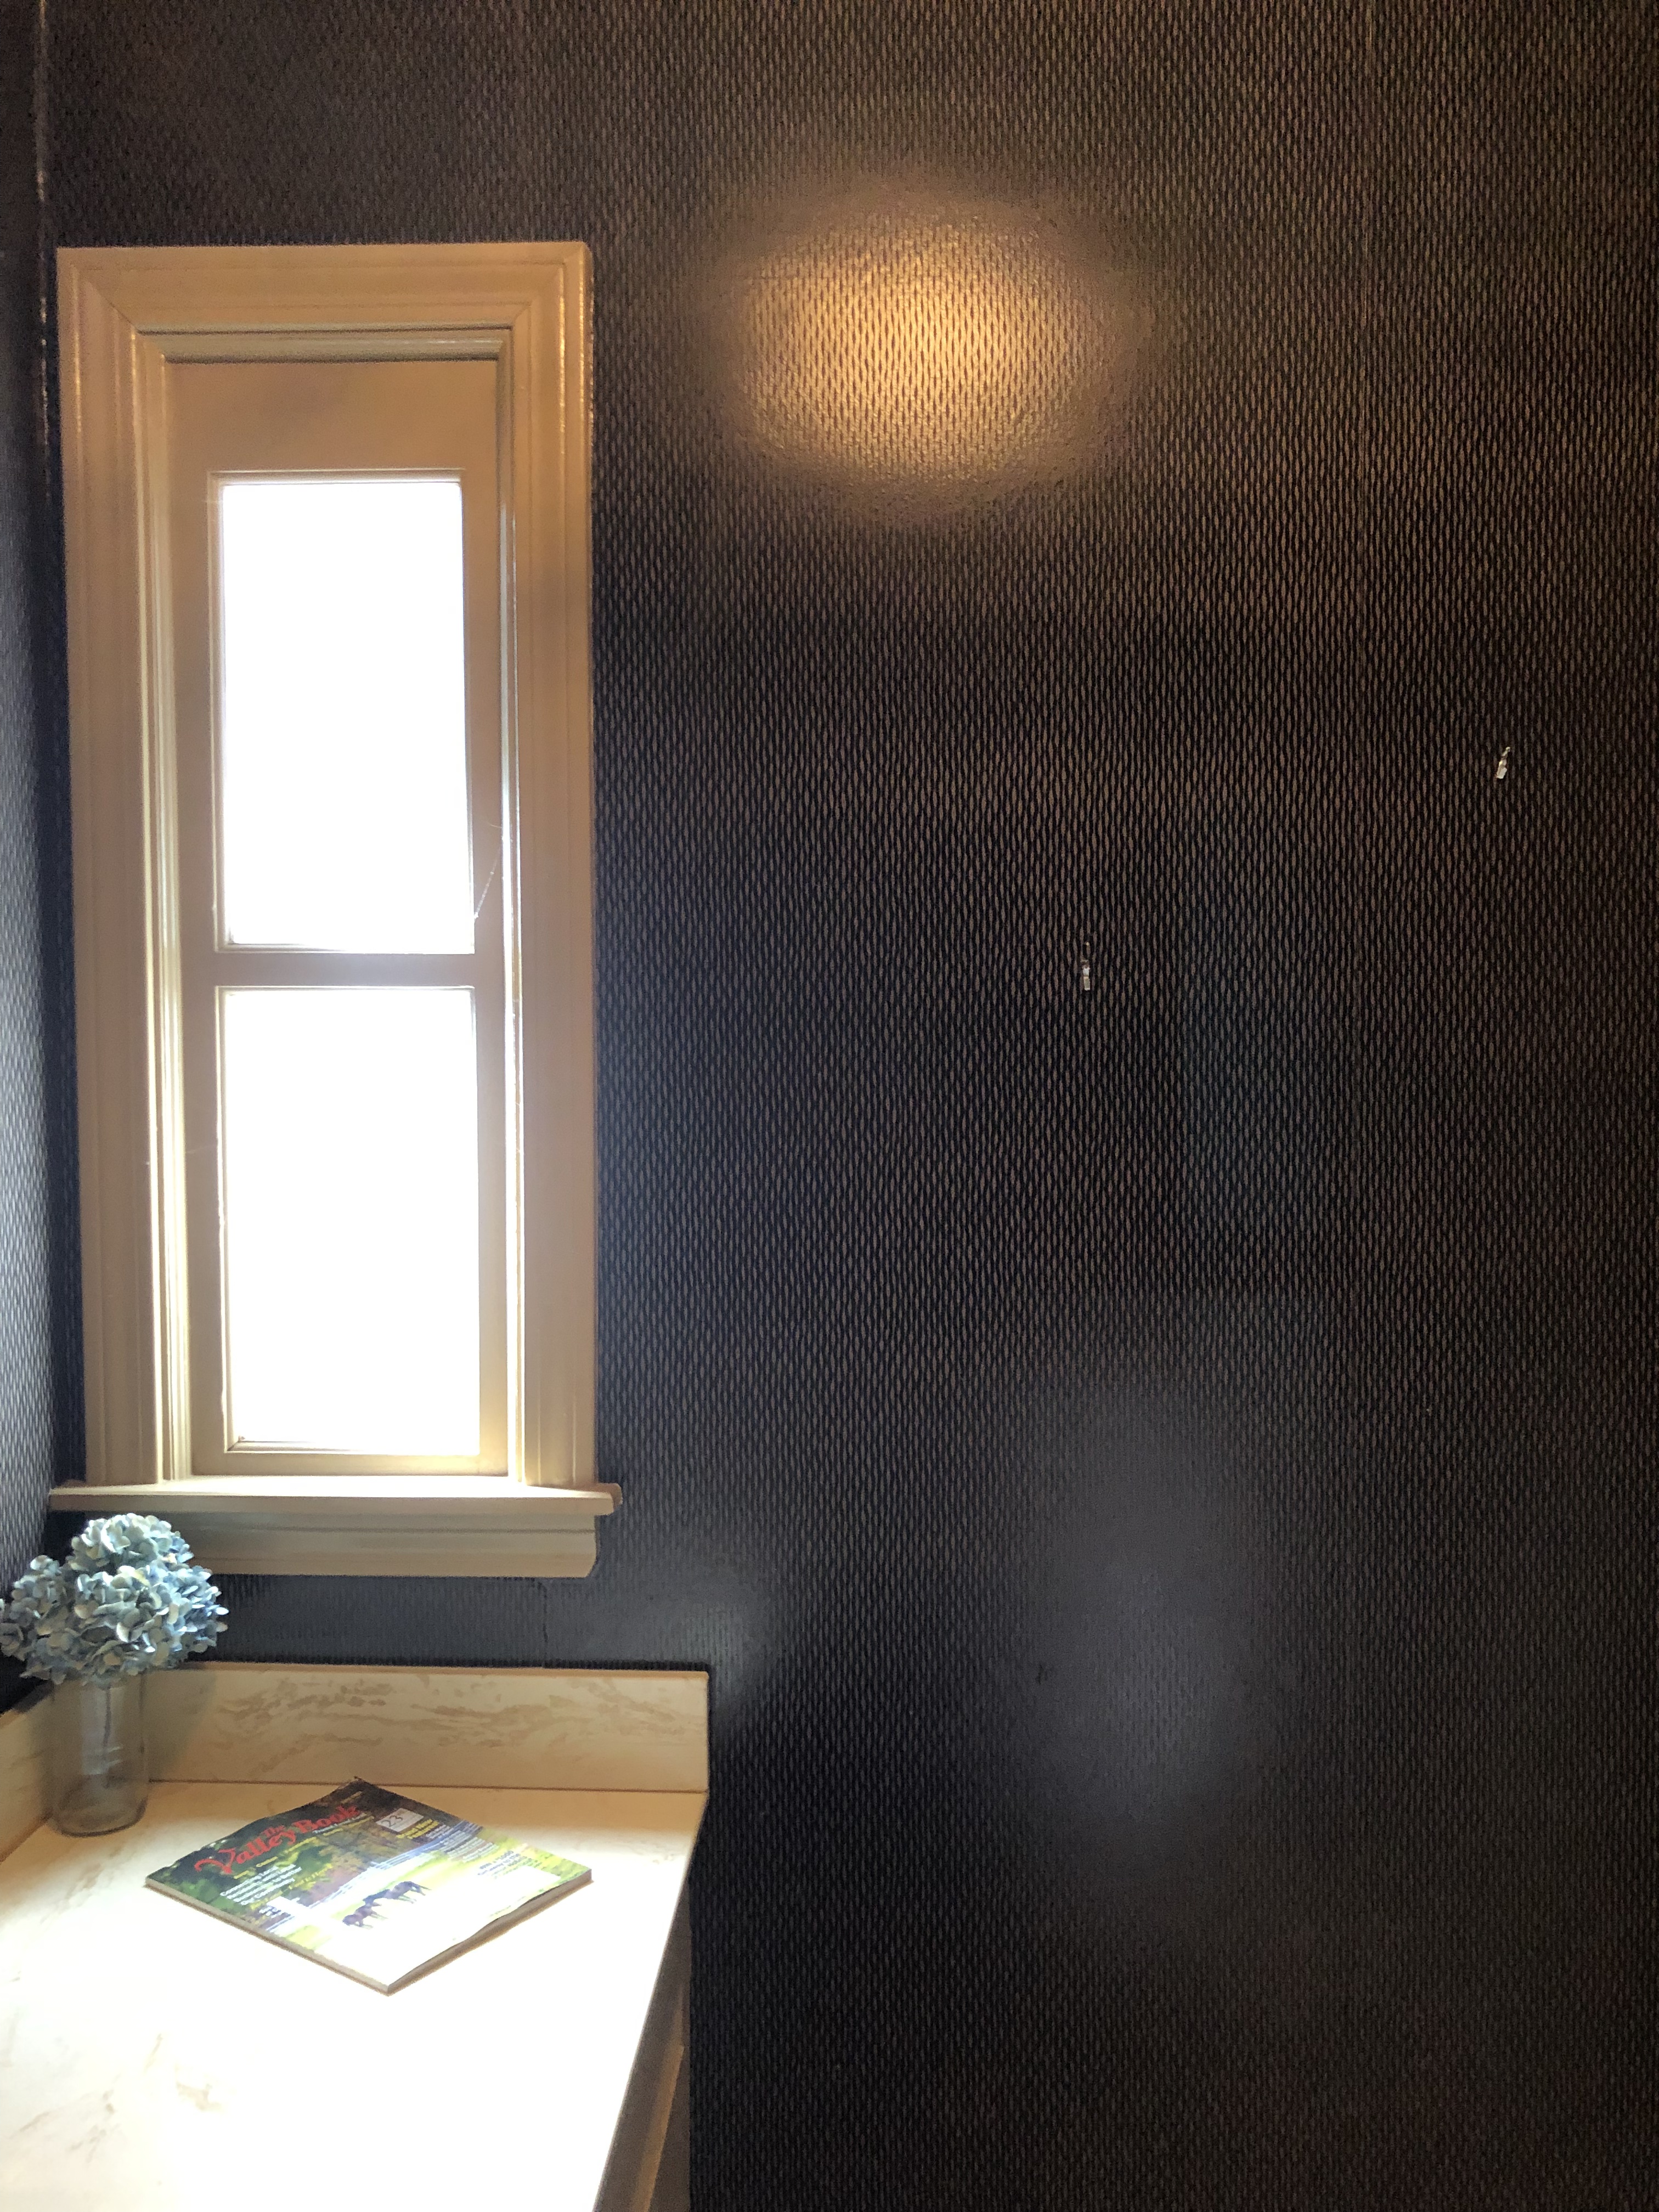


As far as wallpaper goes, this wasn’t bad and I didn’t really mind it, but the room only has a frosted window so it was really dark and the big kicker for me was that the wallpaper seams were starting to come apart and peel. Not to mention a piece of the backsplash on the side had come off the wall so the bathroom needed a little TLC.
WALL PAPER REMOVAL
We started by removing everything from the walls and we actually removed the door since it’s a small space and at times, two of us were working on this project. Then, we went to the dreaded wall paper removal phase. I will say, for this project, removing it was not as bad as I expected.
DURING

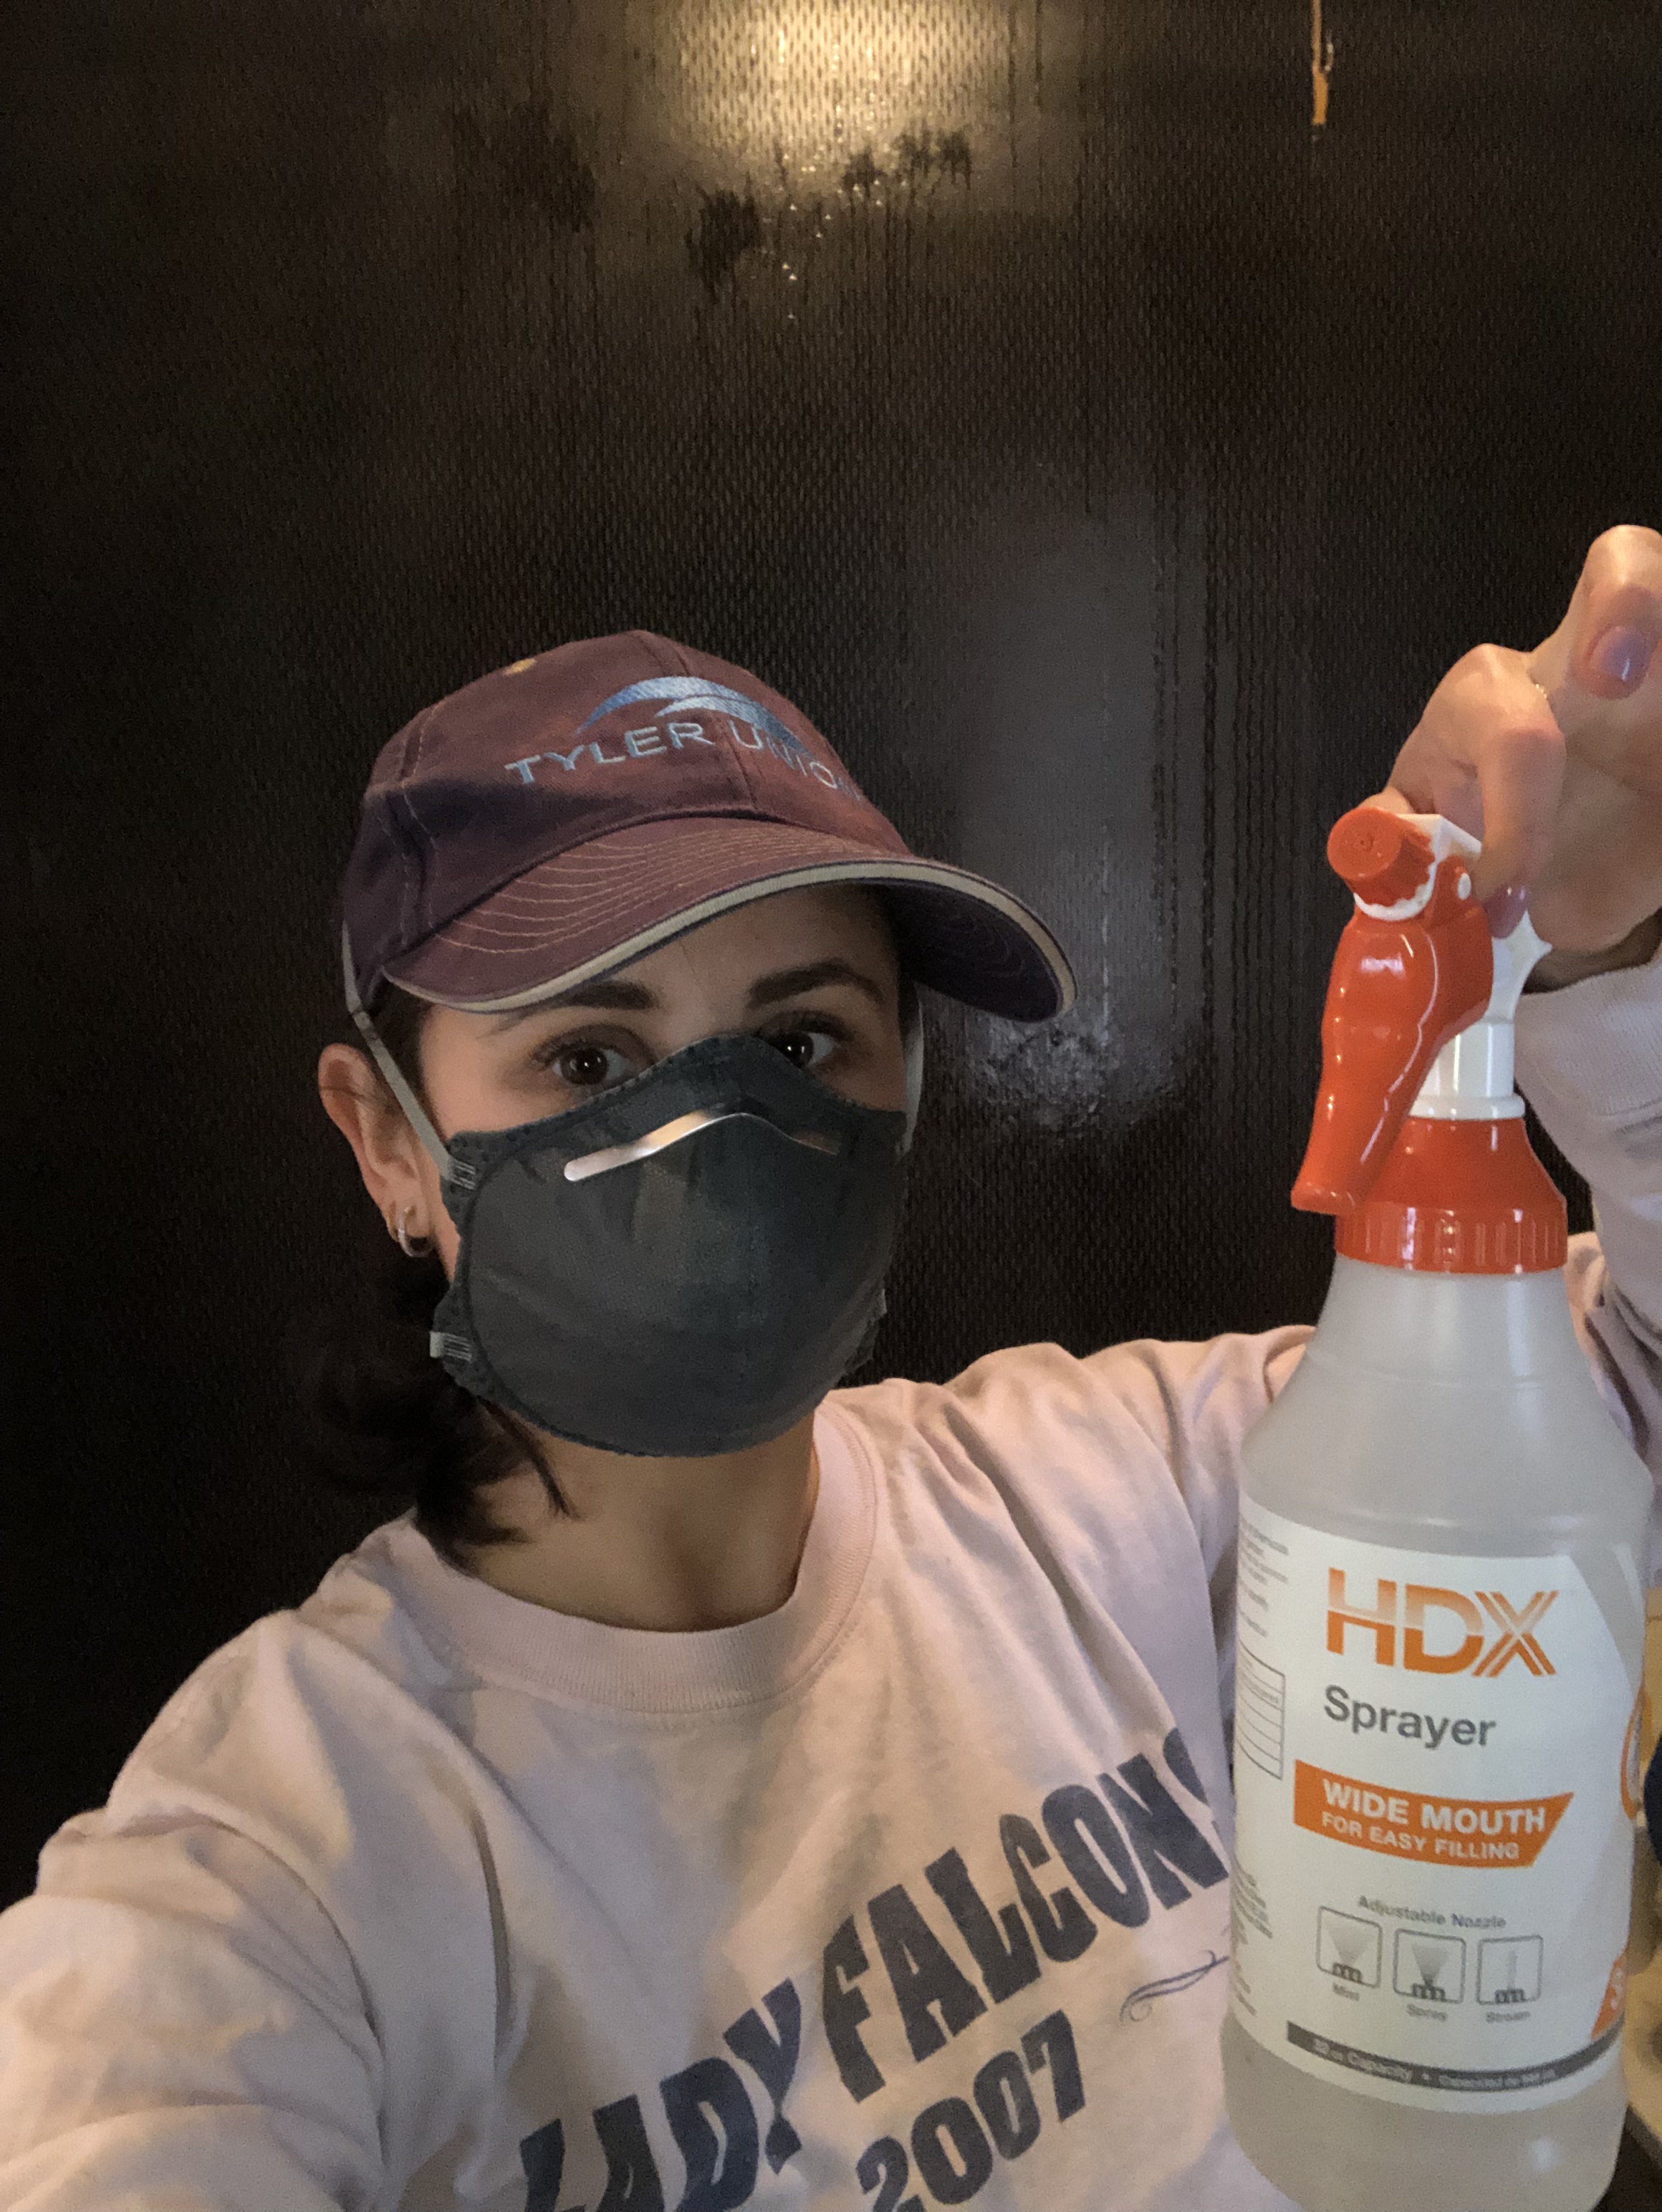

Wallpaper Removal Products & Tools
- Piranha 32 oz. Liquid Concentrate Wallpaper Remover (you can see the bottle on the counter in the first image)
- Zinsser Wallpaper Stripper
- Removal tool kit (the first product came in this kit- also available at Home Depot and other hardware stores)
Both products worked fine. The first one was more of a pain- it had to be mixed in a bucket with hot water and it worked best when it was kept warm. The second product was much easier to use- you could just spray it on from the bottle, but I only used this on a small area (see DIY Fail below). You can also use steam or they sell wallpaper removal machines. Whatever works is just fine!
The best method I found was to start peeling the top layer of paper if there was something to grab onto, and if not, use the scoring tool to rough up the surface. Peel or scrap whatever you can first and then apply some removal product (if you’re me, you apply liberally) and use the scraper to to scrape off the next layer of paper/ glue until you see dry wall. Don’t go to town too hard, like I did, or you will have to do a lot more spackling before the you can paint.
You can see in the above photos the glue on the walls, where you can still see that icky brown coloring on the walls. That glue all has to be scraped off. Keep going if you still see that. And yes, we (by we, I mean my husband), did remove the toilet so that we could remove the wallpaper behind it. It spent too long for comfort hanging out in our foyer. Don’t worry, it’s back in its rightful place now!
PAINTING
Once all of the wallpaper and glue was removed, we painted the walls and trim white. I like this Killz 2 All-Purpose Interior Exterior Primer. You can buy a large vat of it, you don’t have to wait for it to be mixed, and it’s easy to remember what the container looks like so I can be sure I am using the same white in my entire house.
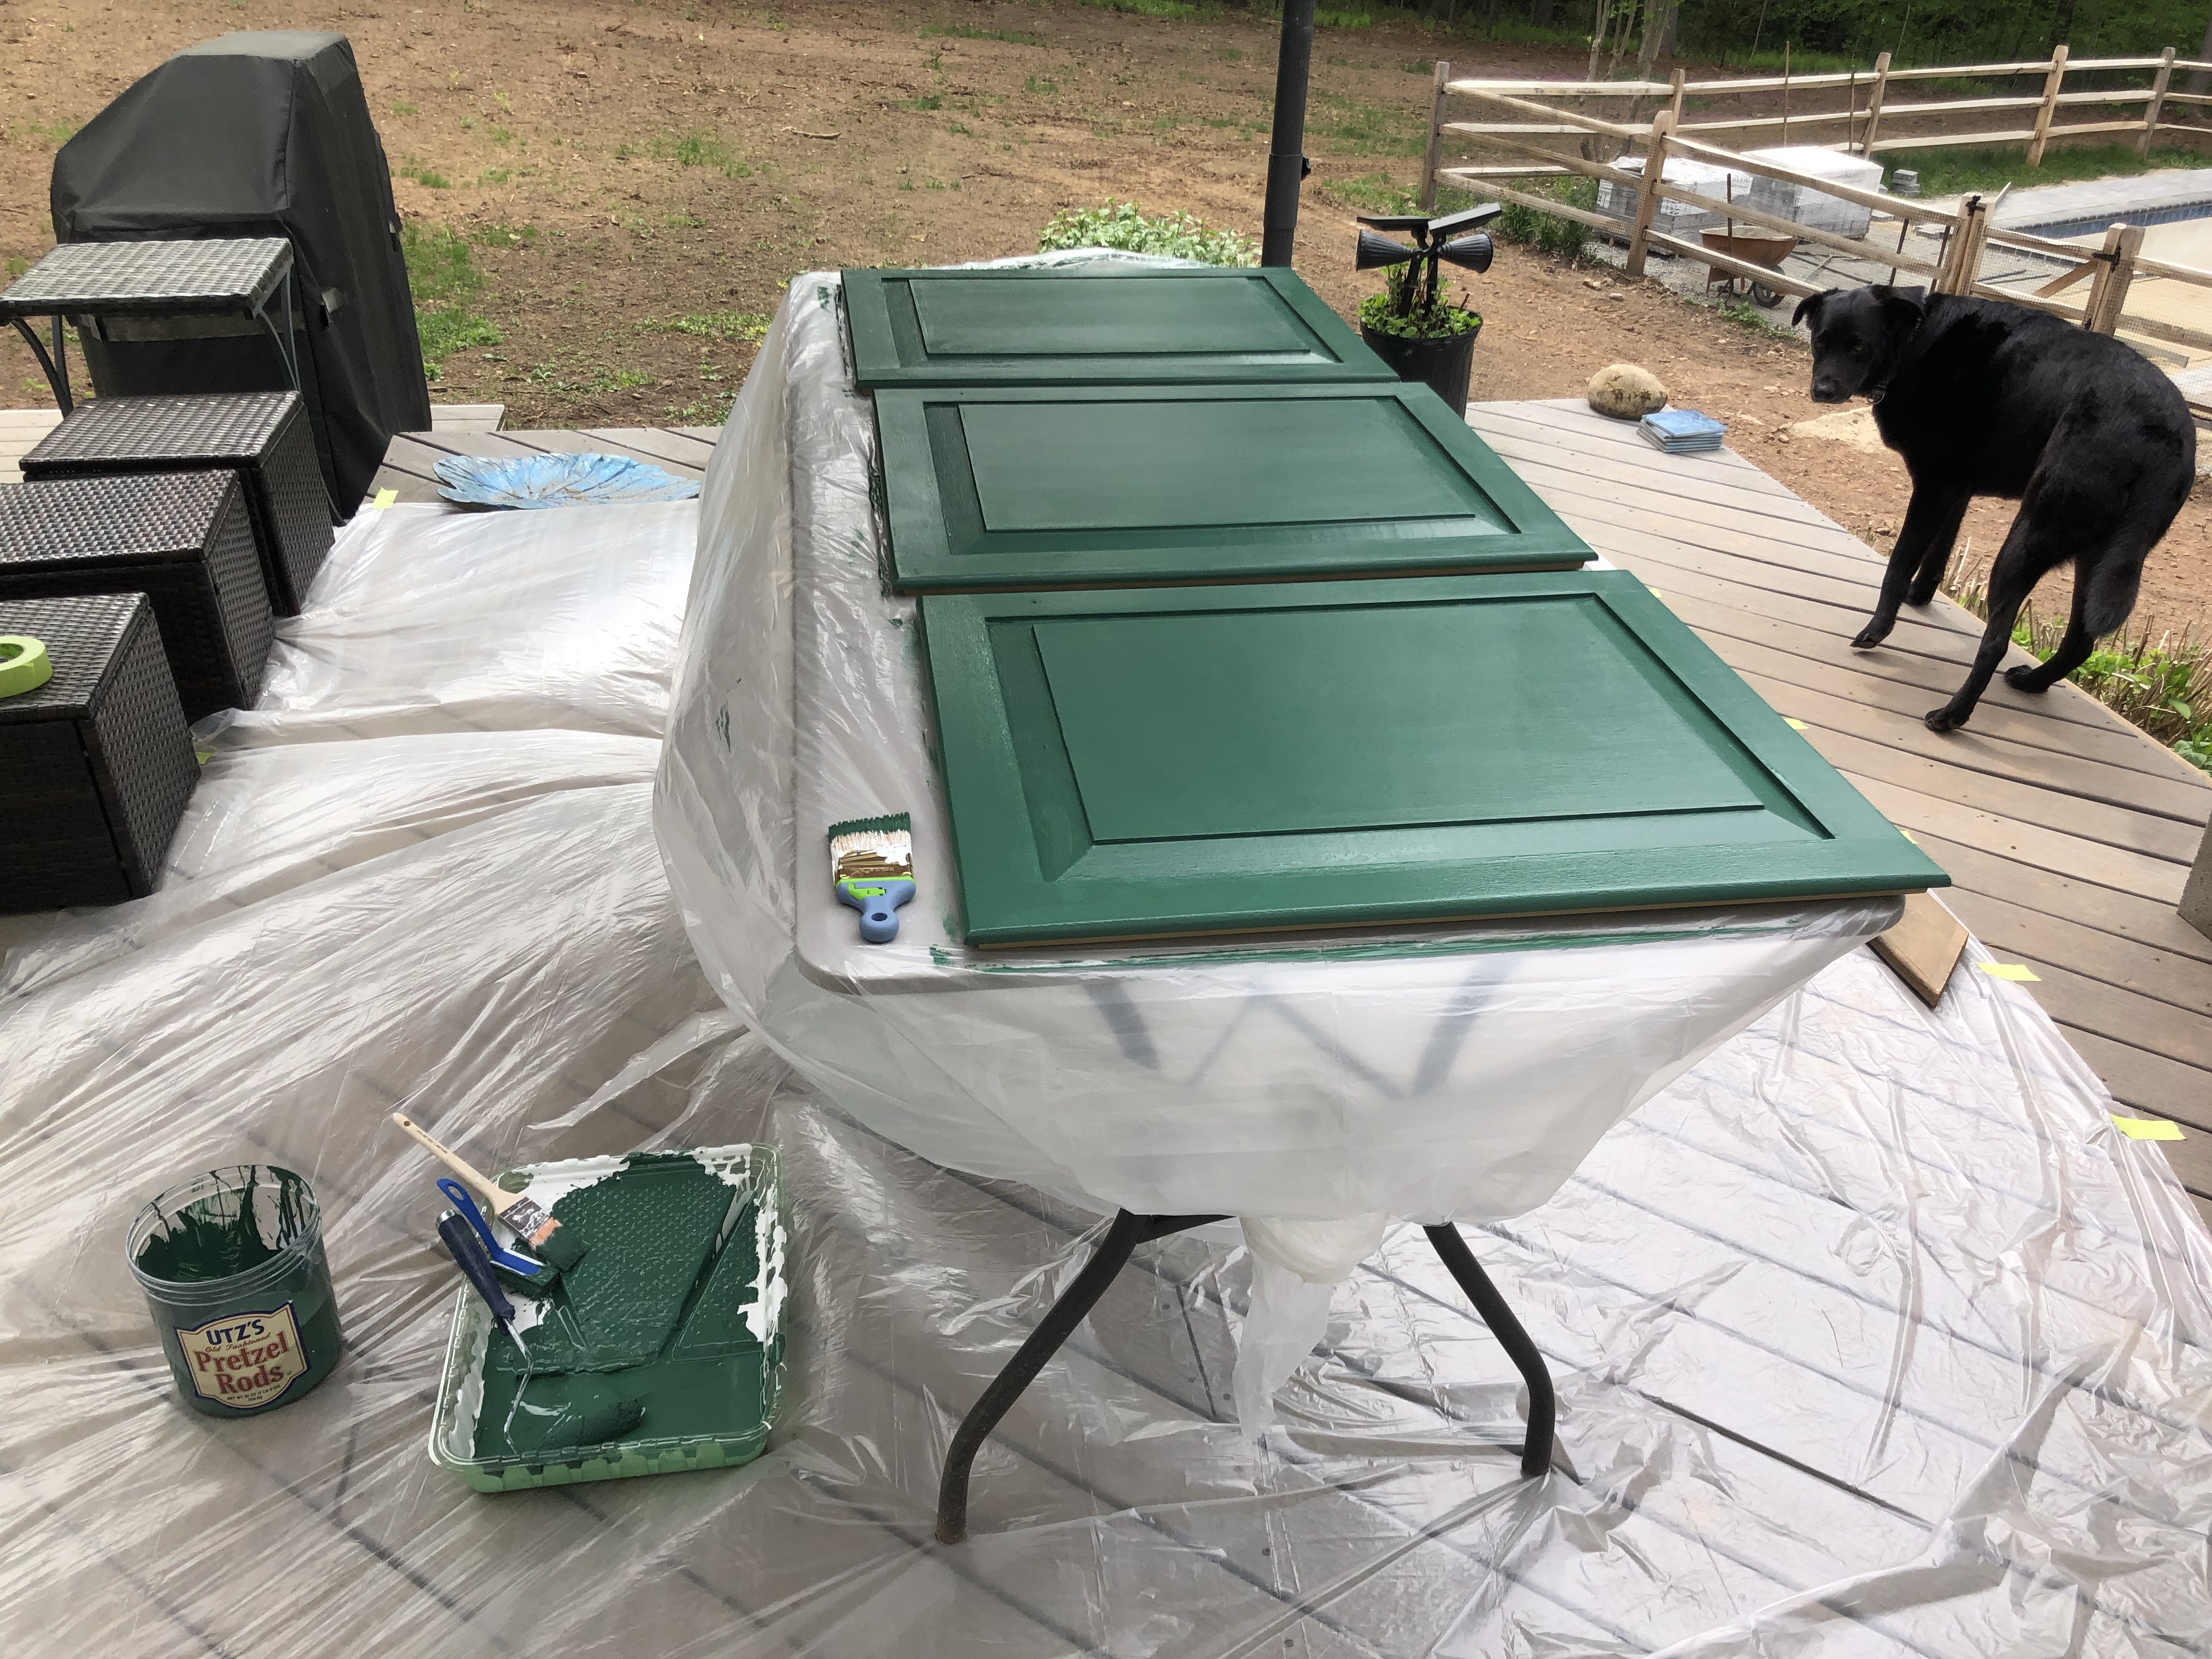
We also removed the cabinet doors and hardware and later replaced them with updated knobs and hinges to match the new faucet, toilet paper and hand towel holder. I painted the front of the vanity without the doors and the inside of it. The hubby painted to the cabinet doors outside. (Can you tell he’s an engineer by his painting set up?). I also painted the door with the same Killz white primer. Heck, while i was at it, I painted the small hallway outside the bathroom that was in the most dilapidated yellowish white. A fresh coat of paint goes a long way in freshening up an old space! [Fun fact: I dropped a microfiber towel in the vent on the wall while prepping the walls. It’s still there if anyone is able to help retrieve it..]


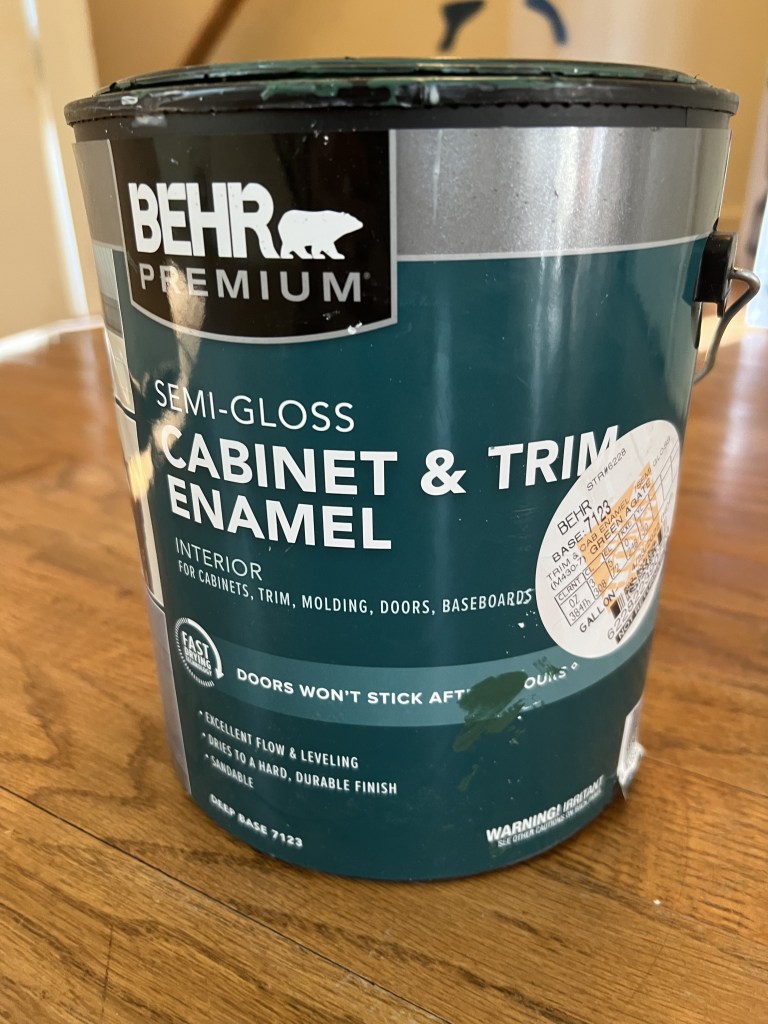
Here is the paint I used for the cabinets (and later for the stenciling)

DIY FAIL
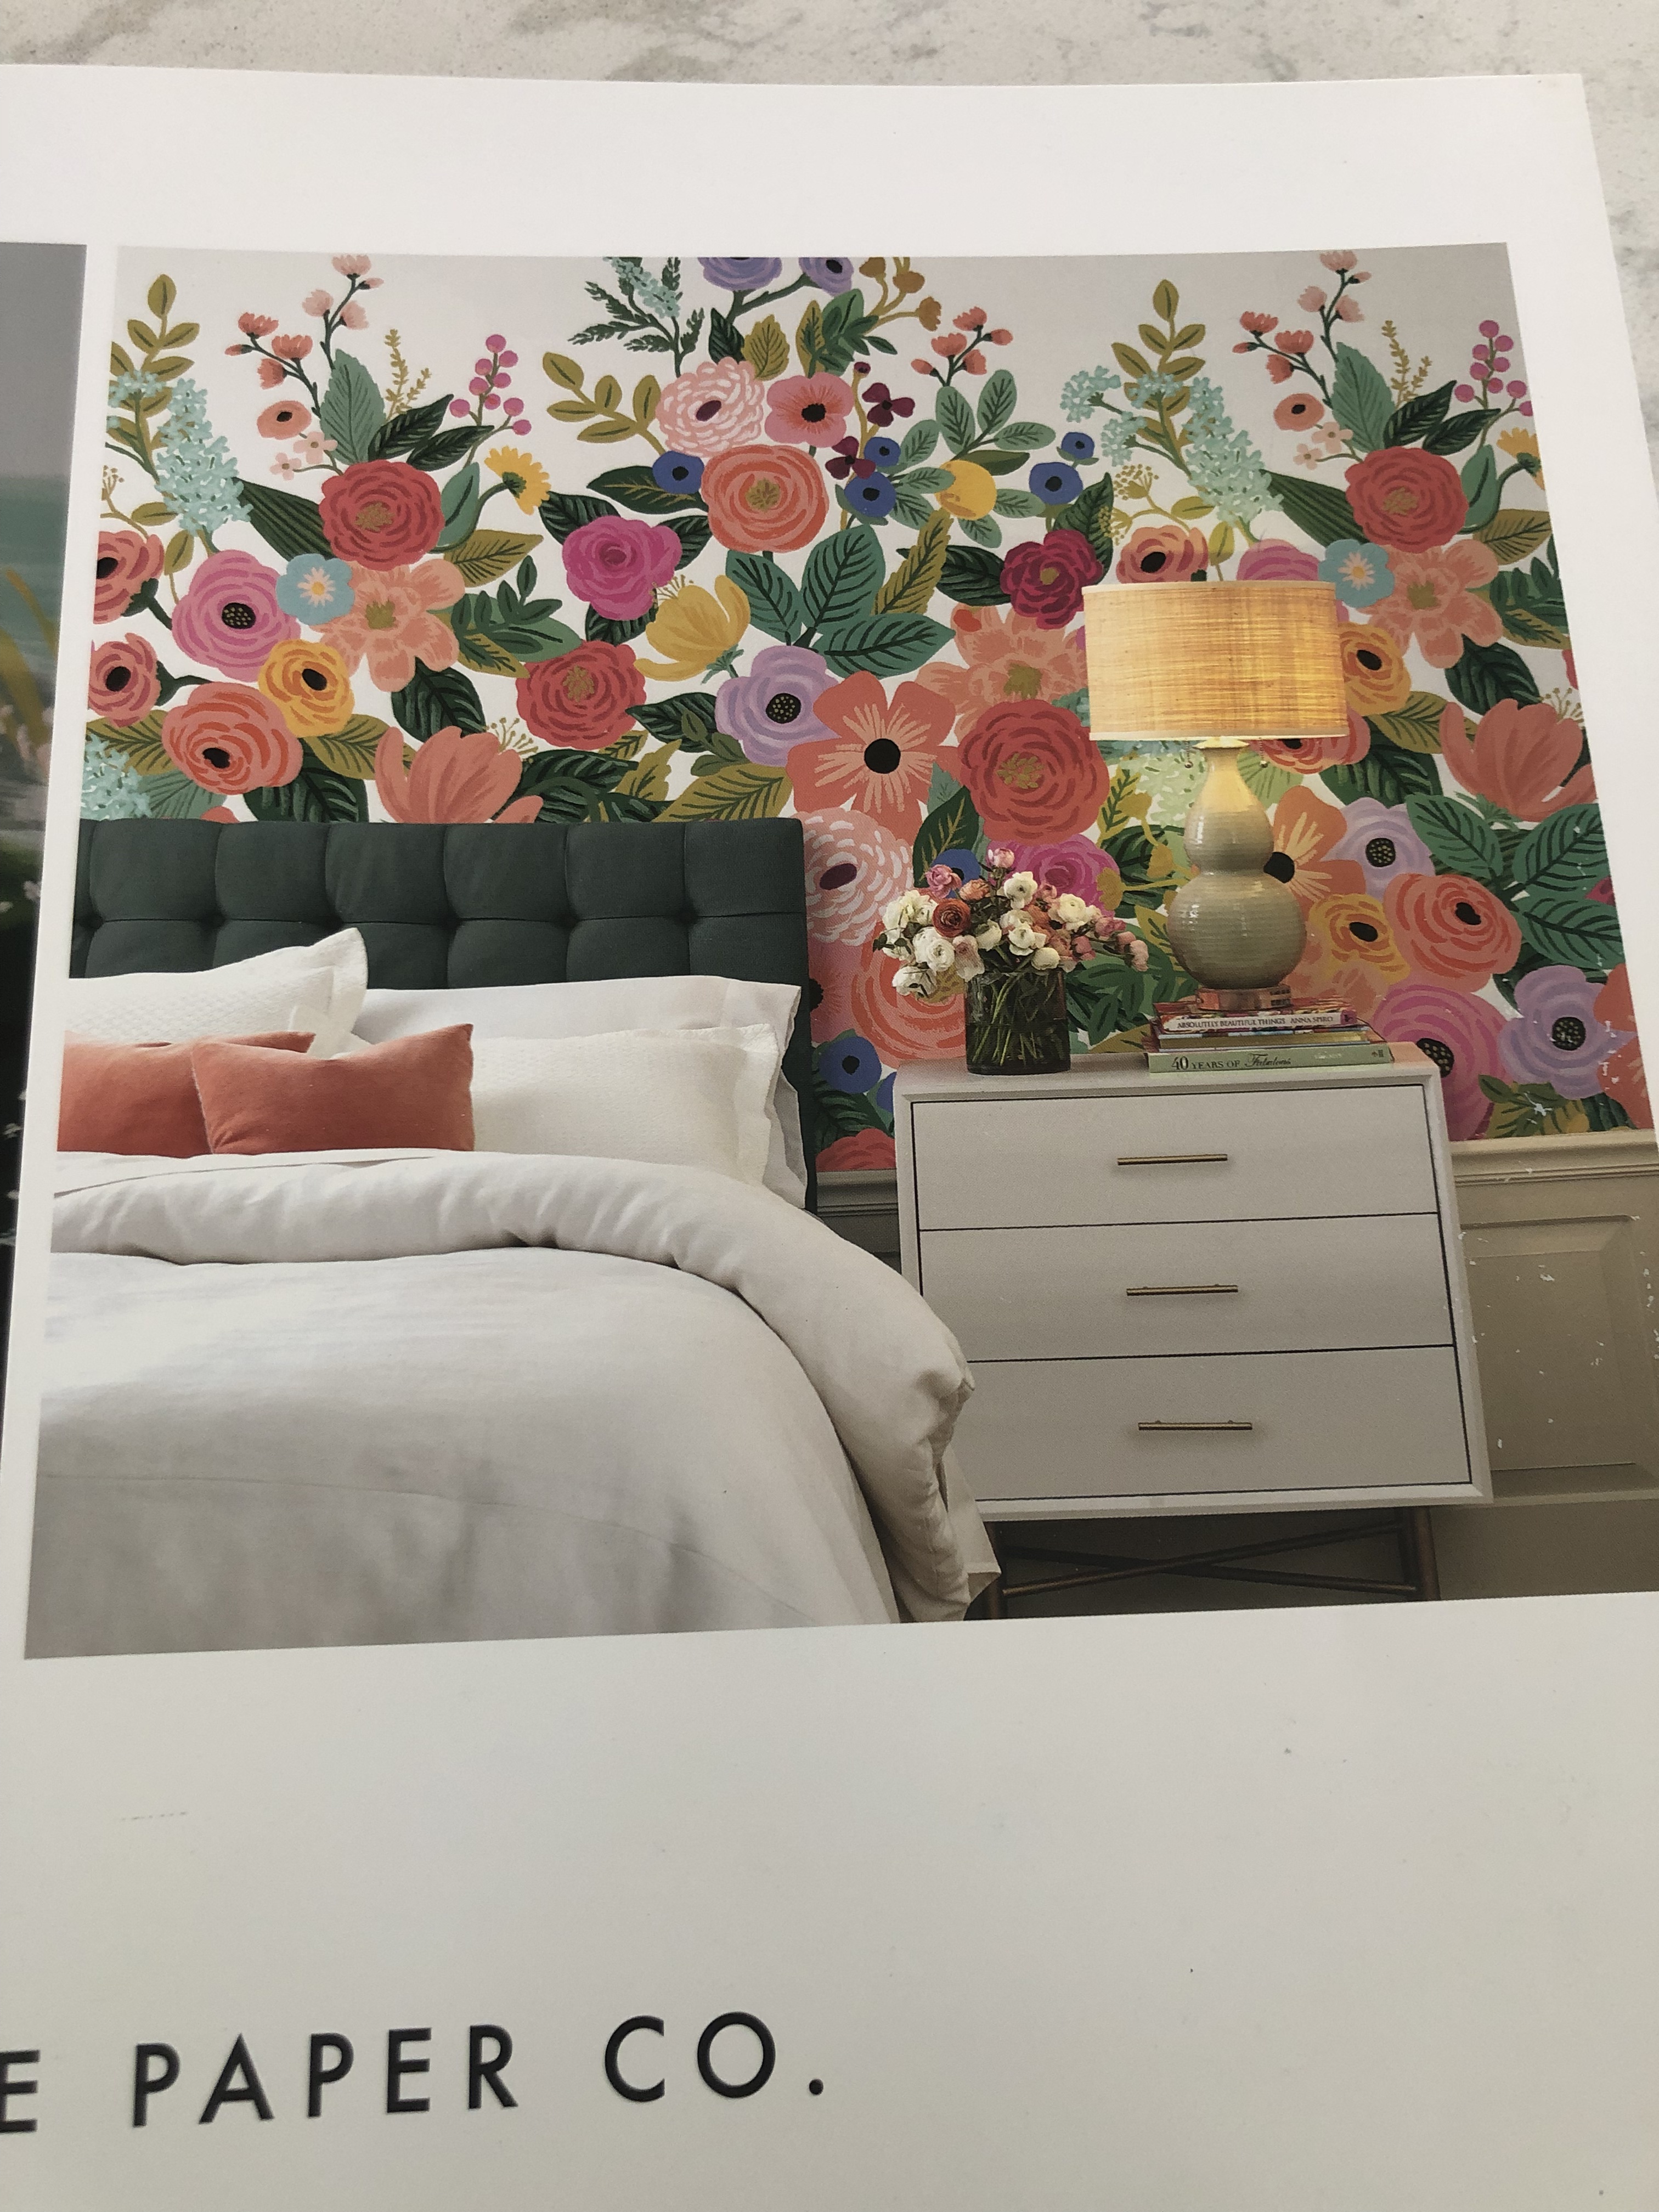
Full disclosure, I attempted wall paper first. I failed. I was so excited when I started this project. I had gone to a local paint store that had books of wallpaper and I picked out the most fun garden print from Rifle Paper Company (see below! How fun is that?). I had picked a paint color for the cabinets to go with the wallpaper (which I ended up using). By the time I got to the wallpapering step, I was down two hands (my husband decided to break his leg- convenient timing) and it just did not go well. It kept wrinkling and sliding and not lining up correctly. I eventually gave up and removed what was still stuck on the walls.
Then I even had someone come and give me a quote for what it would cost to have a professional do it. The paint store had told me one double roll of wallpaper (pictured below), should be enough for a small bathroom. Well, the wall paper professional told me I would need two more rolls (~$120/ roll plus shipping = ~$260) which take about a week to come in, I would need to prep the walls better if I did not want to pay him to do that (spackle, fix the corner with joint compound where we had a slight issue, and paint the walls with wall sealer) and it would cost him another $380 for him to do. That would mean I would need to spend about $640 more on this small powder room. In the grand scheme of things, that might have been worth it, but I was hoping this was a room I could do myself and with other projects I would like to do, this wasn’t going to be what I spent my money on. Plus, I was going to have to put just as much time in to prep the space as I would if I wanted to just paint it.

I did not want a plain white bathroom. So what to do? I scoured Pinterest and Amazon and finally found wall stencils! These are such an easy way to add a little something to your space in a short period of time, on a budget and without hassle. Here is the stencil I selected.


There are a number of stencils available online- most places do not sell them in store. I chose this one because the pattern was neat, and also because the size of the stencil was quite large (24 x 36). The larger, the stencil, the fewer times you need to tape, paint, repeat.
How to stencil: I read several posts and watched several videos before stenciling. I was also a little nervous about it, so I did some test runs on cardboard.
Here are the takeaways:
- Do not overload the roller with paint
- Prep your space – tape a drop cloth down, get your pait in the paint tray and have a roller ready
What I could not find in any post I read or video I watched, was how long do you need to wait to move the stencil? Here is what I discovered on my own: not long!
STENCILING Once your space is prepped, you’ll start in the left hand corner of the wall you want to stencil. Use some painters tape to tape the top left corner to the wall (without covering the cutouts in the stencil). Then tape the top right corner and then smooth the stencil down as much as possible before taping the bottom. The art is in the prep of taping the stencil. Lightly roll your roller through the paint – you can always go over it again before you move the stencil if you don’t use enough. Simply roll the roller over the stencil, being careful not to roll it over any bare wall. And that’s it- you’re done with that section! You can actually immediately (and gently) remove the stencil from the wall. I let me stencil rest on a drop cloth on the floor for just a few minutes, just to let the paint on the stencil dry, before repeating. You could probably wipe the stencil, but this was easier and less messy.
REPEAT To stencil again, you’ll just repeat above, and line up the next section with the previous section. This stencil had two extra pieces so you could line those two up for the next section. When you get to the bottom or the side of the wall, I recommend covering the cutouts in the stencils with painters tape when it’s taped to the wall so that you do not accidentally paint one of the cutouts that will get cut off.
I had no issues, luckily, with color bleeding under the stencil. You may want to read reviews of your stencil. I did see reviews of other stencils where people said that was an issue, but that could be an issue with the taping. If you do have any issues, keep your wall paint handy and just use a brush to touch up any spots. I had a few spots I accidentally painted that needed touching up and they are now unnoticeable (or so I think)!
Supplies Needed
- Paint
- Paint tray
- Small roller
- Painter’s Tape
- Drop cloth
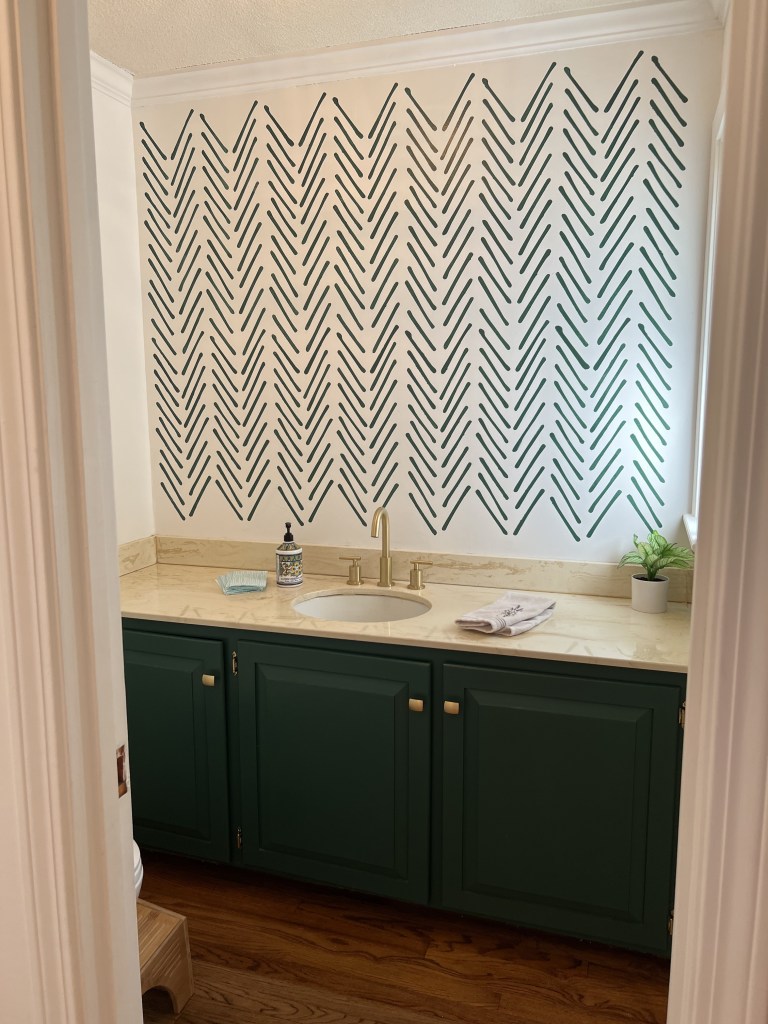
Et voila, here is the finished product!
TLDR: Save yourself the trouble and time and try wall stencils! Prep your space, get some painter’s tape and stencil away!
